Archive
An Egg in my Cheesy Toast
While somedays I want to make something super quick and easy, I wanted to spend a little bit more time and effort today.
 A sunny side up egg in a toast topped with cheddar and mozarella.

A well seasoned cast iron skillet is crucial. The egg cooked nicely, and did not stick to the surface. I covered the skillet with a lid while cooking to help cook the top of the egg.

Happy Breakfast, everyone!
Build Your Own Pancakes Kinda Day
With the holiday season upon us, I thought it best have a little fun with their meals. Today, I made giant pancakes, with various toppings alongside to choose from.


The children were allowed to choose from the array, and slather/sprinkle as they please

It was messy, but fun.

But most importantly, the children had fun.
Unicorn Toast
Unicorn Toast Without Food Coloring

Dear my Unicorn-crazed child,
It was an exceptionally hard week for you.

Naturally Colored Cream Cheese
Daddy went away on a business trip.

Rainbow Toast
You had an emergency visit to the dentist.

Pastel Colored Cream Cheese
And you had a school workload DOUBLE the normal to make up for the previous week you were down with HFMD.

Unicorn Toast
But the weekend is here. It’s time to rest and play! And a reminder to celebrate every tiny things in life!

Baby Shark and Unicorn Toast
** I tried to keep this healthy by not using any food coloring.
The Colors were made as follows:
Purple: Cream Cheese with Mulberry Jam
Pink: Cream Cheese with Freeze Dried Strawberry
Yellow: Cream Cheese with Freeze Dried Mango
Green: Cream Cheese with Matcha
Sourdough Hot Cross Buns
So here I am, dusting my old blog and making an entry… There really isn’t any excuse for not posting apart from laziness. While i have been cooking and baking up a storm over the past couple of months, I haven’t been posting them up in here.
Nevertheless, it’s 10.38 pm on a Good Friday evening. I didn’t want to miss posting a “Hot Cross Buns” recipe. Because as we all know Hot Cross Buns are made to celebrate Good Friday. And i didn’t want to wait till Good Friday 2015 to post this up!

These buns were made using sourdough starter which i’ve been growing in my kitchen for the past couple of months (more on that on a later post). They were studded with raisins and are refined sugar free with the use of coconut sugar.
“Why the sudden health kick???”, u ask… Well, it’s because these buns were made with my toddler’s health in mind. And you know how paranoid mothers can get… Plus, they are all not that bad for you!
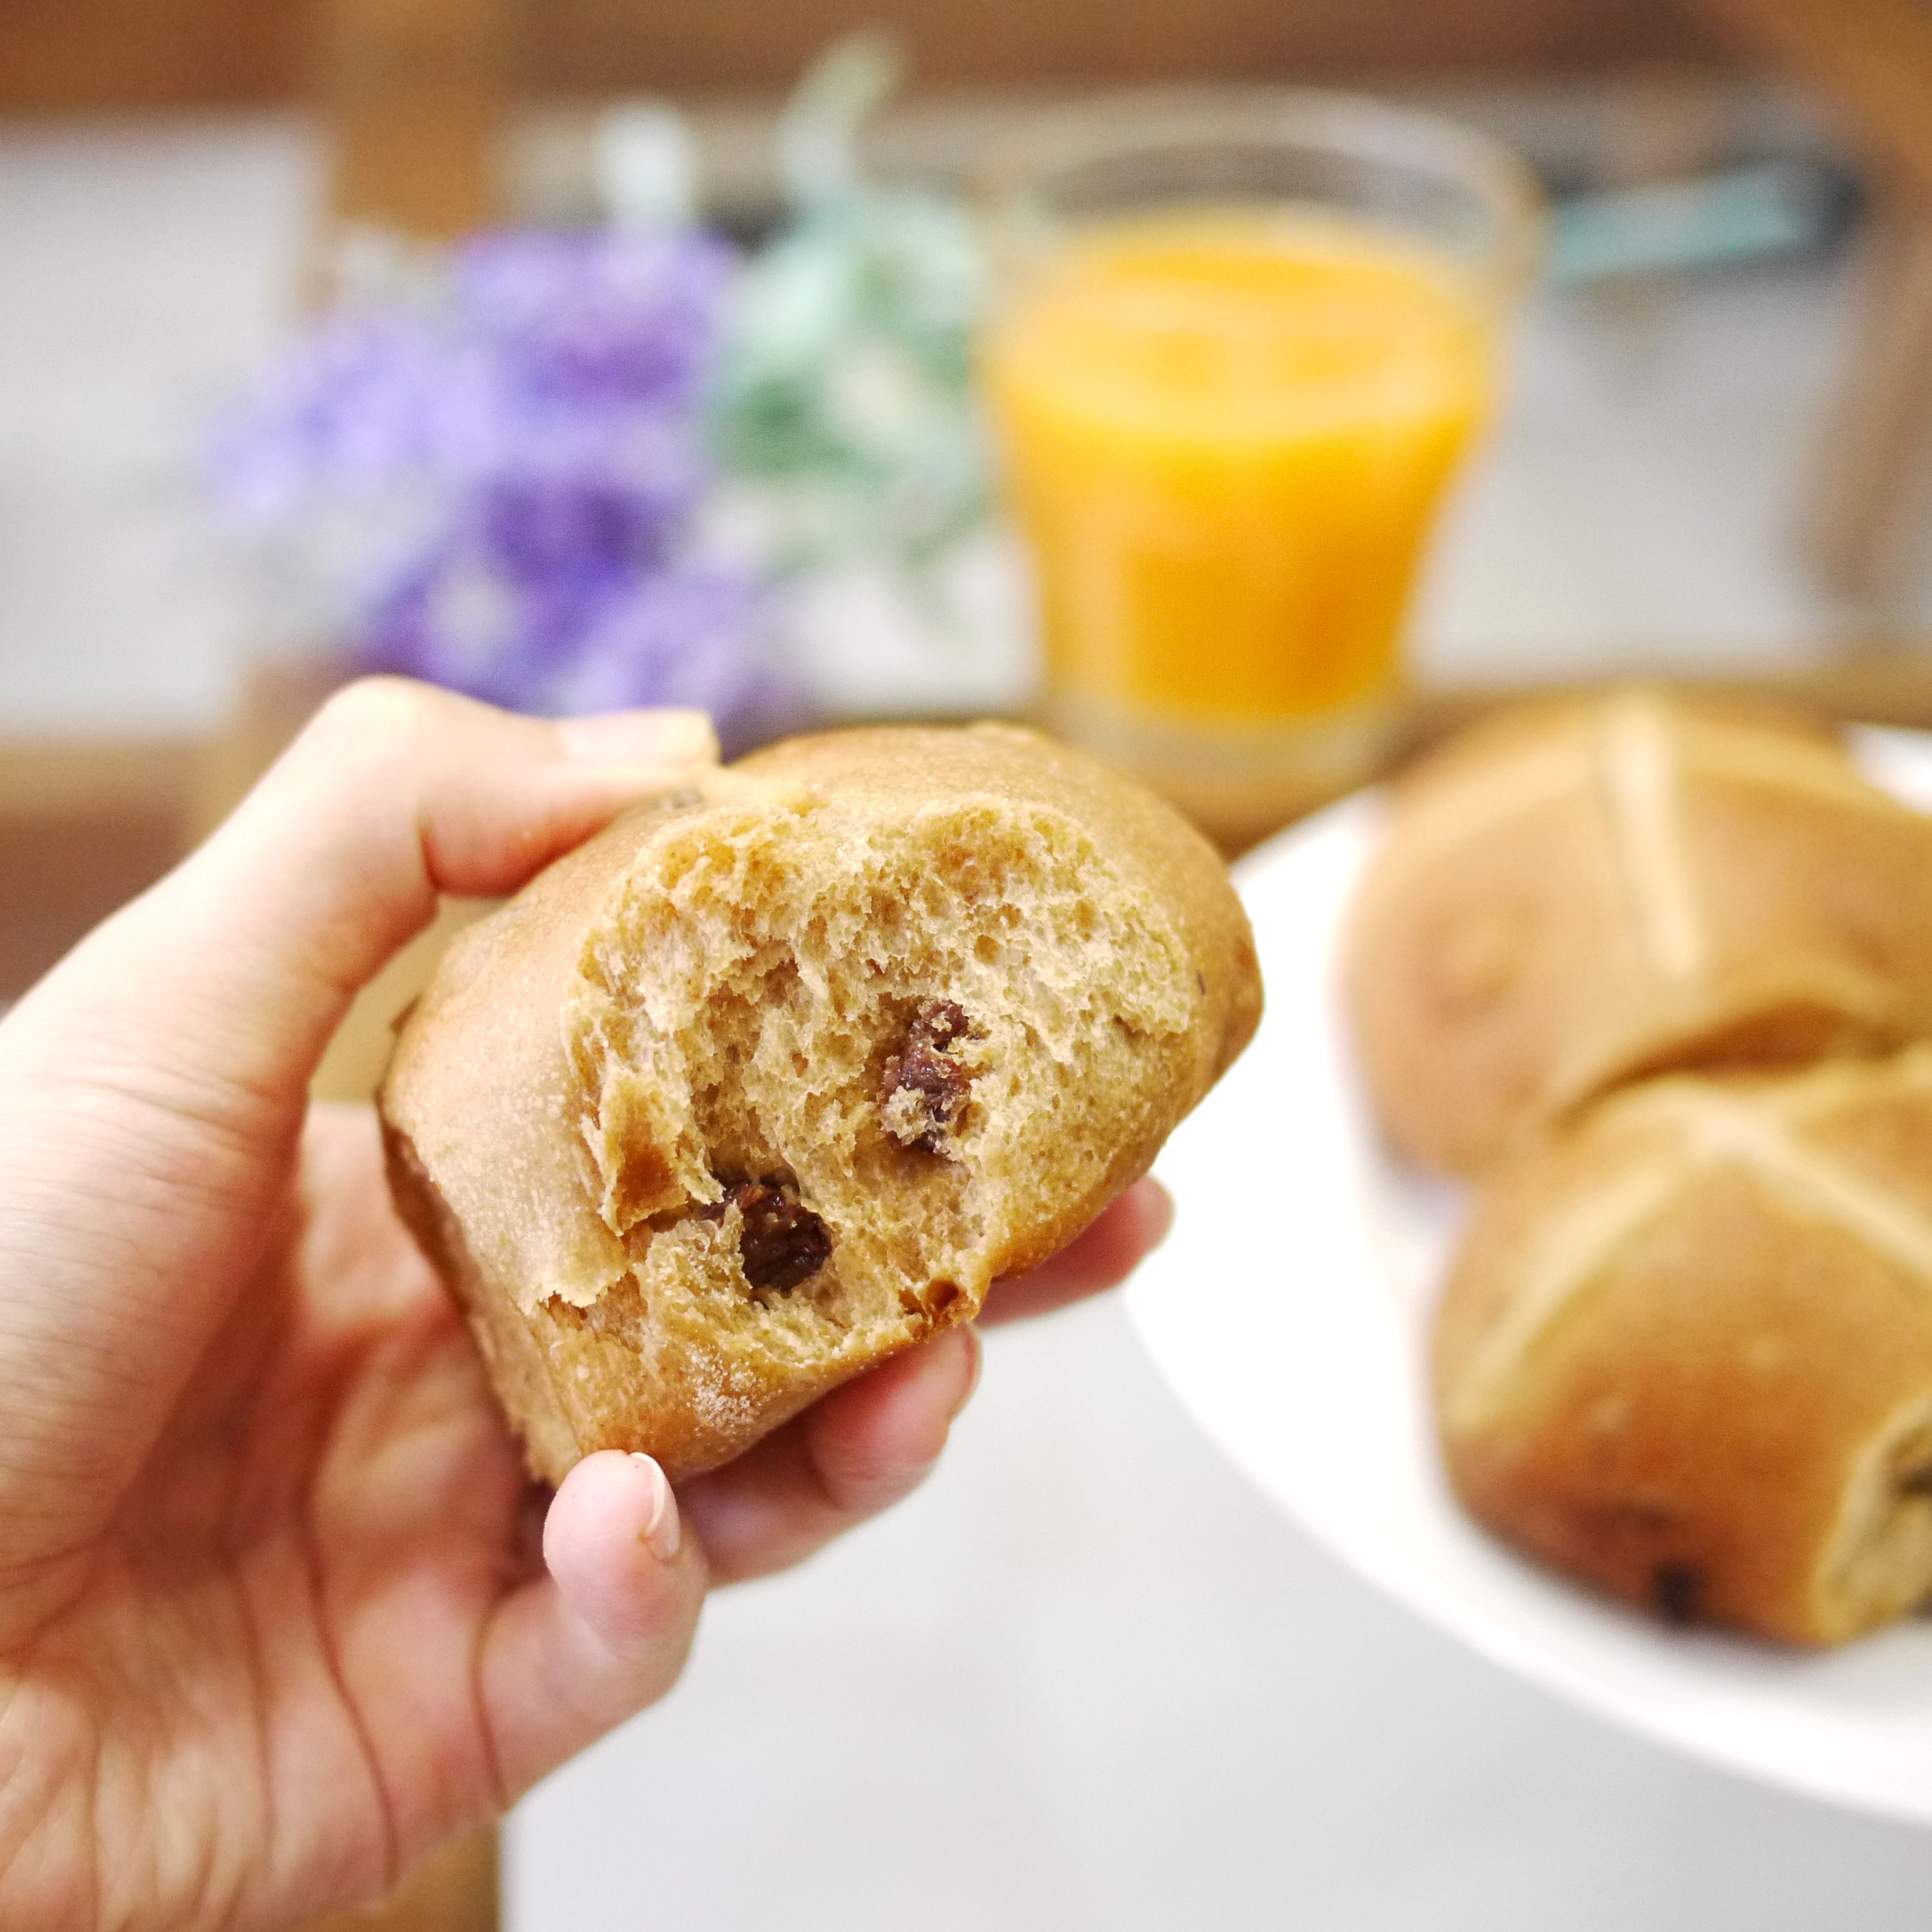

So here’s wishing everyone a Good Friday!
Sourdough Hot Cross Buns
250 gram bread flour
120 gram sourdough starter
50 gram coconut sugar
5 gram salt
1 egg yolk
35 grams butter
40ml milk
50 ml water
100 grams raisins
For the crosses, i just made a paste out of water and flour.
1. Mix the flour, sugar, salt and sourdough starter into a bowl. Make a well in the center, add in the egg yolk, water and milk. Pour the dough onto a kneading table, add the butter and start kneading away till the dough turns elastic and is able to be stretched to thin membrane without tearing. Add the raisins and knead till they are well distributed around the dough
2. Round the dough into a ball and leave it at room temperature, covered, till it doubles in size (about 2 hours, on a hot climate like mine).
3. Gently deflate the dough and cut the dough into balls each weighing 50 grams. Place them on your baking sheet and set aside till it doubles in size again. (about 2 hours)
4. Make a paste with flour and enough water. Pipe crosses across each bun
5. Preheat oven to 200 degree celcius. Bake for about 10-15 minutes till the bread turns a nice golden brown.
Rilakkuma Omurice
I remember seeing someone doing this on the internet a few years ago.

And my first thought was…
“Geez, that’s a lot of work for a meal!!!”
And here I am, a few years later, attempting something i thought was so frivolous.

I must have had a personality transplant or something!
Or rather, the process of ageing does funny things to your brain.
So, if you are old and aged like me, and would like to do frivolous things, here’s a step by step pictorial.

One word of advise though, for the sake of your sanity,, please use the shorter grained Japanese rice for this.
Short grained Japanese rice have a stickier quality, which saves you from tearing your hair out when the balls of rice refuse to ball together.
I learned this the hard way using the regular Chinese (or was it Thai?) long grained rice.

Rilakkuma Omurice:
2 Cups of cooked Japanese Rice
1 TBS of fish sauce
1/2 TBS of soy sauce
2 cloves of garlic, chopped
3 TBS of oil.
Salt and Pepper to taste
Directions:
Heat the oil in a wok, Throw in the chopped garlic and cook till fragrant
Throw in the rice and the sauces. Mix well to combine. Taste and add salt and pepper if necessary
Japanese Omelette
2 eggs
1/2 TBS mirin
1/2 tsp soy sauce
Oil to coat the pan
Beat the eggs, mirin and soy sauce together in a bowl.
Coat your frying pan with a bit of oil and pour just enough of the mixed egg to form a thin layer of omelette.
Repeat the process till all the eggs are used.
Assembly:
I am really bad with words, so i think it is easier if you refer to the pictorial. Or if you are a youtuber, please head on over to theKKSshow’s video for her comprehensive steps on how to make the rilakkuma omurice
But do take note that her recipe differs from mine. Hers was done with tomato ketchup. Mine was soy sauce.
Cheers!
Biscuit with Gravy
When i was making these biscuits this morning. I didn’t think that i was going to write a blog post about them.
All i wanted was to use up the gravy that i made the day before.
My impression of biscuits was never fantastic. Gone were the days where I would nibble on a piece of tasteless, unsavoury Popeye’s biscuits.
In addition to that, biscuits were never photogenic.
Biscuits doused in pale, white-ish sauce were even less impressive.
However, i decided to weather all the negativity. Because it is of utmost importance that i were to journal this recipe.
The recipe that had the power to erase all the bad judgement i passed on all the biscuits that i ecountered before.
I’m sorry Biscuits, I’ve been harsh on you.

- 2 cups all-purpose flour
- 1 tablespoon baking powder
- 1 teaspoon salt
- 1 tablespoon white sugar
- 1/3 cup shortening ( I used butter)
- 1 cup milk
- Preheat oven to 425 degrees F (220 degrees C).
- In a large bowl, whisk together the flour, baking powder, salt, and sugar. Cut in the shortening until the mixture resembles coarse meal. Gradually stir in milk until dough pulls away from the side of the bowl.
- Turn out onto a floured surface, and knead 15 to 20 times. Pat or roll dough out to 1 inch thick. Cut biscuits with a large cutter or juice glass dipped in flour. Repeat until all dough is used. Brush off the excess flour, and place biscuits onto an ungreased baking sheet.
- Bake for 13 to 15 minutes in the preheated oven, or until edges begin to brown.
And in case you were wondering about the gravy, the recipe can be found HERE
DIY Rice Noodles in Soy Sauce
Besides being swamped with handling the payroll at work on the first day of every month, I like to do a little what i call “blog event browsing”
It’s the time of the month where i poke my nosey nose at the various blogs that’s hosting some of my favourite blog events.
So, the theme of this month’s Little Thumbs Up is Soya Bean

And since Mich, the host, was kind enough to open this event to dishes with at least 2 tsp of soy sauce. Our breakfast of DIY Rice Noodles automatically qualified as they were practically swimming in soy sauce!

The rice rolls came out so silky soft that i decided that they were fitting for my 14 month toddler with +- 8 teeth.
Her version was drenched with carrots, corn and some bone broth.

So here goes!
Homemade Rice Rolls
Makes about 5 rolls
150ml water
40 grams rice flour
1/2 tbs cornstarch
1/2 tbs wheat starch
1/2 tbs cooking oil
pinch of salt
Sift the rice flour, corn starch, wheat starch and salt into a large bowl
Gradually, while whisking, pour the water into the flour, making sure that there is no lump.
Add the oil and set aside for 30 minutes
Place an oiled tray into a steamer. When the water in the steamer has come to a boil, Give the batter a good stir and ladle a think layer of batter into the oiled tray.
Cover and steam on high heat for 5 minutes.
Remove tray from steamer, let cool.
Using a spatula, carefully lift one edge of the cooked rice roll and roll it up into a cylinder.
Continue to steam the rest of the batter until it is used up.
Soy Sauce dressing
1 TBS oil
4 slices of ginger
2 TBS sugar
50 ml of soy sauce
50 ml water
Heat the oil, ginger and sugar till the sugar turns syrupy. Add the water and the soy sauce. Let the mixture come to a boil
To serve. Place the rice rolls onto a plate and ladle the soy sauce dressing over it.
This post is linked to the event, Little Thumbs up organised by Doreen from my little favourite DIY and Zoe of Bake for Happy Kids, hosted by Mich of Piece of Cake at this post.
Peach Pie
I am taking a break from all the healthy, wholesome cooking to make way for this peach pie.
This pie is a full butter, double crusted, gluten-full pie made from refined white wheat flour.
The peaches came from a can which probably leached BPA.
White refined sugar was added to the peaches.

While the overall goal here is to make healthier, whole foods to feed my family. I’m taking baby steps towards it.
That canned peach? It was something I unwittingly bought a few months ago. I am using it as I am clearing my pantry of the less healthy food items and replacing it with the healthier ones.

Having said that, I don’t think i will go to the extremeties such as completely eliminating a certain food.
I ‘ll still use wheat flour to create gluten-full bread.
I will still dump cupfuls of sugar into my cookies. ( well, maybe I will hold back just a little)

My version of “healthy” is defined in the most universal way. Health ideas that most of us can unanimously agree on. And my first focus would be to buy ingredients as fresh and as less processed as possible.
I really don’t like the idea of reading the ingredient list on say, a pack of biscuit in the supermarket and not being able to pronounce some of the items listed there, be it preservatives, additives, or even coloring, So if i were really craving for that pack of biscuit, i would load up my grocery cart with flour, butter, sugar and whatever it takes to make that biscuit.
So wish me luck everyone. *tosses empty can of peach*
Peach Pie
Makes a small pie with a diameter of about 12 cm
80 grams flour
60 grams butter, cubed and frozen
pinch of salt
pinch of sugar
1 to 1.5 tablespoon ice cold water
Filling
1 tbs beaten egg
1 cup of peaches (I used canned peach)
1 tbs flour
25 grams sugar
pinch of cinnamon
pinch of salt
1/2 tbs butter
1. In a food processor, add the flour, salt and sugar and pulse a couple of times.
2. Add the butter, and pulse a few times until the mixture resembles peas.
3. Add ice water and pulse. The dough should start to hold together.
4. Remove dough from the food processor, and place it over your working surface. Form the dough into two discs, cover in pastic wrap and refrigerate for at least one hour.
5. Preheat oven to 425 F
6. Take the dough discs and roll it out till it’s at least 18 cm in diameter.
7. Place the rolled dough and arrange it into the pie dish. Brush the pie crust with egg whites so that it doesnt get soggy.
8. In a large bowl, place the sliced peaches. In another bowl, mix the flour, sugar cinnamon,salt and the beaten egg. Pour the mixture over the sliced peaches and mix gently with a wooden spoon.
9. Roll the second disc of dough to make the top crust. Cut small round holes into the disc to let air during baking
10. Spoon peaches onto the pie dish, cover with the second dough, folding the edges under.Dip a fork in the egg wash, and start pressing the edges with the tines of the fork.
11. Bake for 10 mins in a preheated oven. the reduce the heat to 350 F and bake for an additional 30-35 mins.
12. Cool before removing from pie dish,
Coconut Flour Banana Chiffon Cake
I’ve been observing numerous foodblogs and their abstinence to grains.
A Grain-Free diet, as they call it, is a diet devoid of grains. This includes things like rice, barley, oats, etc.
To summarize, ALL the flours in my pantry, be it rice flour, wheat flour or corn flour unmitigatedly breach this grain free diet.
“So what the heck are you supposed to bake with?” screamed the baker in me.
Well, take it easy, Because baking is still possible without the above mentioned flours. Days after days of blogstalking activities revealed that almond flour (almond being a nut, not a grain), and coconut flour (coconut is a fruit), are the top favourites amongst the grain-free dieters.
And since i live in the tropics where coconuts are aplenty. I am using coconut flour on this grain free adventure

but WHY ???? you ask. Aren’t grains good for you? Aren’t they full of fiber? Don’t they reduce the risk of heart diseases.
Well, i guess there are two sides to every story.
The followers of a grain free diet believe that:
1. Grain are inflammatory food due to its high starch content.
Grains that are refined have higher inflammatory index than unrefined grains. So a white flour is more inflammatory than a whole wheat flour.
2. Grain contain phytic acid which binds minerals and prevent absorbtion.
This pretty much means that you won’t be able to fully and effeciently absorb the minerals that the grains boasts about.
3. Grains are linked to tooth decay.
High starches in grain is a breeding ground for bacterial growth in your mouth.
There are probably a more extensive list of the detrimental effects of grains. But I’ll leave it up to you guys to research into it on your own. My brain is starting to hurt just by highlighting the three points above. I guess i could never look into health advisor as an occupation.

Sugar Free Coconut Flour Chiffon Banana Cake with blueberries
Makes two ramekins
5 grams coconut flour
1 egg yolk (preferable organic)
10 grams coconut oil
10 grams coconut milk
60 grams ripe bananas, mashed
1 egg white
a handful of frozen blueberries
Preheat oven to 165 C (330 F).
Mix egg yolk, mashed banana, coconut flour, oil, and milk into a bowl. Stir till you get a smooth batter
Beat egg white till stiff peak.
Fold egg white into banana batter
Transfer batter into ramekins
Drop blueberries on the batter
Bake for +- 20 minutes or till the cake turns a golden brown
Nigella’s Caramel Croissant Pudding
What strikes me the most about Nigella Lawson is her beauty.
It’s almost a pity that she is hosting a cooking show instead of starring in a blockbuster movie. What a waste of pretty face, me thinks.
After watching numerous episodes of her show, I’ve come to conclude that Nigella’s style of cooking comes with a careless wanton. She is not very rigid on her measurements. It’s always a “drizzle of this” or a “handful of that”. That doesn’t sit well with me. My sense of estimation is tragically useless.
Thankfully, someone was able to convert her recipes into teaspoons, tablespoons and cups. Precise instructions are my bedrock. Without it, I am just a piece of wood drifting about cluelessly in the world of culinary.
So the recipe I’ve chosen for this month’s cook like a star , organised by Bake for Happy Kids, Joyce from Kitchen Flavours and Anuja from Simple Baking – is Nigella’s Caramel croissant pudding.


What made this pudding stand out is the use of croissant instead of the common stale bread. This made a very soft, melt-in-your-mouth pudding texture which you barely have to chew.
So, grab a spoon and dig in!

Recipe taken from Food Network.
Caramel Croissant Pudding
2 stale croissants
1/2 cup sugar
2 tablespoons water
1/2 cup heavy cream
2 tablespoons bourbon
1/2 cup whole milk
2 eggs, beaten
Directions
Preheat the oven to 350 degrees F.
Tear the croissants into pieces and put in a small gratin dish; I use a cast iron oval with a capacity of about 500ml/ 2 cups for this.
Put the sugar and water into a saucepan, and swirl around to help dissolve the sugar before putting the saucepan on the hob over medium to high heat. Caramelize the sugar and water mixture by letting it bubble away until it all turns a deep amber colour; this will take 3 to 5 minutes. Keep looking but don’t be too timid.
Take the pan off the heat and add the cream – ignoring all spluttering – followed by the bourbon and milk. Whisk to mix, then still whisking add the beaten eggs. Pour this quickly over the croissants and leave to steep for 10 minutes.
Place in the preheated oven for 20 minutes and prepare to swoon.
Fast food @ home
I am currently reading a book titled “the super natural home” by Beth Greer. In this book, Beth tells us about the toxins that we unwittingly expose to ourselves daily and what we can do to avoid or rather minimize them.
In a chapter of the book, she mentioned about her daughter coming home having eaten two pieces of McNuggets. She said, and i quote : “the dreaded food made from highly processed reconstituted chicken that is breaded and mixed with toxic additives and preservatives , then deep fried in fat-laden, partially hydrogenated oil.”
Also in the recent news was Jamie Oliver winning his case against McDonald’s over the use of pink slime, Where he pointed out that the meat in the burger patties had been pre-treated with a cocktail of chemicals and thus not fit for human consumption. McDonald’s has since agreed to change its recipe.
But, I don’t think i will be going to the golden arches for a while now.
So instead, i try to re-create. I’ve even gone a step further by making my own burger buns!

So here i am with my sausage patty burger. Appearance wise, it’s a far cry from the McDonald’s sausage McMuffins. Namely because i’ve used burger buns instead of english muffins and added the lettuce and tomatoes which are absent from the original.
The sausage patty tasted pretty close. I can confidently say that because Mr. Crustabakes who had absolutely no inkling of my copycat attempt pointed out the taste resemblance.
So, do try it out and save yourselves a trip to the drive-thru!
Simple Homemade Sausage Patties
Taken from MarthaStewart.com
Ingredients
- 1 pound ground pork- i used chicken
- 1 garlic clove, minced
- 1 tablespoon dried sage, crumbled
- 3/4 teaspoon dried thyme
- 1/2 teaspoon dried fennel, crushed
- Pinch of ground nutmeg
- 1 1/2 teaspoons coarse salt
- 1/2 teaspoon freshly ground black pepper
- 1 large egg white
- 2 teaspoons vegetable oil
Directions
-
Step 1
Mix together the pork, garlic, sage, thyme, fennel, nutmeg, salt, and pepper in a medium bowl. Add the egg white and combine thoroughly. Cover and chill for at least 15 minutes.
-
Step 2
To easily form the sausage patties, rinse your hands in cold water. Divide the mixture into eighths and shape each portion into a 2 1/2-inch disk. Patties can be made to this point and refrigerated or frozen until ready to use.
-
Step 3
Heat a skillet over high heat, and then swirl in the oil. Fry the sausages on both sides until completely cooked through and golden brown, about 4 minutes per side. Drain and serve immediately with pancakes, waffles or eggs. Sausage patties can be fully cooled, wrapped, and frozen for microwave reheating.
Beautiful Burger Buns |
Taken from King Arthur Flour
- Volume
- Ounces
- Grams
Buns
- 3/4 to 1 cup lukewarm water
- 2 tablespoons butter
- 1 large egg
- 3 1/2 cups King Arthur Unbleached All-Purpose Flour
- 1/4 cup sugar
- 1 1/4 teaspoons salt
- 1 tablespoon instant yeast
- *For best results (a smooth, slightly soft dough), use the smaller amount of water in summer (or in a humid environment), the greater amount in winter (or in a dry climate); and something in between the rest of the time.
Topping
- 3 tablespoons melted butter
Directions
| 1) Mix and knead all of the dough ingredients — by hand, mixer, or bread machine — to make a soft, smooth dough. |
| 2) Cover the dough, and let it rise for 1 to 2 hours, or until it’s nearly doubled in bulk. |
| 3) Gently deflate the dough, and divide it into 8 pieces. Shape each piece into a round ball; flatten to about 3″ across. Place the buns on a lightly greased or parchment-lined baking sheet, cover, and let rise for about an hour, until noticeably puffy. |
| 4) Brush the buns with about half of the melted butter. |
| 5) Bake the buns in a preheated 375°F oven for 15 to 18 minutes, until golden. Remove them from the oven, and brush with the remaining melted butter. This will give the buns a satiny, buttery crust. |
| 6) Cool the buns on a rack. |
| Yield: 8 large buns. |
Caitlyn’s Sugar Free Cupcakes with Avocado Frosting
I know, i know, majority of you would probably feel repulsed by yet another sugar free, gluten free baby food.
But i feel the need to post this recipe, namely because it’s a recipe I’ve developed myself.
After rounds and rounds of trial error, I’ve finally came up with a cake recipe i really loved.
A cake recipe that’s subtly sweet and soft as can be.
Considering that this is an entirely sugar free (refined/unrefined, synthetic/natural), this is quite a breakthrough. No stevia, no xylitol, or any of that fancy sweeteners was used here.
The goodness came from ripe bananas.

Working with my sugar free constraints, I also wanted to come up with a frosting that’s equally healthy for these cupcakes. For days, I find myself sometimes staring into blank space. I just couldn’t think of something that’s naturally sweet and is thick enough to pipe.
Then the idea hit me. avocadoes! At first I was skeptical, I didnt know whether blended avocadoes would be too watery. I also thought that avocadoes would be too tasteless as a frosting. That’s when i decided to drop in some medjool dates in. And boy, did it work like a charm! and most importanly, baby Caitlyn loves it!
Sugar Free, Gluten Free Chiffon cake with Avocado Date Frosting
Makes 3 of the above star shaped cupcakes
15 grams rice flour
5 grams sago flour
1 organic egg yolk
8 grams olive oil
11 grams raw almond milk
60 grams banana, mashed
1 organic egg white
Preheat oven to 170 degree celcius.
In a bowl, mix the yolk, raw almond milk, bananas, and olive oil together. Sift in the flours.
Beat the egg whites till stiff peaks.
Fold the egg whites into the banana mixture.
Pour into mold and bake till golden brown (+- 20 to 25 minutes)
Avocado Frosting
1 avocado
1 medjool date
With a blender, blend the avocado and the date together.
Using a piping bag, pipe onto cupcakes.
Cinnamon French Toast with Red Berry Sauce
I’ve never really known how to spell “cinnamon”. I always get confused with double ‘N’s or double ‘M’s, or double both.

What i always do is, i type them in and try the different combinations till the red wriggly line, which signify a spelling error is gone. That’s on good days. Sometimes, i don’t even bother. Who cares if i spell “cinammon” wrong? I am pretty sure everyone still knows i am referring to that bark of a spice.
Nevertheless, here’s a cinnamon (Ha! I got it right @ first try) French Toast with Red Berry Sauce. I decided to make this because :
1. I’ve just made a loaf of sandwich bread, which means i could cut them up as thick as desired.
2. I’ve got spare berries lurking about in the fridge
3. I wanted to join the “cook like a star” organised by Zoe of Bake for Happy Kids, Baby Sumo from Eat your heart out and Grace from Life can be simple.

The selected star for the month of July is Curtis Stone. I know him from watching snippets of “take home chef” whereby he surprises his guests going into their homes and cooking for them.

So, here’s your “berry” delicious toast Curtis. Enjoy the month of July where everyone will be flocking to your site to join the event. 😉
Cinnamon French Toast with Red Berry Sauce
Serves 4
Ingredients
Red Berry Sauce
1 6-ounce/170g package fresh blueberries
1 6-ounce/170g package fresh raspberries
1 4.4-ounce/125g package fresh blackberries
3/4 cup/180ml sugar
French Toast
6 large eggs
4 1/2-inch-thick slices brioche bread, halved diagonally
3 tablespoons butter
1/4 cup sugar
2 teaspoons ground cinnamon
1/3 cup crème fraîche
Assorted fresh berries
Method
- To prepare the red berry sauce: Combine all the berries and sugar in a blender and puree until smooth.
- Strain the berry puree through a fine sieve, discarding the seeds, and into a small saucepan.
- Place the saucepan over medium-low heat and simmer for 2 minutes, stirring frequently.
- Remove from the heat and keep warm while preparing the French toast.
- To prepare the French toast: Using a fork, beat the eggs in a 13×9 baking dish to blend. Place the slices of brioche in the eggs and let stand for 5 minutes, or until the eggs are absorbed, turning the brioche slices once.
- Melt the butter on a heavy large griddle pan over medium heat.
- Add the brioche slices to the hot pan and cook for about 2 minutes per side, or until golden brown on the outside and heated through.
- Meanwhile, stir the sugar and cinnamon on a large plate; set aside. Immediately place the hot French toast in the cinnamon-sugar and turn to coat completely.
- Divide the French toast among 4 serving plates.
- Top with a dollop of crème fraîche. Spoon the berry puree over the French toast.
- Scatter the fresh berries over and serve immediately.
document.write(”);
Food Combining Diet
I am not sure how big “Food Combining” is in the world out there. But here in Indonesia, it’s pretty big.
I’ve read a few publishings and articles regarding Food Combining. And like all diets (raw food, vegan, paleo…), there are a few rules to follow.
One of the most basic rules to follow is that you should only eat fruits, and only fruits, till 12 noon. While at first, this sounded silly, the reasoning behind it does make some sense.
If i didn’t grasp it wrongly, the body is set to rid itself of waste matters between the hours of 4a.m till 12 noon. As such, you do not want to burden your digestives with heavy meals. As fruits mostly consist of sugar and water, they are therefore the most recommended items for you breakfast plate.
So here’s what breakfast looks like:

It’s just shredded rock melon within watermelon juice.
And it’s pretty refreshing!
I’m not sure how long this Food Combining diet will last. I’m not even sure i can last till 12 noon with only fruits. But for now, I’m pretty happy with my drink!
Sourdough Sandwich Bread
After all the sourdough recipes you had to put up with, I am glad to say that the sourdough adventure is almost coming to an end.
You see, my previous recipes were all recipes that didn’t require the lifting powers of the yeast thriving in the sourdough starter. Items such as brownies, muffins, pancakes, waffles all had either baking powder or baking soda in them that did the lifting. The sourdough starter was superfluous at the very best. It’s just there to add flavour, or as a means to use up all the sourdough discard that came with each sourdough feeding.
Last night however, i put my sourdough starter to its ultimate test. I baked a bread with it.

Unlike instant yeast which probably takes two hours to proof, i had to let it sit for about three hours for its first proofing, and another 5 hours for its final proofing.

Nevertheless, I am pretty happy with the result. The bread came out sufficiently soft with that sour twang that trademark sour twang that comes with sourdough bread! I can’t believe i just baked a bread with yeast that i grew in my own kitchen!
Yay Me!
Sourdough Sandwich Bread
Slightly modified from “Rahasia Membuat Roti Sehat & Lezat Ragi Alami” by Sangjin Ko
375 grams Bread Flour
180 grams sourdough starter
7 grams salt
37 grams sugar
165 grams water
30 ml milk
45 grams butter
In a bowl, mix the flour, salt, sugar and sourdough starter. Make a hole in the middle and pour the water and milk into it. Mix well. Transfer the batter onto a table top that has been dusted with flour. Add the butter, and knead till is elastic and stops being sticky.
Shape the dough into a bowl. Cover and let to proof at room temperature till it doubles in size (3 hours).
Punch the dough down to let out excess air. Divide dough into 2. Cover with plastic and let rest for another 30 minutes.
Grease you S\sandwich tin with butter. Preheat oven to 200 degree celcius.
Take one of the dough, flatten it and roll it up like a swill roll. Place the dough onto the sandwich tin.
Let the dough proof for another 2 hours (i left mine to proof for 5 hours).
Bake the dough at 180 degree clecius, for about 30 minutes till the tops get crusty and golden brown.
Sourdough Chocolate Chip Muffins
Please bear with me as i yet again put up another sourdough recipe.
This time, i used my sourdough discard to make chocolate chip muffins.

The sourdough here acts as an acidic base for the baking soda, which made the muffins get an extra “oomph” while rising in the oven.

As always with muffins, i was extra generous with my chocolate chips. I loved picking the chips with my fingers when i eat my muffins.

Taste wise, i couldnt really taste the sour twang of the sourdough starter. Neither did Mr.Crustabakes… I know this because he didn’t complain. You see, Mr. Crustabakes isn’t a big fan of sourdough related items. He thinks they are stinky and rotting. Little did he know that he just scarfed a whole muffin of sourdough. Ha!
Sourdough chocolate chips muffins
Yields about 8 muffins
Adapted from Sourdoughhome.com
- 1 C “discarded” sourdough starter
- 1 C All Purpose flour (sift flour prior to measuring)
- 1 egg
- 1 tsp vanilla
- 1/4 tsp salt
- 1/4 C oil
- 1/2 C sugar
- 1 tsp baking soda
- ~1/2 C chocolate chips
Preheat oven to 425F.
Combine dry ingredients in small bowl. Stir in chocolate chips. Combine wet ingredients in medium bowl. Add dry ingredients to wet ones.
Line your muffin tins with cupcake wrappers. Mix the wet and dry ingredients quickly and spoon into your muffin cups.
Bake at 425 for about 20 minutes.
Sourdough Discard Waffles
U know those little packets of living organisms that you use to make breads? The one that spring to action when it is watered? The one responsible for making your bread expand and rise?
Well, i’ve been trying to grow my own packet of them.
Yup, I’ve been trying to grow my own natural yeast.
I’ve prowled all over internet sites and books.
I’ve joined a facebook group called the “natural homemade bread” club. I’ve asked for opinions, advise, guides from the experts in that group. And I must genuinely thank these people for offering me needed instructions and solutions to caring for my yeast.
So, a little bit about natural yeast, from my short lived “research”….
Natural yeast is a tiny organism. It exists around us. You can find them clinging on the surfaces of fruits, or even on the surface of flour particles.
By soaking your fruits/flour in water, you are giving a media for these little yeast to grow. These yeast feed on starch molecules. Be it the flour or sugar.
So like a pet, you are supposed to feed and water them at intervals to make sure they have enough water and food to thrive.
However, before you feed them, you are supposed to throw away a good portion of it to make sure the yeast population is controlled, and there is enough food and water for the remaining yeast that you did not discard.
The thought of discarding this yeast bothers me. They were afterall good yeast, which I had cared, fed and looked after.
So again, I prowled the internet for recipes which use discard yeast.
So here I am with my first post on a waffle recipe using discarded yeast.

A sourdough waffle.
One of the most flavorful waffle I’ve ever tasted.
Like its name would suggest, these waffles have a slight twang of sourness to it. Just like how sourdough breads are.
These waffles were so good, I didnt really need any kind of topping to eat them with. Maybe just a slight dusting of icing sugar

It really depends on personal preference though.
Mr. Crustabakes on the other hand wasn’t too crazy over these sourdough waffle.

But with maple syrup, he managed to scarf down two slices without any complaints though.
With this yeast project in hand, I foresee myself posting more discard yeast recipes. I wish I could interest everyone into growing their own yeast. Because not only is it healthier, but it is also easier on the digestive system…
But if all these yeasty things arent your thing, please do bear with me…
For instructions on how to grow your own yeast, you can refer to King Arthur Flour’s website HERE
Sourdough discard Waffles
Recipe taken from King Arthur Flour
Overnight sponge
- 2 cups King Arthur Unbleached All-Purpose Flour
- 2 tablespoons sugar
- 2 cups buttermilk (I used 2 cups of milk mixed with 2 cups of lemon juice)
- 1 cup sourdough starter, unfed
Waffle or pancake batter
- all of the overnight sponge
- 2 large eggs
- 1/4 cup vegetable oil or melted butter
- 3/4 teaspoon salt
- 1 teaspoon baking soda
1) To make the overnight sponge, stir down your refrigerated starter, and remove 1 cup.
2) In a large mixing bowl, stir together the 1 cup starter, flour, sugar, and buttermilk.
3) Cover and let rest at room temperature overnight.
4) In a small bowl or mixing cup, beat together the eggs, and oil or butter. Add to the overnight sponge.
5) Add the salt and baking soda, stirring to combine. The batter will bubble.
6) Pour batter onto your preheated, greased waffle iron, and bake according to the manufacturer’s instructions.
7) Serve waffles immediately, to ensure crispness. Or hold in a warm oven till ready to serve.
Sugar Free Raisin Banana Bread
Lots of cakes out there claim to be sugar free.
But they are laden with synthetic sugar.
I’ve seen cakes that claim to be refined sugar free.
But they are laden with a whole party of unrefined sugar.
This cake however is wholly Sugar Free.
It relies wholly on bananas and raisins to its sweetness.

Perfect for my 10 month old baby Crusta.
Yup, she is still not allowed sugar. Refined, or not refined.
My poor baby.
So till you hit your 12 month mark,
and are finally allowed a moderate amount of sugar
here is something to tide you over.

Sugar Free Banana Bread with Raisins
Makes 2 large muffins
20 grams organic raisins, chopped
40 grams boiling water
40 grams whole wheat flour
12 grams All purpose flour
1/4 tsp organic/natural baking powder
28 grams olive oil
125 grams (about 1) banana
1 egg yolk
Pour the boiling water onto the chopped raisins, set aside for half hour
preheat oven to 180 degree celcius, Grease and line the muffin tins.
Sift whole wheat, all purpose flour with the baking powder.
Drain the raisins, reserving the liquid.
Put the olive oil, banana and 12 grams of the steeped raisin water in a food processor. Process till smooth.
Pour the processed banana mixture onto the flour mixture and mix till well combined.
Add the chopped raisins and pour the batter onto awaiting muffin tins.
Egg benedict and Bacon Sandwich
It’s an Egg-citing day for me today,
Because i successly:
1. Poached an egg
2. Made hollandaise sauce.

Yay Me!
For tips and instructions to make these two, i refer to KitchenRiffs, here
Bread Pudding with Brown Sugar Crumbles
Using yesterday’s swirled sweet potato sandwich bread, i made this bread pudding, with brown sugar crumbles.

It’s a recipe re-visited, from HERE

Happy Friday everybuddy!
Another potato bread, this time, swirled.
I know I just posted a purple sweet potato bread yesterday. But the truth is, the bread was made last week. And we finished it.
And I just had to make another one.

This time however, i used two types of sweet potatoes. The regular orange skinned, white flesh sweet potatoes and the purple ones.
Then i swirled them together.
It takes a little bit more effort making this, I had to divide everything into two. Which means double the dirty bowls, double the kneading process, double almost pretty much everything.
But I wanted to see how it would swirl so badly, that i decided to go ahead and did double duty on this bread.

So here it is, the bread swirled.
And here it is, as a ham sandwich. Whoopee!

Swirled Sweet Potato Loaf
(adapted and modified from Jess of J3ss Kitch3n)
Recipe
Starter Dough Ingredients
200g bread flour
1/2 tsp instant yeast
65 cooked purple sweet potato (mashed)
65 cooked white sweet potato (mashed)
Water
- Combine bread flour, instant yeast and mashed PURPLE sweet potato in a mixing bowl, add in sufficient water to form a soft pliable dough, cover with cling wrap or a wet cloth and prove for 1hr or until double in size.
- In another bowl, Combine bread flour, instant yeast and mashed WHITE sweet potato in a mixing bowl, add in sufficient water to form a soft pliable dough, cover with cling wrap or a wet cloth and prove for 1hr or until double in size.
Main Dough Ingredients
15g bread flour
25g all purpose flour
33g cooked PURPLE sweet potato (mashed)
10g sugar
20g olive oil
15g bread flour
25g all purpose flour
33g cooked WhITE sweet potato (mashed)
10g sugar
20g olive oil
- Combine all of the PURPLE Main Dough Ingredients with the PURPLE starter dough ingredients in your bread maker machine or stand mixer and knead till the window pane stage, cover with cling wrap or wet cloth and prove for 1hr or until double in size.
- In a separate bowl, do the same for the White main dough and white starter dough ingredients.
- Punch out the air from the proofed dough and divide the dough into 2 equal parts, cover and rest the doughs for 15mins.
- Punch out the air from the rested dough, wrap the white dough in the purple dough, roll it up swiss roll stylea nd shape into rounds, place into bread tin and prove for 1hr.
- Bake in preheated oven of 170C for 38mins or till golden brown, remove bread from tin immediately once done and cool completely on a cooling rack before slicing.
Purple Sweet Potato Bread
Some of you are probably sick of the babyfood posts that i’ve been putting up lately.
Today, I shall suspend baby-related activities and return to regular Crustabake-y kinda post.
“Back to basics” as everyone would say.
Basics, in Crustabakes, would probably be baked goods.
While still on a “healthy” strike,
I bring you this Purple potatoes sandwich swirled bread.

No, its not gluten free, and yes, there is sugar involved in making this.

But it’s low gluten, due to the potatoes.
And no artificial coloring was used to get this beautiful hue.

It’s all natural from the pureed purple sweet potatoes.
Purrty ain’t it?
Sweet Potato Loaf
(adapted and modified from Jess of J3ss Kitch3n)
Recipe
Starter Dough Ingredients
200g bread flour
1/2 tsp instant yeast
130g cooked purple sweet potato (mashed)
Water
- Combine bread flour, instant yeast and mashed sweet potato in a mixing bowl, add in sufficient water to form a soft pliable dough, cover with cling wrap or a wet cloth and prove for 1hr or until double in size.
Main Dough Ingredients
All of Starter Dough
30g bread flour
50g all purpose flour
65g cooked purple sweet potato (mashed)
20g sugar
40g olive oil
- Combine all of the Main Dough Ingredients in your bread maker machine or stand mixer and knead till the window pane stage, cover with cling wrap or wet cloth and prove for 1hr or until double in size.
- Punch out the air from the proofed dough and divide the dough into 2 equal parts, cover and rest the doughs for 15mins.
- Punch out the air from the rested doughs and shape into rounds, place into bread tin and prove for 1hr.
- Bake in preheated oven of 170C for 38mins or till golden brown, remove bread from tin immediately once done and cool completely on a cooling rack before slicing.
Cream of Mushroom Soup for everyone
“The standard of breakfast has dropped, it seems” joked Mr Crustabakes yesterday.
I looked up from where i was sitting, onto the plate of storebought blueberry puff pastry which Mr. Crustabakes was having for breakfast.
I turned my gaze over to Baby Crustabakes. She was squishing a piece of dragonfruit. And on her highchair tray, there was a homemade, sugar free, and gluten free fruit tart. Topped with pureed avocado and freshly diced cantaloupe and dragonfruit

The standard of breakfast for Mr.Crustabakes has sure dropped, but it didn’t land anywhere far. It merely shifted to Baby Crustabakes breakfast.
I admit, i have been spending ridiculous amounts searching the web on what to feed and what not to feed baby Crustabakes at her age.
Lots of adjustments were needed to convert a standard adult recipe to her babified version. At her age, baby Crustabakes still has lots of restrictions in her diet. Starting from gluten, sugar, salt, dairy, eggs, etc etc.
And it’s really straining, if not impossible for me to prepare two full fledged, very different breakfast for the two most important people in my life.
But i was determined, to do it, and so i came up with this.
Cream of Mushroom soup.
Breakfast for the two champions.

Jackpot.
What a time saver, this killing two birds with one stone recipe.
It saves me so much time that i was even able to decorate and snap pics. Hola!
Cream of Mushroom Soup
taken from allrecipes.com
- 115 g sliced fresh mushrooms
- 120 ml chicken broth
- 25 g chopped onion
- 0.1 g dried thyme
- 15 g butter
- 8 g all-purpose flour / 1/2 tsp Tapioca flour for babe
- 0.5 g salt (no salt for babe)
- 0.2 g ground black pepper (exclude for babe)
- 80 ml half-and-half/ 100 ml coconut milk for babe
- 5 ml sherry (exclude for both)
Directions
- In a large heavy saucepan, cook mushrooms in the broth with onion and thyme until tender, about 10 to 15 minutes.
- In blender or food processor, puree the mixture , leaving some chunks of vegetable in it. Set aside.
- In the saucepan, melt the butter, whisk in the flour until smooth. Add the salt, pepper, half and half and vegetable puree. Stirring constantly, bring soup to a boil and cook until thickened. Adjust seasonings to taste, and add sherry.
- For the baby version, pour coconut milk in saucepan, add pureed mushrooms, thicken with tapioca starch mixed with a bit of water
Cait’s Fruit Cup
I can’t resist whipping out my camera to capture the beautiful colours of these tropical fruits.

It’s Baby Crustabakes breakfast fruit cup.
And it’s also her first time eating cut fruits.
Bye bye Puree!
Cut fruits are:
Avocadoes,
Dragonfruit,
Papaya
Christmas Tree Waffles
I wish I could say this is my bright idea. but it wasn’t. I saw this on Pinterest a while ago, but somehow couldn’t find the link back to the person who came up with this.

But at least, i managed to replicate it.
I used pandan flavoured waffles for this.
And topped it off with a starfruit.
Happy Christmas everybuddy!

Pandan Waffles
Recipe taken from Cuisine Paradise
Ingredients:
125g All-purpose Plain Flour
50g Caster Sugar
1.5 Teaspoon Cornflour
1/4 Teaspoon Salt
1/2 Teaspoon Baking Soda
1 Teaspoon Baking Powder
1 Egg, yolk and white separate
100ml Coconut Milk
80ml Drinking Water
1/2 – 3/4 Teaspoon Pandan Paste
30ml Salad/Vegetable Oil
1. In a mixing bowl, whisk in coconut milk, pandan water(pandan paste mix with 80ml drinking water), oil and egg yolk till well-combined.
2. Using another bowl, sieve in all dry ingredients such as flour, sugar, salt, baking powder, baking soda and cornflour.
3. Next using a whisk, stir in wet ingredients into the flour mixtures till the batter is slightly lumpy and thick.(do not over mix at this stage)
4. Whisk Egg White with pinch of cream of tartar on medium speed using electric whisk till stiff peaks.(done is about 3 – 5 minutes. To test overturn the bowl and the white should remains without falling)
5. Gently fold white into the flour better till incorporate.
6. Preheat waffle iron and ladle 1 to 1.5 scoop(depending on the size of the scoop) of batter onto hot waffle iron. Cook according to the machine instruction manual until golden brown.
7. Serve hot with honey, jam, kaya, chocolate and etc.
Tamago and crab stick sushi
A sushi is like a sandwich to me. You can pretty much add whatever you fancy into it.
Or whatever you happen to have in your fridge.
I am running low on supplies.
So, it’s imitation crab sticks, tamago omelette, and lettuce for me.


Not the fanciest items around. But they still work like a charm.
Oiishiiii!
Mango Yogurt Muffins
Let’s welcome the Mango Season with these mango Yogurt muffins!

Mango Yogurt muffin*makes 12 muffins
Taken from Nasi Lemak Lover
(printable recipe)
125g unsalted butter
150g cake flour
110g sugar
200g chopped fresh mango
100g yogurt (natural flavour)
2 eggs (medium)
1tsp baking powder
1/2tsp baking soda
1/4tsp salt
1. Beat butter, salt and sugar till pale and creamy.
2. Add egg one at a time, mix well.
3. Sift in flour, baking powder and baking soda, add in yogurt, combine well
4. Add in chopped mango, and lightly mix well.
5. Spoon batter into a muffin pan, sprinkle some chopped mango on top.
6. Bake at preheated oven 180c for 25mins or till golden brown.
Miso Udon Soup
Before Baby Crustabakes, supermarket trips were often and regular.
With her arrival, these visits however, became sporadic and infrequent.
So when i did get to a supermarket last weekend, i felt the urge to buy the store out. I stuffed our cart with things that are usually not in my grocery list.
Things that include fresh udon noodles.

I combined the fresh udon noodles with things that are in my usual grocery list.
Prawns,
Corn,
Crabsticks, and
Egg

I poured some miso broth over the whole party. And thus, was my miso udon.
Miso Udon
- 2 packets of udon
- 3 fresh prawns
- 2 Imitation Crabsticks
- 1 egg – hard boiled
- Boiled corn
- Dried seaweed
For soup:
- 1cup water
- 1 stalk spring onion – chopped
- 1 tbs (or more) miso paste
- 1/4 tsp Hon-dashi seafood flavour seasoning
- 1/2 tbs mirin
Directions:
- Bring the cup of water and dried seaweed to boil.
- Mix in the miso paste the hondashi and the mirin
- Turn the heat off (I used the residual heat to cook the rest of the items on the list) and add the prawn and the imitation crab stick
- In another pot, boil the fresh udon. Drain and place into a bowl.
- Pour miso soup over udon.
- Garnish with spring onion.
Chocolate Chocolate Chocolate Chip Muffins
Chocolate Chocolate Chocolate Chip Muffins.
Who could resist a muffin with a name like that?

One moment, I was in bed reading a blog post off the Food Librarian,

And the next thing i knew, I was in the kitchen taking butter out of my fridge.
Chocolate Chocolate Chocolate Chip Muffins
From: Joy the Baker Cookbook (Via the Food Librarian)
1/2 cup (1 stick) butter
5 ounces semisweet chocolate, coarsely chopped (I used Nestle semi-sweet chocolate chips)
2 cups all-purpose flour
1 teaspoon baking powder
1 teaspoon baking soda
1/2 teaspoon salt
1 teaspoon vanilla extract (or 1 teaspoon instant espresso powder)
1/2 cup packed brown sugar
2 large eggs
2/3 cup buttermilk
1 cup (6 ounces) semi-sweet chocolate chunks (I used Nestle semi-sweet chocolate chips)
1/2 cup white chocolate chips (I used 96 grams of Nestle white chocolate chips)
Preheat oven to 350 degrees. Prep a muffin pan. Joy’s recipe says it yields 12 muffins, but I must have made mine a bit smaller and got 16 muffins.
Create a double boiler (place some water in a saucepan and bring to a simmer) and place the butter (chopped into about 8 pieces) and 5 ounces of chocolate into a heatproof bowl over the simmering water. Don’t let the bowl touch the water. Melt the butter and chocolate together, stirring together. Once melted, remove and set aside to cool a bit while you mix the rest of the ingredients.
In a medium bowl, whisk together the dry ingredients: flour, baking powder, soda, salt.
Whisk the brown sugar into the chocolate mixture. Follow with the eggs, buttermilk, vanilla. Add the flour mixture all at once and fold together. Don’t overmix. Add the chocolate chunks.
Dish into muffin tin. Bake for 18-20 minutes – until a toothpick comes out clean. Remove from pan after 5 minutes and place muffins on wire rack to cool completely.
When the muffins are cool (or as long as you can wait), melt the white chocolate like you did the semi-sweet chocolate. Note that white chocolate melts at a lower temperature. Once melted, have fun drizzling it over the muffins.
Garlic Cream Cheese Sandwich Bread in Bacon
Here’s a peak of breakfast at the Crustabakes household

There’s baked beans, scrambled egg, and…. what in the world is that?!

Those, my dear readers, are garlic cream cheese sandwich breads rolled in bacon?
Ok, that’s a pretty long name. Let me try to break it up.
I chopped some garlic and mixed it with cream cheese right?
Then, i spread this garlic cream cheese mixture onto a sandwich bread.
I halved the bread, took a piece of bacon and rolled it around the bread halves.
Then i popped them in the mini toaster to let the bacon cook.
And there you have it. I believe i just wrote a recipe.
Dorayaki
My curiosity for the Dorayaki started from years upon years of reading the Doraemon comics. Growing up, i had volumes of the comics strewn all over my house, be it in the living room, kitchen, dining room, etc.

To me, they provided mini reliefs from mundane everyday tasks. I could just conveniently pick them up while waiting for the commercial to be over on the TV. Or while waiting for my food to heat up in the microwave.

If you are familiar with the comics. you would know of Doraemon’s love affair with Dorayaki. Having a dorayaki in your hands is like a golden ticket. Because you can pretty much bribe Doraemon to cater to your whims and fancy with the dorayaki.
 While in the Crustabakes household dorayakis dont have that kind of influential power, it does have the power to fill our bellies andkickstart our mornings with its sugar rush!
Taken from Just One Cookbook
(I halved the recipe)
- 2 eggs
- 70g sugar
- 1 Tbsp. honey
- 80g all-purpose flour
- 1/2 tsp. baking powder
- 1 Tbsp. water
- Some Sweetened Red bean Paste
Instructions:
- In a large bowl, combine eggs, sugar, and honey and whisk well until the mixture gets fluffy.
- Sift flour and baking powder into the bowl and mix. Keep in the fridge to rest for 15 minutes.
- Stir in ½ Tbsp of water at a time to get the right consistency. It should be a little bit thicker than pancake batter. If the batter is too thin, Dorayaki buns will be too flat and not fluffy.
- Heat a large non-stick frying pan on medium-low to medium heat. Dip the paper towel in oil and coat the bottom of the pan with the oil. The pan should be slightly oiled but shouldn’t be visible. That’s the secret to get nice texture on the surface of Dorayaki. With a ladle, drop the batter from 1 foot above the pan to create 3 inch diameter “pancake”. When you see the surface of batter starts to bubble, flip over and cook the other side. Transfer to a plate and cover up with damp towel to prevent from drying. Continue making pancakes.
- Make sandwich with red bean paste. Put more red bean paste in the center so the shape of Dorayaki will be curved (middle part should be higher). Quickly wrap them with saran wrap until you ready to serve.
Scalloped Potatoes, SPAM and Cheese
I am glad the lazy bug who’s been sprinkling lazy dust all over me took off. I’m not sure how long will his leave of absence be, but he was definitely away this morning as i got myself busy with scalloping potatoes, cubing SPAM and grating Cheese.
Yup, you must have guessed that’s the ingredients I am gonna use for today.

Potatoes, SPAM and Cheese. That sounds like the start of something hearty and filling.

Layers of scalloped potatoes are sprinkled with bits of SPAM & cheese, then drowned in a slightly peppered mixture. Ahh.. Yumms..
That’s carbs, with some protein and definitely some fats. A comfort meal fitting to feed the cold and the hungry. Not that i am ever cold in this oven hot-climate of Indonesia, but i am certainly hungry.

I’m not sure if you can cut this dish up and present it nicely. For me, i just used the largest spoon nearby and spooned it out into my mouth, which i learnt is not such a good idea when it’s pipping hot.
So, please take the time to find a stray dish to save your tongue ( I learnt this the hard way…)

And when you are done with your mini heap, you can always go back for more!
🙂
Scalloped Potatoes, SPAM and Cheese
Taken from The Pioneer Woman
- 3 pounds Russet Or Yukon Gold Potatoes, Washed Thoroughly
- 2 Tablespoons Butter
- 1 whole Yellow Onion, Diced
- 3 cups Diced Ham (*subbed with SPAM)
- 1-1/2 cup Half-and-half
- 1-1/2 cup Heavy Cream
- 1/4 cup Flour
- Black Pepper To Taste
- 1 cup Grated Cheddar Cheese
- 1 cup Grated Monterey Jack Cheese
- Chopped Parsley (optional)
Preparation Instructions
Preheat oven to 350 degrees. Butter a large casserole dish.
Heat butter in a large skillet. Add onions and cook for 1 to 2 minutes, or until they start to turn translucent. Add ham and cook for 3 to 4 minutes until thoroughly heated. Remove from heat and set aside.
Combine half-and-half and cream in a microwave-safe container and nuke for a minute or so, until no longer cold. Whisk in flour and black pepper until totally combined. Set aside. (You may add salt, but cheese and ham are salty, so add sparingly.)
Combine the two grated cheeses. Set aside.
Using a mandoline or slicer, slice potatoes into 1/8-inch slices (very thin.) Layer 1/3 of the potato slices in the buttered casserole dish. Sprinkle on 1/3 of the ham/onion mixture, then 1/3 of the cheese, then pour on 1/3 of the cream mixture.
Repeat this twice more, ending with a sprinkling of cheese and a pouring on of the rest of the cream mixture. Cover dish with foil and bake for 40 minutes. Remove the foil and bake for an additional 20 minutes at least, or until bubbly and hot.
Cut into squares and serve. Sprinkle on chopped parsley if you’d like!
(Note: To speed along the process a bit, you may boil sliced potatoes for 3 to 5 minutes before assembling the casserole. Just drain and slightly cool before assembling.)
Pao de Queijo (Brazilian Cheese Bread)
I haven’t been baking much recently. These couple of weeks, instead of over-zealously waking up at dawn to preheat my oven, i found myself relying more on more on my mini toaster.
I find myself buying less of fresh baking ingredients. No more filling up my cart with butter, flour and eggs. Instead, i just grab a pair of tongs at the bakery section of the supermarket and fill my tray with cinnamon rolls, buns, croissant and even cakes.
I guess i just got lazy… But it’s just so tempting to lie longer in bed… Not to mention how much more cost efficient it is to power up a mini toaster as opposed to heating up a full sized oven.
I was quite happy in my lull of baking inactivity. Then a batch of Brazillian Cheese breads from Evan’s blog caught my attention. They sparked me and re-ignited my dormant oven.

Don’t let appearance deceive you. Because plain looking as they are, these mini buns are cheesier than my uncle’s jokes (Don’t worry, he is not reading this).
Although they are called “bread”, i think they are more akin to choux pastry in terms of appearance. They puff up when baked, and form these little balls with webbed interiors.
They are also as chewy as can be. And by this, i don’t mean bread-like chewy. They are more like mochi-chewy.

I baked these up in a mini muffin pan. They came out looking like gorgeous balls of golden brown.

They are bite-sized and i find myself popping one after another in succession! They are as good as snacks as they are for breakfast! or maybe even appetizers!
Ps: I stored them in the refrigerator and popped them into my mini oven to eat two days later, and they are still as good as freshly baked! 🙂
Brazillian Cheese Bread
Recipe taken from Evan’s kitchen Ramblings
ingredients (makes 24-28 mini cheese buns) :
1/2 cup unsalted butter
1/4 cup water
1/4 cup milk
3/4 tsp table salt or 1 tsp kosher salt
2 cups tapioca flour or gluten-free tapioca starch
2 tsps minced garlic
heaping 2/3 cup grated Parmesan, Romano, or aged Asiago cheese
2 large eggs, lightly beaten
directions :
1. lightly grease a couple of baking sheets or mini muffin pans; or line baking sheets with parchment. put the butter, water, milk, and salt in a saucepan, and heat till the butter has melted and the mixture has come to a full boil. while the mixture is heating, put 2 cups of tapioca flour into a mixing bowl.
2. pour the boiling butter mixture over the tapioca flour, beating to combine. beat at high speed till the mixture becomes smooth and elastic-looking; this will happen very quickly.
3. beat the garlic and cheese into the dough till well combined.
4. stick your finger into the dough. if it’s uncomfortably hot, let it sit for a couple of minutes to cool a bit; you don’t want to cook the eggs when you beat them in. if it seems hot but not burning hot, continue with the next step.
5. with the mixer going, gradually dribble in the beaten eggs, beating till well combined and smooth.
6. drop the mixture in 2-tablespoon balls (about the size of a golf ball) onto the prepared baking sheets, spacing them about 1 1/2″ apart. A level tablespoon cookie scoop works well here. or pour mixture almost to the rim into the muffin tins.
7. bake the rolls for about 20 minutes in a preheated oven of 375F (190C) till they have a freckled appearance (from the browning cheese), and they’re beginning to color a bit. remove them from the oven, and serve hot.
Fluffy American Pancakes
As big as I am on making breakfasts, i have never (gasp!) made pancakes before.
Something about the controlling of a fire on a stove with the simultaneous flippping of runny batter distress me.

But let’s not under estimate the power of lust. I was lusting after a stack of warm pancakes with a pat of butter and a drizzle of caramel, and perhaps some caramelized apples.
And against general belief, lust can be a good thing. Because lust brought out courage. I confronted my fears and conquered.

And as of today, I am a damsel freed of pancake making distress.
And i didn’t need a man to rescue me from it!

Ps: I have been trying my hands at some DIY postcards and came out with this recipe card. It’s my first attempt, and i have come to realize that there are so many wonderful features and “magic tricks” in photoshop that i feel ashamed for under-using them the programme after all these years. I look forward to exploring more with it!
FLUFFY AMERICAN PANCAKES (Taken from junglefrog-cooking and BBC Good Food website)
Ingredients
135 gr plain flour
1 tsp baking powder
1/4 tsp salt
2 tbsp caster sugar
130ml milk
1 large egg, lightly beaten
2 tbsp of melted butter (allowed to cool slightly) or olive oil, plus extra for cooking
Sift the flour, baking powder, salt and caster sugar into a large bowl. In a separate bowl or jug, lightly whisk together the milk and egg, then whisk in the melted butter.
Pour the milk mixture into the flour mixture and, using a fork, beat until you have a smooth batter. Any lumps will soon disappear with a little mixing. Let the batter stand for a few minutes.
Heat a non-stick frying pan over a medium heat and add a knob of butter. When it’s melted, add a ladle of batter (or two if you frying pan is big enough to cook two pancakes at the same time) It will seem very thick but this is how it should be. Wait until the top of the pancake begins to bubble, then turn it over and cook until both sides are golden brown and the pancake has risen to about 1 cm thick.
Repeat until all the batter is used up. You can keep the pancakes warm in a low oven, but they taste best fresh out of the pan.
Serve with lashings of maple syrup and extra butter if you like. *
* I served mine with homemade caramel sauce and caramelized apples.
Tamago Nigiri

So these may not be the best looking tamago nigiri around. But they are my very first attempt at sushi making.
And i must say, i am in awe at how much attention and care the Japanese put to their food. I am not talking only about the arts of making sushi. This general devotion to handling and presenting food is also displayed in Japanese cakes, most of which scream both class and elegance.
Each of this sushi, or rather, nigiri (the specific term used for the rectangular shaped sushi), is molded using a nigiri mold.

The rice was pushed into the mold to take its signature Nigiri shape. The sweet egg omelette (tamagoyaki), is then topped onto the molded sushi and finally a belt of nori is used to secure the egg and the rice together.
These steps sound easy peasy when described, but in truth, i was tearing at my hair trying to assemble them together.
Just by the slightest touch, my fingers would take away some of the rice from the molded nigiris, mishapping them along the way.

I then remembered how an uncle used to go to the rice cooker when he had to seal envelopes, and didn’t have any glue on hands (No, i am not making this up). And the thing is, you cant really free yourself of sticky rice just by wiping your hands on a kitchen towel, there will definitely be some bits left, which leave your fingers semi sticky. You had to go with the soap and water route to get really clean hands. Which i did, and which i was glad i did, cause working with semi wet hands was the way to go! Rice don’t stick to wet hands! Win!

Here are the things i’ve used for this tamago nigiris. Nori sheet, soy sauce, mirin and Japanese rice.It’s a pretty short list.
So go on, get yourself wet and join the fun in sushi making!
Tamago Recipe
(Taken from Momofuku for 2)
* Pls do go to her website for step by step pictures on how to roll the omelette
3 eggs
1 tablespoon mirin
1 tablespoon sugar
1 teaspoon light soy sauce
Crack your eggs and lightly mix them. You don’t want to incorporate air into them so the best way is to use chopsticks: stir them gently without whipping, but make sure that the eggs and yolks are completely homogeneous. Add the mirin, sugar and soy and gently mix in.
Use a paper towel to evenly spread a bit of oil in your pan. Heat it on medium low heat, then add the eggs so they cover the bottom of the pan.
After 2-3 minutes, the egg will start to cook and solidify. The eggs don’t need to be entirely cooked, in fact, they should be a tiny bit moist on top so that the egg sticks to itself. Using chopsticks or a spatula, fold the egg over onto itself twice, like how you would fold a letter into thirds. Don’t flip the eggs, just push them to the end of the pan.
Use your oily paper towel to spread a tiny bit more oil in the pan and add a bit more of the eggs. Lift up the log of already cooked eggs so that the raw eggs are touching them. When the new layer of egg is almost cooked, fold the eggs over onto themselves again. Repeat until all the eggs are used. (You might want to keep stirring the egg mixture as most of the sugar in it didnt dissolve into the egg and would collect on the bottom)
Wrap in saran wrap and using a sushi mat, press the tamago into a rectangle shape. (I skipped this step, and as a result, my tamagoyaki werent perfectly rectangular)
Let cool completely, slice and enjoy!
Sushi Rice
Taken from Noobcook
*Click on the link for step by step Pictures
– 1 cup of Japanese short-grain rice
– water to cook the rice (usually in the ratio of 1 cup rice: 1 1/4 cups of water)
Vinegar Mixture A (if not using ready-made seasoned rice vinegar)
– 2 tbsp Japanese rice vinegar
– 1/2 tbsp caster sugar (adjust to taste)
– pinch of salt (adjust to taste)
Rinse the rice in several changes of water till the water runs clear. The first few changes of water will likely be quite cloudy (skip this step if you are using pre-washed rice). Drain the rice in a colander for roughly 30 minutes (I skipped this). Draining the rice is believed to improve the texture and appearance of the cooked rice, but I usually skip this step if I’m pressed for time.
Measure and add water for cooking the rice.
Cook the rice using a rice cooker or simmer over the stove top (I used the rice cooker. Rice was ready in less than half hour).
While waiting for the rice to cook, prepare vinegar mixture by mixing the ingredients in (A) in a small, non-aluminum saucepan over low heat until the sugar dissolves. You may also use a microwave oven and heat using low power for about a minute. The idea is to warm the vinegar just enough to dissolve the sugar, not to boil the mixture. I often use the short cut method of using seasoned rice vinegar (shown above) which has already been mixed with sugar & salt, and can be used straight from the bottle. .
Transfer the cooked rice (while it is still hot) to a hangiri or wide bowl. Pour prepared vinegar mixture over the rice. Stir the rice (gentle slicing action) using a rice paddle with one hand, while fanning the rice with a paper fan on the other hand. Do so until the rice has cooled to room temperature. Fanning the rice gets rid of excess moisture and gives the rice grains a glossy look.
Cover the bowl of rice with a damp slotted cloth (dim sum cloth is perfect for this role) to keep the rice fresh and moist. Use the rice as soon as possible, preferably within a few hours. If you refrigerate the rice, it will turn hard and dry.
Egg Tarts
So i made these egg tarts and served it for breakfast yesterday.

So when the question” Where are my favourite egg tarts?” came about on the breakfast table this morning, i knew i hit gold with this recipe.

If i had to guess, these egg tarts are more Chinese than anything else.
Made of a butter cookie like tart shell, this dessert are filled with baked custard

Soft, silky custard on top of a butter cookie.
It’s pretty amazing!
Each of these tart was baked in its individual little tartlet tin.

The crust got baked first before the custard mixture was poured in and the tarts went into the oven a second time.
Sure, it’s double the effort and double the baking time,

But it’s damn worth it!
Egg tarts
Taken from Yochana’s Cake Delight
Ingredients:
Pate Sucree:
125 gm. Butter – chilled
60 gm. icing sugar
1/2 egg white
1 egg yolk
200 gm. plain flour
1/2 tsp. vanilla essence
Egg Custard:
280 gm. fresh milk
160 gm. sugar
3 nos. eggs
1 tsp. rum
1/2 tsp. vanilla essence
Method:
(1) For pate sucree: beat butter and icing sugar till wellmixed.
(2) Add in white and yolk and mix.
(3) Add in vanilla essence and then the flour and mix into a dough. Rest for 10 mins. Press dough into small tart moulds.
(4) Bake the tart shell till half-cooked.
(5) For egg custard, heat sugar and milk together. Once sugar dissolves, off heat.
(6) Whisk eggs and pour into the milk mixture. Do not whisk till frothy.
(7) Add in rum and vanilla essece.
(8) Sift the egg custard and pour into tart moulds and bake at 175C till egg custard sets.
Note:
Half baked should be around 10 mins at 175C. I didn’t put the timing cos everybody’s oven is different. Judge yourself and see that it’s like puff up slightly and turned white.
After pouring in the custard, bake at a lower shelf to make sure that the pastry will be cooked at 175C. Bake for about 10 mins and watch over it. If you see the custard is about to puff up into a ball, take it out from the oven immediately. Once it puffs up, the egg tart will wrinkle when it’s cooled. What you can do is to shake the tray of egg tarts and if the custard wobbles, then it a sign that it’s not cook and if it doesn’t wobble, then it’s set and you can take it out from the oven.
Buttermilk Fried Chicken and Chicken Sausage and Potatoes Roast
I kept plucking at the crispy bits on these chicken

And with each bite, it was like fireworks in my mouth. Salty, spicy, herby, peppery. All at the same time. I kept picking at it, till my chicken was pretty much bald.
I looked at the other chicken pieces, and wondered if i should work on a second piece.

I practiced restraint and kept my fingers on my now bald chicken. I was glad i did. Because i was about to get on to the meat.
The meat.
The meat that had been soaked in buttermilk overnight.
The meat that was juicy and tender.
I am not an expert on the topic, but from what i read, soaking meat in buttermilk would help tenderize the meat while flavouring them at the same time.

While i can’t really vouch for the flavouring part, i can totally affirm on the tenderizing. But then again, my tastebuds was probably desensitized from all that flavour burst from the crunchy flour. Judging flavor on the chicken meat would be totally inaccurate
Nevertheless, since all your attention would be sucked to the frying station for these chicken, i thought this chicken sausage and potatoes roast would be the perfect accompaniment.

This dish is really easy to put together.
All you had to do is toss cubed potatoes, sausages, oil, rosemary, salt and pepper together and pop them into the oven, then tend back to your fried chicken.

Roasting this will cause the skin on the potatoes to dry while the insides remain moist. The same goes for the potatoes. Succulent on the insides, crisp on the outside.
Okay now, I shall leave you guys with these double chicken post. I hope you guys enjoyed it!
Pioneer Woman’s Buttermilk Fried Chicken
recipe from The Pioneer Woman Cookbook: Recipes from an Accidental Country Girl by Ree Drummond
Note:I took it from Steamy Kitchen
serves 6-8 hungry ranch hands (halve recipe if you you’re feedin’ normal city folk)
2 cut-up fryer chickens
1 quart plus 1/4 cup buttermilk
5 cups all-purpose flour
3 tablespoons seasoned salt (like Lawry’s)
2 teaspoons black pepper
2 teaspoons dried thyme
2 teaspoons paprika
1 teaspoon cayenne pepper
1/4 cup milk
canola or vegetable oil for frying
1. In a large bowl (or 2 freezer bags) add the chicken with 1 quart buttermilk. Refrigerate overnight. When ready to fry, remove chicken from bowl and let sit on counter for 30 minutes to take chill off.
2. Preheat oven to 350F. Stir together the flour, seasoned salt, pepper, thyme, paprika and cayenne in a very large bowl. In a small bowl combine the 1/4 cup buttermilk and the milk. Pour the milk mixture into the flour and use a fork to mix until little lumps throughout.
3. Heat 1 1/2 inches of oil in a deep skillet or dutch oven over medium high heat to 365F. Working in batches, thoroughly coat each buttermilk-soaked chicken piece with the breading, pressing to adhere the breading. Add the chicken to the oil 3-4 pieces at a time. Cover pan and fry 5-7 minutes, checking to make sure chicken isn’t getting too brown. Turn, cover and cook additional 3-5 minutes more. Monitor temperature of oil to make sure chicken doesn’t burn. Keep in mind chicken will finish cooking in oven.
4. Place chicken on baking sheet and continue frying rest of chicken. When done, bake the chicken for 10-15 minutes, until chicken cooked through.
Roasted Chicken Sausage and Potatoes
Taken from Martha Stewart
Ingredients
- 1 1/2 pounds smoked chicken sausage
- 1 1/2 pounds small white potatoes, halved
- 1 tablespoon fresh rosemary leaves
- 2 tablespoons olive oil
- Coarse salt and ground pepper
Directions
- Preheat oven to 450 degrees. Pierce sausage all over with a fork; place on a rimmed baking sheet with potatoes and rosemary. Drizzle all with oil; season generously with salt and pepper. Toss to coat, and spread in an even layer.
- Roast, tossing occasionally, until sausage is browned and potatoes are tender, 30 to 35 minutes. If desired, halve sausages crosswise before serving.
Oyako Don
I can’t think of anything more comforting for breakfast than a bowl of hot rice with with slurry half cooked eggs and chicken pieces.
Known as Oyako don, this Japanese dish literally translates to “parent and child” don. Though i knew the translation behind the Japanese name. It took google and wikipedia to point it out to me why it might be named such.
The reason is pretty obvious actually. Chicken and egg = parent and child. Chicken being the parent, egg being the child.Geez, that was pretty obvious!

I really loved slurping the softly cooked eggs, and the chicken gave some bulk to the Japanese rice dish.
But of course, the highlight of this dish is the sweet yet savoury sauce in this dish. This is the sauce in which the chicken, eggs, and some onions are stewed in.
It is also the sauce that the rice soaks up as the stew got ladled over it. And if you can’t really picture it, think of gravy and mashed potatoes.
Oyako Don
Taken from Momofokufor2
Chicken Katsu-Oyakodon Recipe
Yield: 2 servings
2 cups of cooked white rice
4 chicken drumsticks, de-boned and cut into bite-sized chunks (see below)
2 tablespoons flour*
salt and pepper*
1 egg, lightly beaten*
1 cup panko*
oil for pan-frying*
1/2 cup dashi
2 tablespoons soy sauce
1 1/2 tablespoon mirin
1/2 onion, thinly sliced
1 teaspoon oil
3 eggs, lightly beaten
sliced green onions for garnish
1. Set up a breading station and break the chunks of chicken by dipping in flour, shaking off excess, dipping in egg, and then in panko. Continue until all chicken is breaded.
2. Heat up oil to 375˚F in a frying pan. Shallow fry chicken in batches until golden brown and cooked. To check, cut a piece of chicken in half. Drain on paper towels and set aside while you cook your onions and eggs.
3. Heat a teaspoon of oil in a sauce pan on medium-high heat. Add the onions and pan-fry until cooked and soft, but not brown. Add the dashi, soy sauce, and mirin and turn the heat to high. When the mirin mixture comes to a boil, add the eggs and turn the heat off and cover the pan so the eggs cook in the residual heat for about 3-4 minutes.
4. Fill rice bowls and place chicken katsu on top. Scoop soft omelette and dashi broth onto the chicken and rice. Garnish with green onions. Enjoy!
*Note: I didnt katsu my chicken. Instead i just slid after pan frying the onions and simmer it in the sauces.
Chicken Breast with Mushroom Sauce
This breakfast came together because i happened to have all the ingredients in my fridge.
1. Mushrooms – check
2. Chicken Breast – check
3. Cream – check

Put everything together and we had this chicken breast with creamy mushroom sauce. And of course, the peas and carrots.

And for carbs, i dipped a baguette in an egg and milk mixture, just like how you would to a french toast.But instead of sugar, i gave it a savoury twist by adding salt into the dip.
But i guess i could have done better with that toast. Since we had leftover creamy mushroom sauce anyways. It seemed obvious.

to have mushroom crostinis!
Chicken with Creamy Mushroom Sauce
Taken from My Recipes
Ingredients
- 4 (6-ounce) skinless, boneless chicken breast halves $
- 2 teaspoons canola oil $
- 1/2 teaspoon salt, divided $
- 1/4 teaspoon freshly ground black pepper $
- 1/4 cup chopped shallots
- 1 (8-ounce) package presliced mushrooms
- 2 minced garlic cloves $
- 1/2 cup dry white wine $
- 1 1/2 teaspoons all-purpose flour $
- 3/4 cup fat-free, lower-sodium chicken broth $
- 2 tablespoons butter $
- 1 teaspoon minced fresh thyme
Preparation
- 1. Place each chicken breast half between 2 sheets of heavy-duty plastic wrap, and pound to 1/2-inch thickness using a meat mallet or small heavy skillet.
- 2. Heat a large nonstick skillet over medium-high heat. Add canola oil to pan; swirl to coat. Sprinkle chicken with 1/4 teaspoon salt and pepper. Add chicken to pan; cook 3 minutes on each side or until done. Transfer chicken to a serving platter; keep warm.
- 3. Add shallots and mushrooms to pan; sauté for 4 minutes or until browned, stirring occasionally. Add garlic; sauté for 1 minute, stirring constantly. Stir in wine, scraping pan to loosen browned bits; bring to a boil. Cook until liquid almost evaporates. Sprinkle mushroom mixture with remaining 1/4 teaspoon salt and flour; cook 30 seconds, stirring frequently. Add broth to pan; bring to a boil. Cook 2 minutes or until slightly thick. Remove pan from heat; add butter and thyme, stirring until butter melts. Serve with chicken.
Chicken Cordon Bleu
When i brought this dish out onto the dining table, i got a big “WOW” as a remark.
Clearly, this was a dish to impress. An elaborate dish which should only be attempted by a professional chef with the nimblest hands.
But, what do you know, looks can be deceiving.

Because i (gasp! yes me!), was able to pull it off pretty effortlessly!

My attempt at this Chicken Cordon Bleu started off with chicken breast meat that has been pre-sliced to 1/4 inch thick. You would want the meat to be somewhat thin to be able to roll the filling inside it.
I seasoned the meat with salt and ground black pepper, and laid a piece of cheese and ham over it.

I then rolled the breast meat to enclose the filling, and used some toothpicks to secure them in place.After which I dipped the rolls in a mixture of egg and milk, and dredged it in some panko flour.
I slid the rolls into hot oil and watched it sizzle. When the panko flour got that gorgeous golden tan, i flipped it and waited for the second side to get the same colour.
Once they are all golden and pretty, i tossed them into a preheated oven. Just to be safe as we don’t really fancy raw chicken.
While the chicken was baking, i also made these maple glazed carrots

Cooked with brown sugar and maple syrup, these carrots are really really sweet and caramel-ey. Adding a pinch of salt to this brought out the flavour even more. This makes eating vegetable that much easier.

Especially if they are served alongside regal looking rolls!
Chicken Cordon Bleu
Adapted from Nibbledish
- 1-11 ounce or 2-4 oz. log Fresh Goat Cheese, such as Chavrieshopping list (I used sliced cheddar cheese)
- 4 – 6 oz. Boneless, skinless chicken breast halves
- 4 ea. Slices Serrano Ham
- 1 Tbsp. Chopped fresh parsley (I omitted this)
- 1 Cup All Purpose Flour
- 3 ea. Eggs
- 2 Tbsp. Milk
- 2 Cup Panko or Bread crumbs
- 2 Cup Vegetable oil
- Salt and pepper
- Preheat the oven to 350 degrees F.
- Place chicken breast flat on a cutting board, using a sharp knife, about 1/3 of the way down the thick side, cut a deep pocket horizontally into the center of the meat about 3/4 of the way down (I used pre-sliced thin breast meat), being careful not to cut through to the other side. Repeat with the remaining breasts. Wash hands well.
- Season each pocket with salt and pepper
- Place a slice of ham in each pocket
- Cut the Fresh Goat Cheese Log in quarters. Wrap each cheese slice with ham. Place each wrapped quarter into each pocket that was made in the chicken breasts.
- Wrap each stuffed chicken breast and place in refrigerator to chill for 30 minutes. (I place ham and cheese on the meat and rolled it up to enclose the filling)
- Set up a standard breading procedure using 3 shallow containers. Put flour in the first one, eggs and milk in the second, and Panko or bread crumbs in the third one.
- Beat the eggs and water together.
- Dredge each of the stuffed Chicken Breasts first in flour, then egg wash and then in the Panko or bread crumbs.
- In a large, oven-proof skillet, heat the oil over medium-high heat. Add the chicken and sear until golden brown, 2 to 3 minutes on each side.
- Place the pan in the oven and bake in the oven until the chicken is cooked through, 7 to 10 minutes.
- Split each chicken breast in half and serve
Maple Glazed Carrots
Taken from epicurious.com
- 4 1/2 cups water
- 4 pounds carrots, peeled, cut on sharp diagonal into 1/4-inch-thick ovals (about 11 cups)
- 10 tablespoons (1 1/4 sticks) unsalted butter
- 3 tablespoons sugar
- 1 1/2 teaspoons coarse salt
- 6 tablespoons pure maple syrup
- 3 tablespoons (packed) dark brown sugar
- 2 tablespoons chopped fresh Italian parsley
Combine 4 1/2 cups water, carrots, 4 tablespoons butter, sugar, and coarse salt in heavy large pot. Bring to boil. Reduce heat; cover and simmer until carrots are just tender when pierced with knife, about 10 minutes. Drain. (Can be prepared 3 hours ahead. Let stand at room temperature.)
Melt remaining 6 tablespoons butter in large nonstick skillet over medium-high heat. Add maple syrup and brown sugar and stir until sugar dissolves. Add carrots and cook until heated through, about 5 minutes. Season with salt and pepper.
Transfer carrots to large bowl. Sprinkle with parsley and serve.
Country Fried Steaks and Homemade Fries
Instead of baking today’s breakfast menu, i fried.
I fried up country fried steaks and some homemade fries.

I used minute steaks for the erm.. steaks (duh). Minute steaks, or also known cube steaks is a pre-tenderized cut of beef. Its surface is pockmarked from all that pounding with a mallet. This cut of beef is thin and cooks quickly, which makes it perfect for this occasion.
Then we had the homemade fries, and the over-used carrots and broccoli (i so need to find alternatives for my choice of veggies).
The potatoes were first cut into shoestrings, then soaked with ice water for about an hour. They were then fried once till pale and blond, let to rest on paper towels, and re-fried again just when they were about to get served.

Together, they made a really really satisfying and filling breakfast set. They HAD to be good, for the sake of all that mess and oil splatters in my kitchen. *wipes sweat from brow*
Country fried steaks and milk gravy
Recipe taken from Allrecipes.com
Ingredients (yields 4 servings)
- 4 (4 ounce) cube steaks
- 1/2 teaspoon salt, divided
- 1 3/4 teaspoons ground black pepper, divided
- 1 cup all-purpose flour
- 2 eggs, lightly beaten
- 1/4 cup lard
- 1 cup milk
Directions
- Season meat with 1/4 teaspoon of the salt and 1/4 teaspoon of the pepper; set aside. In a shallow dish, mix flour with 1 teaspoon of the pepper. Dredge each steak in flour. Dip in beaten egg, then dredge in flour again.
- Heat lard in a large, heavy skillet over medium-high heat. Fry steaks 3 to 4 minutes on each side, or until golden brown. Drain on paper towels.
- Pour off all but 2 tablespoons of the fat. Sprinkle 2 tablespoons of the dredging flour into oil. Cook over medium heat for 1 minute, scraping up any browned bits from the bottom of skillet. Gradually whisk in milk. Cook, stirring frequently, 3 to 4 minutes, or until thickened and bubbly. Add 1/4 teaspoon salt, and 1/4 to 1/2 teaspoons pepper; gravy should be quite peppery.
Bread Pudding with Brown Sugar Crumble
I had half a baguette that’s way past it’s prime.
It was sitting on my kitchen counter for the first couple of days, after which it was shifted into the refrigerator for fear of mold attack.
It became a refrigerator resident for another two days, in which it started to lose moisture and started to turn crisp.
I decided to make a bread pudding out of it. For what better way than to salvage a piece of old, dry bread than to drench it with milk, sugar and cream ?

The only problem i had was, i only had half of a baguette. Cutting it into 1″ thick, i didn’t have enough to cover the 9×13 inch pan that most bread pudding recipes are customed for. Geez, i didnt even have enough bread to cover an 8×8.
So i took out my smallest pan, a 9 x 5 and did some major mathematical computation to scale back on the recipe.

The original recipe also called for a praline topping of pecans.
I didn’t have any pecans on hands. But i knew i needed some sort of sweet topping for this since the sugar in the bread mixture was so scant.
So i flipped Martha Stewart’s Pies and Tarts book and proceeded with her crumble topping. I didn’t scale back on this recipe even though the recipe was for a much larger pan. I happen to like crumbles.

So with that, there we have it,
half a baguette revived, and a breakfast served.

I wish all of you a happy breakfast too!
Adapted from Paula Deen
Half a baguette (mine weighed to about 4 ounces)
2 eggs + 1 yolk
75 ml Half and Half
75 ml milk
10 gr sugar
1 tsp vanilla extract
1/8 teaspoon ground cinnamon
Dash salt
Taken from Martha Stewart
- 6 tablespoons unsalted butter, melted, plus room-temperature butter for pan
- 1 cup all-purpose flour, (spooned and leveled), plus more for pan
- 1/2 cup packed light-brown sugar
- 1/4 teaspoon salt
Directions
Slice baguette into 1-inch each. Arrange slices in a generously buttered 9 by 5-inch flat baking pan in 2 rows, overlapping the slices. In a large bowl, combine the eggs, half-and-half, milk, sugar, vanilla, cinnamon, and salt. Beat with a whisk until blended but not too bubbly. Pour mixture over the bread slices, making sure all are covered evenly with the milk-egg mixture. Cover with foil and refrigerate overnight.
The next day, preheat oven to 350 degrees F.
Make crumbles: Whisk together butter, brown sugar, and salt. Add flour and mix with a fork until large crumbs form. Refrigerate until ready to use.
Spread crumble Topping evenly over the bread and bake for 40 minutes, until puffed and lightly golden.
Muah Chee
I came across this Southern China snack as a 3rd grader.
The bell for school dismissal rang on that one fine day. And just outside the school, an old lady stood.
She had a large pan sitting on the passenger seat of her bicycle. In the pan, was this white shapeless glob covered in crushed peanuts. And she was jabbing at that glob with a pair of scissors.
It looked somewhat like this:

Except her glob was much larger.
Selling at a dollar a serve, the other kids were crowded around her. And being a greedy, curious kid who happened to have a dollar in her pocket, i went for it, not really knowing what to expect.

Like many years ago, i used a toothpick to pick up at a bite sized glob, purposefully dredging it around the crushed peanut mixture to make sure it was generously coated.
I popped it into my mouth, and worked at a deliciously chewy glob with a crunchy, sweet peanut crumbs.

Better known as Muah Chee, this steamed, sticky dough is made from glutinous flour. If i am not wrong, it is the flour from which you make mochi from.
As mentioned, the sticky dough is then coated with a mixture of crushed peanuts and sugar.

And served with a couple of toothpicks.
The old lady of many years came back the next day. But stopped coming the day after. I bought 2 packs of muah chee 2 days in a row on the only 2 days she was selling. I bet i would have bought a third pack had she been there on the third day.
That must have said quite a bit on how much i liked this snack.
Muah Chee-Glutinous Rice Snacks With Peanuts
Taken from The Malaysian Cuisine
Ingredients
200 g Glutinous Rice Flour
300 ml Water
1 Tbsp Vegetable or Peanut Oil
A pinch of Salt
100 g Roasted Peanuts, coarsely ground
25 g Sugar
Method
Combine glutinous rice flour, water, salt, and mix until well combined. Steam the mixture on high heat for 15 minutes.
Meanwhile, combine the ground peanuts and sugar.
Remove the glutinous rice mixture from the steamer and let cool briefly, about 5 minutes. Knead the dough until smooth and elastic for about 5 minutes.
Pinch or cut the dough and toss into the peanut mixture. Serve immediately.
Serves 6 to 8
PS: i am also submitting this to Aspiring Bakers 12, with the theme Traditional kueh
you can check all about it HERE
Of course, not to mention my thanks to Small Small Baker for hosting the event!
Breaded Pork Cutlets
So i picked up half a pound of pork loins the other day.
I cut it into half and made some pork chops with it.
I still had half a chunk of meat left. Instead of chucking it to the freezer, i decided to use it up and make these breaded pork cutlets.

Rather than working over the stove, i decided to fall back upon the oven.
Watching the video on Martha Stewart, i think i did exactly as what she did.
I “butterflied” my pork, and pounded it maniacally.
Martha also has a tip on how to make the crumbs gold so beautifully. The crumbs used here is Japanese Panko crumbs. They are really really crunchy when fried (or baked in this case). Anyhoo, the crumbs are tossed with oil and pre-baked till golden brown before they get on the pork. And thats how she got them to get to brown so evenly.
Pork aside, we also had garlic bread.

A store bought hot dog bun sliced into sections and spread with garlic butter.
I wrapped the bun in foil and baked it for a bit in the oven to get the butter melting and the bread warmed.

A sunny side up and some vegetables,
A lil milk and some cut fruits,

Let’s eat!
Taken from Martha Stewart
Ingredients
- 1 1/2 cups panko (Japanese breadcrumbs)
- 2 tablespoons vegetable oil, such as safflower
- 4 boneless pork loin chops (6 to 8 ounces each)
- 3 tablespoons Dijon mustard
- Coarse salt and freshly ground pepper
Directions
- Preheat oven to 425 degrees. On a rimmed baking sheet, toss panko with oil. Bake, tossing once, until golden brown, 7 to 10 minutes. Transfer to a medium bowl. Reduce oven temperature to 400 degrees.
- Meanwhile, one at a time, place chops between two large pieces of plastic wrap. Using a meat mallet or the bottom of a small heavy pan, pound to make 1/4-inch-thick cutlets.
- Dividing evenly, coat pork with mustard; season with salt and pepper. One at a time, dip cutlets into panko, pressing firmly to adhere.
- Place a rack on a rimmed baking sheet; place pork on rack, and bake, without turning, until opaque throughout, 10 to 15 minutes.
Pork Chops, Potatoes and a whole buncha stuff
I wonder what stirred the daredevil in me to pick up half a pound of pork loins on my last trip to the supermarket.
I am not usually a cook, I bake more than i should.
The things that come out of my kitchen usually revolve around cakes, cookies, pies and tarts. And i must say, pork loins are totally out of my jurisdiction.

But there is always a first time to everything,
And this is my first, working with pork loin, and ON the stove, instead of the oven.
Working with extra care,
I tossed the pork loins in flour, browned them in a skillet and then simmered them with potatotes in chicken broth.
And you know what? It wasn’t as daunting as i thought it would.
Growing confidence as i went along, i even improvised and threw in a few carrots and broccolis as with the potatoes.

I love how they added such a bright contrast to the otherwise drab colours of yellow and brown.
And of course, nothing brings out the brightness of the sun better than eggs.

This is not the usual sunny side up. This is a coddled egg with runny, half cooked yolks.
Behind the egg is a slice of watermelon and some leftover black glutinous chiffon cake.

And there you have it, a full set of breakfast.
Have a good morning ahead!
Skillet Pork Chops with Potatoes and Onions
Taken from Allrecipes.com
Ingredients
- 2 tablespoons vegetable oil
- 4 pork chops (1/2 inch thick), trimmed
- 2 tablespoons all-purpose flour
- 1/3 cup grated Parmesan cheese
- 1/2 teaspoon salt
- 1/4 teaspoon pepper
- 4 Yukon Gold potatoes, thinly sliced
- 2 medium onions, sliced * i omitted this as i didnt have any on hands
- 3 cubes beef bouillon * i used chicken bouillon
- 3/4 cup hot water
- 1 tablespoon lemon juice
Directions
- Heat oil in a large skillet over medium heat. Coat the pork chops with flour, and place in the skillet. Brown about 4 minutes on each side.
- In a small bowl, mix the Parmesan cheese, salt, and pepper. Sprinkle 1/2 the Parmesan cheese mixture over the pork chops. Layer chops with the potatoes. Sprinkle with remaining Parmesan cheese mixture. Top with onion slices.
- In a small bowl, dissolve the beef bouillon cubes in hot water. Stir in the lemon juice. Pour over the layered pork chops.
- Cover skillet, and reduce heat. Simmer 40 minutes, until vegetables are tender and pork chops have reached an internal temperature of 160 degrees F (70 degrees C).
Black and White Glutinous Rice Flour
Truth be told, i had no intention to make this chiffon cake at all.

It all started when i was too lazy to head to the grocery store to buy some WHITE glutinous rice flour. And i happened to know that a friend was going to do her groceries anyway. I decided to take advantage of the situation, and asked her if she could pick it up for me.
Being a doll that she is, she came back with my glutinous rice flour.
But the black one, instead of the white.
I suppose, i could have gone to the grocery store and asked for an exchange.
But like what i said, i was too lazy to go to the grocery store.

So i made this black glutinous rice flour chiffon cake instead.
This chiffon cake is really popular in the Asian countries. It is soft, airy with bits of aromatic grits from the black flour.
That saved me a trip for the exchange.
But i still needed my white glutinous rice flour.

Because i wanted to make this.
This chinese dessert is known as tang yuan. They are balls of white glutinous rice dumpling boiled in a sugar syrup infused with ginger.
You can fill these dumplings as you want. But the popular ones revolve around red bean paste, ground peanut and black sesame paste.
I decided with the black sesame paste for this.

Black sesame seeds <not the afore mentioned black glutinous rice flour>, were toasted and ground, mixed with sugar and butter to form this filling.
While encasing the filling with the dumpling dough, you might want to make sure that the surface is smooth and is crack free, or they will burst open while cooking.

Hmm, black specks of deliciously messy, ground sesame against white dough balls…
Black Glutinous Rice Flour Chiffon Cake
Taken from Ancoo Journal
4 Egg yolks
20g Sugar
1/4 tsp Salt
50g Coconut cream (Kara brand)
2 tbsp Corn oil
30g Plain flour
55g Black Glutinous rice flour
1/4 tsp DA Baking powder
4 Egg whites
1/4 tsp Cream of tartar
50g Sugar
Method:
Sift plain flour, black glutinous rice flour and DA baking powder together and set aside.
Whisk egg yolks, salt and sugar together until sugar dissolved.
Mix corn oil and coconut together till combined and add to the egg yolks mixture, mix well and add flour ingredients into it and stir batter until smooth.
Whisk egg whites and cream of tartar till frothy. Gradually add in the 50g sugar and whisk till peak form.
Lower speed and slowly pour the egg yolks mixture into it. Stop machine and use a rubber spatula to fold mixture until well combined.
Pour batter into two mini moulds.
Bake at preheated oven at 160C for 25 mins and 150C for another 15 minutes.
Then switch temperature to lower grill and bake chiffon cake for another 5 minutes.
Remove chiffon cake from oven, invert mould onto table.
Allow the cake to cool completely before removing the cake from the mould.
Taken from Rasa Malaysia
Ingredients:
8 oz. glutinous rice (sticky rice) flour
180 ml water (3/4 cup water)
1/4 cup black sesame seeds
1/4 cup sugar
1/2 stick unsalted butter (1/4 cup or 4 tablespoons)
Ginger Syrup (姜茶):
5 cups water (reduced to 4 cups after boiling)
1 cup sugar
4 oz. old ginger (skin peeled and then lightly pounded with the flat side of a cleaver)
1/2 teaspoon sweet osmanthus (optional)
2 screwpine leaves or pandan leaves (tie them into a knot, optional)
Method:
Lightly toast the black sesame seeds over medium fire until you smell the aroma of the black sesame seeds. Please take note that the sesame seeds will start popping when they are heated, so use your lid to cover. Don’t burn the black sesame seeds; transfer them out and let cool as soon as they smell aromatic.
Use a mini food processor to grind the black sesame seeds until they become fine. Transfer the ground black sesame into a wok, add sugar and butter and stir well to form a thick paste. If they are too dry, add more butter. Dish out and let cool in the fridge. (This will make the filling easier.)
In a big bowl, mix the glutinous rice flour with water until it forms a smooth paste and no longer sticks to your hands. Divide it equally into 16-20 balls (depends how you like the size, the bigger the size, the easier it is to do the filling). Flatten each ball in your palm, and then use a pair of chopsticks to pick up some black sesame paste and lay it in the middle of the flatten ball. Fold the edge to seal the dumpling. Lightly roll it into a ball shape using both palms, very gently and delicately. Set aside.
Prepare the ginger syrup by boiling the water. Add the ginger and screwpine/pandan leaves (optional) into the water and boil for 10-15 minutes with medium heat. Add sugar and sweet osmanthus and boil for another 5 minutes. Lower heat to simmer and reduce to about 4 cups of water. Add more sugar to taste if you like.
Heat up another pot of boiling water. Drop the dumplings into the hot boiling water. As soon as they float to the top, transfer them out and into the ginger syrup. Turn off heat and serve the black sesame dumplings in a bowl immediately.
Crab Rangoon, Cajun Fries and Nutella Bread
Today’s breakfast:

Creamy Crab Rangoon.

The filling is made of frozen crab meat, mayonnaise, cream cheese with a dash of hot sauce. This mixture is piled into ready made wonton wrappers and baked in the oven.
Then, we had Nutella Bread:

The bread was from a hot dog bun. I made 4 slices across each bun and just spread some Nutella over 2 of the slices. Then i topped it with the remaining slices and steamed them just a bit to soften up. 🙂
And lastly,
Oven baked Cajun Fries

Isliced a potato into wedges. Then i tossed some oil, and some cajun seasoning before i sent them to bake. These were not as crispy as when they are fried i guess, but at least we saved on the fats.

So that was breakfast for us. I hope u had a good breakfast too.
Ingredients
1 can (6 oz.) white crabmeat, drained and chopped
4 oz. (1/2 of 8-oz. pkg.) cream cheese, softened
2 tablespoons light mayonaise
½ teaspoon Sriracha
2 teaspoons finely slice chives, plus more for garnish
fresh ground pepper to taste
12 won ton wrappers
Directions
1. Preheat oven to 350°F. Spray a mini muffin tin with nonstick cooking spray.
2. In a medium bowl, combine crab meat, cream cheese, mayonaise, Sriracha, chives, and pepper. Mix until well combined.
3. Place 1 won ton wrapper in each 12 mini muffin cups. The edges of the won ton wrappers will extend beyond the mini muffin tin cups and may need to be folded slightly. Fill the center of each won ton cup with crab mixture.
4. Bake 15 to 20 minutes or until edges of cups are golden brown and filling is heated through. Garnish with reserved chives.
adapted from Kraft
Chicken Bacon Sandwich, Homemade Fries, and Strawberry Sponge Cake
As the title says,
Chicken Bacon Sandwich,
Homemade Fries
And Strawberry Spongecake.
That sounded a lot for breakfast doesn’t it?
It seems like i might go overboard with my breakfast menus at times.
I think i might be just a lil bit obsessed.
Nevertheless, obsessed or not, lets get started shall we?

So we were eating out the other night, and ordered one half of a roasted chicken. And though the chicken was not dry, it was pretty bland and lacked flavour. So instead of trying to finish the chicken, we packed it in a doggie bag.
The doggie bag went into the fridge when we got home, and i scoured the internet for ways to somehow salvage the poor chicken.
Of course, it seems like Martha Stewart knows the answer to everything.
She came up with the idea of shredding the chicken and re sautee-ing it in bacon fats. Yes! what better ways to add flavour than add bacon fats!
So i first pan fried the bacon, and using the leftover grease from it, i dumped the shredded chicken in. And for good measure, a pinch of salt, and a dash of pepper. 🙂
As for the fries,

I made this fries from scratch. Like from the real potatotes.
Well, the truth behind these fries is that a new toy i just bought. A mandolin to be exact. The kind that allows you to shred, cut, slice, grate etc, etc..
I was reading the instruction manual and saw the settings for shoestring fries. And what do u know, i do happen to have potatoes in my kitchen! So there it is!
But of course, being a newbie in cooking, i did a lil bit of research before embarking on this french fries-ing.
It seems like the trick to getting your fries to crisp up is to first soak in in cold water to get rid of the starch on the surface, and fry it TWICE.
I found this instruction from the food network website. And i guess it did work, and the browning of the fries was quite even. On the other hand, this method is not totally foolproof as after sometime, the fries did get soggy like all fries would.
And for dessert, it was a sponge cake sandwiching leftover strawberry preserve and with a dollop of pastry cream on the top.

Just another shot for the record,

I am officially full.
Chicken Bacon Sandwich
Adapted from Martha Stewart.com
Ingredients
- 2 slices bacon
- 1/3 cup shredded rotisserie chicken
- coarse salt and ground pepper
- 1 tablespoon mayonnaise
- 1 garlic clove, minced
- 2 slices Batard *
*Note: I dipped the batard in a mixture of eggs and milk and pan fried (french toast style) it to soften
Directions
- In a small skillet, cook bacon over medium until crisp, 10 minutes. With tongs, transfer bacon to paper towels to drain. Add chicken to skillet and stir to coat with drippings. Season with salt and pepper. In a small bowl, mix together mayonnaise and garlic; season with salt and pepper. Spread mayonnaise on batard and layer with chicken, then the bacon. Top with the other slice of batard.
*Note: I didnt exactly bothered with the measuring of the temperature of the hot oil. I went by whatever instincts i had.
Taken from Foodnetwork.com
Ingredients
- 4 large russet or kinnebec potatoes, peeled and cut into 1/4 by 1/4-inch thick batons
- 2 quarts peanut oil
- Salt and pepper
Directions
Rinse cut potatoes in a large bowl with lots of cold running water until water becomes clear. Cover with water by 1-inch and cover with ice. Refrigerate at least 30 minutes and up to 2 days.
In a 5-quart pot or Dutch oven fitted with a candy or deep-frying thermometer, (or in an electric deep fryer), heat oil over medium-low heat until the thermometer registers 325 degrees F. Make sure that you have at least 3 inches of space between the top of the oil and the top of the pan, as fries will bubble up when they are added.
Drain ice water from cut fries and wrap potato pieces in a clean dishcloth or tea towel and thoroughly pat dry. Increase the heat to medium-high and add fries, a handful at a time, to the hot oil. Fry, stirring occasionally, until potatoes are soft and limp and begin to turn a blond color, about 6 to 8 minutes. Using a skimmer or a slotted spoon, carefully remove fries from the oil and set aside to drain on paper towels. Let rest for at least 10 minutes or up to 2 hours.
When ready to serve the French fries, reheat the oil to 350 degrees F. Transfer the blanched potatoes to the hot oil and fry again, stirring frequently, until golden brown and puffed, about 1 minute. Transfer to paper lined platter and sprinkle with salt and pepper, to taste. Serve immediately.
French Toast with Pastry Cream and Strawberry Preserve
My mother bought me a pack of strawberries a few days ago. And while they were organic, and look really pretty with their bright scarlet colour, they were really really sour.
Anyone who took a bite of the strawberry winced.
There was really no way i could have eaten them on their own. I needed sugar. LOTS of sugar.

So i made a preserve out of it.
And if you were wondering what those curious white balls were,
they are pastry cream scooped with an ice cream scoop.

And to top it all off, some french toast to complete the meal.
Breakfast is served!
Big Big Breakfast!
I look forward to making breakfasts.
It’s the only time i get to play in the kitchen and prepare a meal.
I can never prepare dinner. Because by the time i get off work and reached home, dinner would turn to supper.
Breakfasts are different.
No one dictates what time i wake up. I can get up really really early if i wanted to.
Then proceed to my wonderland of a kitchen.
Today, the wonderland seen some chocolate.

And if these brownies already look perfect with their shiny, crackly top and deep, fudgy insides,
they are made even better, because they have hidden surprises.

See the whites in the brownies?
They are none other than oreo cookies, the nation’s favourite cookies!
Brownies for breakfast. That’s a load of fun isn’t it?
But of course, we can’t only have brownies for breakfast. Cause we are grown ups and we do not want tummy aches.
Here is a grown up breakfast,

A ham and cheese sandwich.
I took a store-bought bread, sliced it into half, spread cream cheese on either side, slapped on some ham and cheese.
I wrapped the whole sandwich in foil, then placed it in the oven to get the cheese melting. I like warm sandwiches more than cold ones.
And of course, no meal should come unaccompanied by your greens.

Or whites in this case.
Doesnt matter, cause i am pretty damn sure white cabbage is part of the green family.
I am also quite surprised at how easy to make coleslaws are!
I shredded half a cabbage, and a whole carrot. And instead of red onions, i decided on the milder scallions as i didnt think anyone would like morning onion breath.
As for the marinade, all it took was some mayo, some white vinegar, sugar, salt and pepper! Nothing fancy at all in this ingredient list.
I let my greens (or whites) sit in the marinade overnight in the fridge, just to get the max flavour out in the cabbage. =)
So yupp, that was breakfast.
And here’s the whole crew hanging out together like a happy family.

Oreo-Stuffed Brownies
Recipe taken from Sing for your Supper
1 cup (2 sticks) unsalted butter
2 1/4 cups sugar
4 large eggs
1 1/4 cups cocoa powder
1 teaspoon salt
1 teaspoon baking powder
1 teaspoon espresso powder, optional
1 tablespoon vanilla extract
1 1/2 cups flour
1 cup chocolate chips
1 package Oreos (Double Stuff is best!)
Preheat the oven to 350 degrees. Lightly grease a 9×13 pan.
In a medium-sized microwave-safe bowl, or in a saucepan set over low heat, melt the butter, then add the sugar and stir to combine. Return the mixture to the heat (or microwave) briefly, just until it’s hot, but not bubbling; it’ll become shiny looking as you stir it. Heating the mixture a second time will dissolve more of the sugar, which will yield a shiny top crust on your brownies.
While the sugar heats a second time, beat the eggs, cocoa, salt, baking powder, espresso powder, and vanilla until smooth. Add the hot butter/sugar mixture, stirring until smooth.
Add the flour and chips, again stirring until smooth.
Spoon half of the batter into the greased pan. Place the Oreos in even rows across the batter (as many as you can fit). Pour the remaining batter over the Oreos and gently spread to the edges of the pan. Bake for about 35-40 minutes, until a cake tester inserted into the center comes out clean. Cool the brownies for at least 10 minutes before serving.
Coleslaw
Half a head of cabbage
One Carrot
One Scallion blade
Coleslaw Marinade:
1 C mayonnaise (I used Best Foods Mayonnaise)
1/4 C White Distilled Vinegar
1/4 C Sugar
Salt and Pepper to taste
Shred the cabbage and carrot (I used a mandolin slicer). Chop the scallions. Mix them together.
Rinse and drain the vegetables.
In another bowl, whisk the mayonnaise, vinegar, and sugar.
Pour the mayonnaise mixture into the vegetables, season with salt and pepper, and let it sit overnight in the fridge.
Serve chilled.
Mini Caramel Walnut Rolls
I am so glad to be back!
I’ve been away on a trip to the US of A for the last three weeks.
And while i was totally having a blast and the time of my life, i couldnt help missing my oven laying cold and lonely back home.
So here’s me, doing what i love most.
Baking.

And today’s baking involved a little yeast,
A little flour,
A bit of kneading,
And a whole lot of brown sugar.

And you do want all that brown sugar.
Cause the brown sugar will caramelize, and create the beautiful glossy sheen on the surface of your rolls. Which is what these are.
These are cinammon rolls with caramel brown sugar glaze.

This is how they look like from the bottom.
Did you notice the chocolate chips i’ve sneaked into the filling? 🙂

I served these for breakfast along with a bacon, scrambled egg sandwich and some baked beans.

Now all i gotta do is figure out how to burn the calories in here for the day.
Mini Caramel Walnut Roll
- 1 package Pillsbury crescent rolls ( I made my own rolls using the recipe HERE)
- 1½ Tbs butter melted
- 1/2 tsp cinnamon
- 2 – 3 Tbs brown sugar
Caramel:
- ½ cup Butter
- ½ cup brown sugar
- 1 tsp vanilla extract
- ½ cup chopped walnuts
- Pinch of salt
For the Caramel:
Mix together the butter, sugar and vanilla. Spread about 1 TBS of the mixture into each muffin tin. Scatter walnuts over the mixture.
For the Rolls:
Preheat oven to 350. Place the dough (I made my own dough instead of the frozen ones) on a floured surface and roll it with a rolling pin to make a thin rectangle. Brush topside of rectangles with butter, and sprinkle with sugar and cinnamon. Tightly roll dough rectangle starting from one of the short ends Cut the rolls crosswise and place each on the prepared muffin tins.
*Note:
My rolls were a bit on the small side. Between that and the fact that they are baked individually in muffin cups, these rolls bake up faster than usual. As a result, they were just a tad hard with a crunchy exterior. I would probably reduce the baking time for these the next time i make these.
Also, while turning these rolls out from the muffin tins to the serving plate, some of the caramel stuck to the base of the pan instead of sliding down the sides of these rolls. Again, i think i might have overbaked these which results in the sugar overcooking and turning candy like instead of remaning liquid.
Egg Sandwich and Baked Sweet Potato Fries
So we had egg salad sandwiches for breakfast today.

It was creamy, and delicious.
And i learnt how to hard boil eggs.
The trick was to Place eggs in a pan full of cold water, taking note that all eggs are fully submerged,
then to heat the pan over medium high heat till the water comes to boil.
After the water came to a boil, switch off the heat, cover the pan with a lid, and walk away.
You would need 10 mins before the eggs get cooked in the hot water.
You can pretty much do whatever u want during this time..

I took this time to get started with making some sweet potato fries.
Baked, not fried, to offset the not-so-healthy mayo in that egg salad.

Seems like making crispy baked sweet potato fries had its own tips and tricks too.
I am not yet an expert. But for this version, the sliced baked potatoes were rinsed in cold water, patted dry and tossed in egg whites.
And if you think tossing sweet potatoes in egg whites are weird, you are not alone. I too thought the same way.
But somehow, the egg whites did manage to dry surfaces of the sweet potatoes. My sweet potatoes came out pretty crisp on the surface, but still retained its moistness within.
It was a good breakfast !
Mini Pizza Bites
I knew i had to make these the first time i saw it at Annie’s eats.

Mini Pizza Bites.
Mini buns of pizza dough, wrapping around cheese and pepperoni.

Totally handy to eat.
Because they dont drip and droop they way pizzas do,
and because they are bite sized.

They are also not crazily coated with pizza sauce. Which makes them light enough for breakfast.
Hmmm breakfast…
I am a morning person. Breakfast is totally my favourite meal of the day.

But if for some reason, sauce-less pizza bites for breakfast dont fly with you,
You can totally have pizza dipping sauce at the side (I just warmed ready made pizza sauce).
Either way, they were wonderful. And they are totally making it to my breakfast staple list.
Pizza Bites taken from Annie’s Eats
Eggs in Purgatory
This dish has such a fancy name to it.

It’s called “Eggs in Purgatory”.
Originating from Italy, the signature appearance of this dish is that of a poached egg swimming in a sea of hellish red hot sauce.
That pretty much explains the name doesnt it?
I am unsure of how it is done traditionally.
But i had tomato sauce based pasta with meatballs the night before. And i had leftovers.
Waste not, want not. Right?

My Eggs in Purgatory lies on a bed of leftover cooked pasta.

To which i spooned my leftover tomato sauce, and a poached egg.
You might want to be really really careful in transferring half cooked poached eggs. I hold my breath each time i have to do it
My tomato sauce looks a bit pale. I originally used canned whole tomatoes as a starting point for the sauce. But found the taste to be too sharp.
I added milk into it in an attempt to tone down on the acidity.
]The taste did soften a bit. So did the colour.
Nevertheless, pale coloured or not, It still made for breakfast.

Along with the company of the leftover meatballs and french toast.

A dinner turned breakfast. 🙂
Breakfast!
I have a new obsession.
It’s called making breakfast.

I dont mind waking up early, just to make breakfast.
I am not good at it though, cause most of the time, it involves cooking.

Take this cheese, ham and egg crepes for instance.
It involved cooking the crepes on the stove top first.
It took several tries, and a few youtube videos, before i somewhat got the hang of it.
Then, we arrange the crepes.
You would want the yolk to sit right smack in the centre.
That’s not easy, because eggs are slimy. They slid all over the place.

But thankfully, these made for breakfast.
In the quiet break of dawn, when the rest of the world is still asleep,
And when there is no one to annoy you.
Or break your focus as you try to flip crepe batter,
or attempt to hold runny egg yolks in place.
A baking addict who loves to give away all her baked products to willing (or unwilling) recipients to make room for more baking. i would love to hear from you! Email me at twilightzky@hotmail.com
Flickr Photos


Foodgawker

Paperblog

Yummy

