Archive
An Egg in my Cheesy Toast
While somedays I want to make something super quick and easy, I wanted to spend a little bit more time and effort today.
 A sunny side up egg in a toast topped with cheddar and mozarella.

A well seasoned cast iron skillet is crucial. The egg cooked nicely, and did not stick to the surface. I covered the skillet with a lid while cooking to help cook the top of the egg.

Happy Breakfast, everyone!
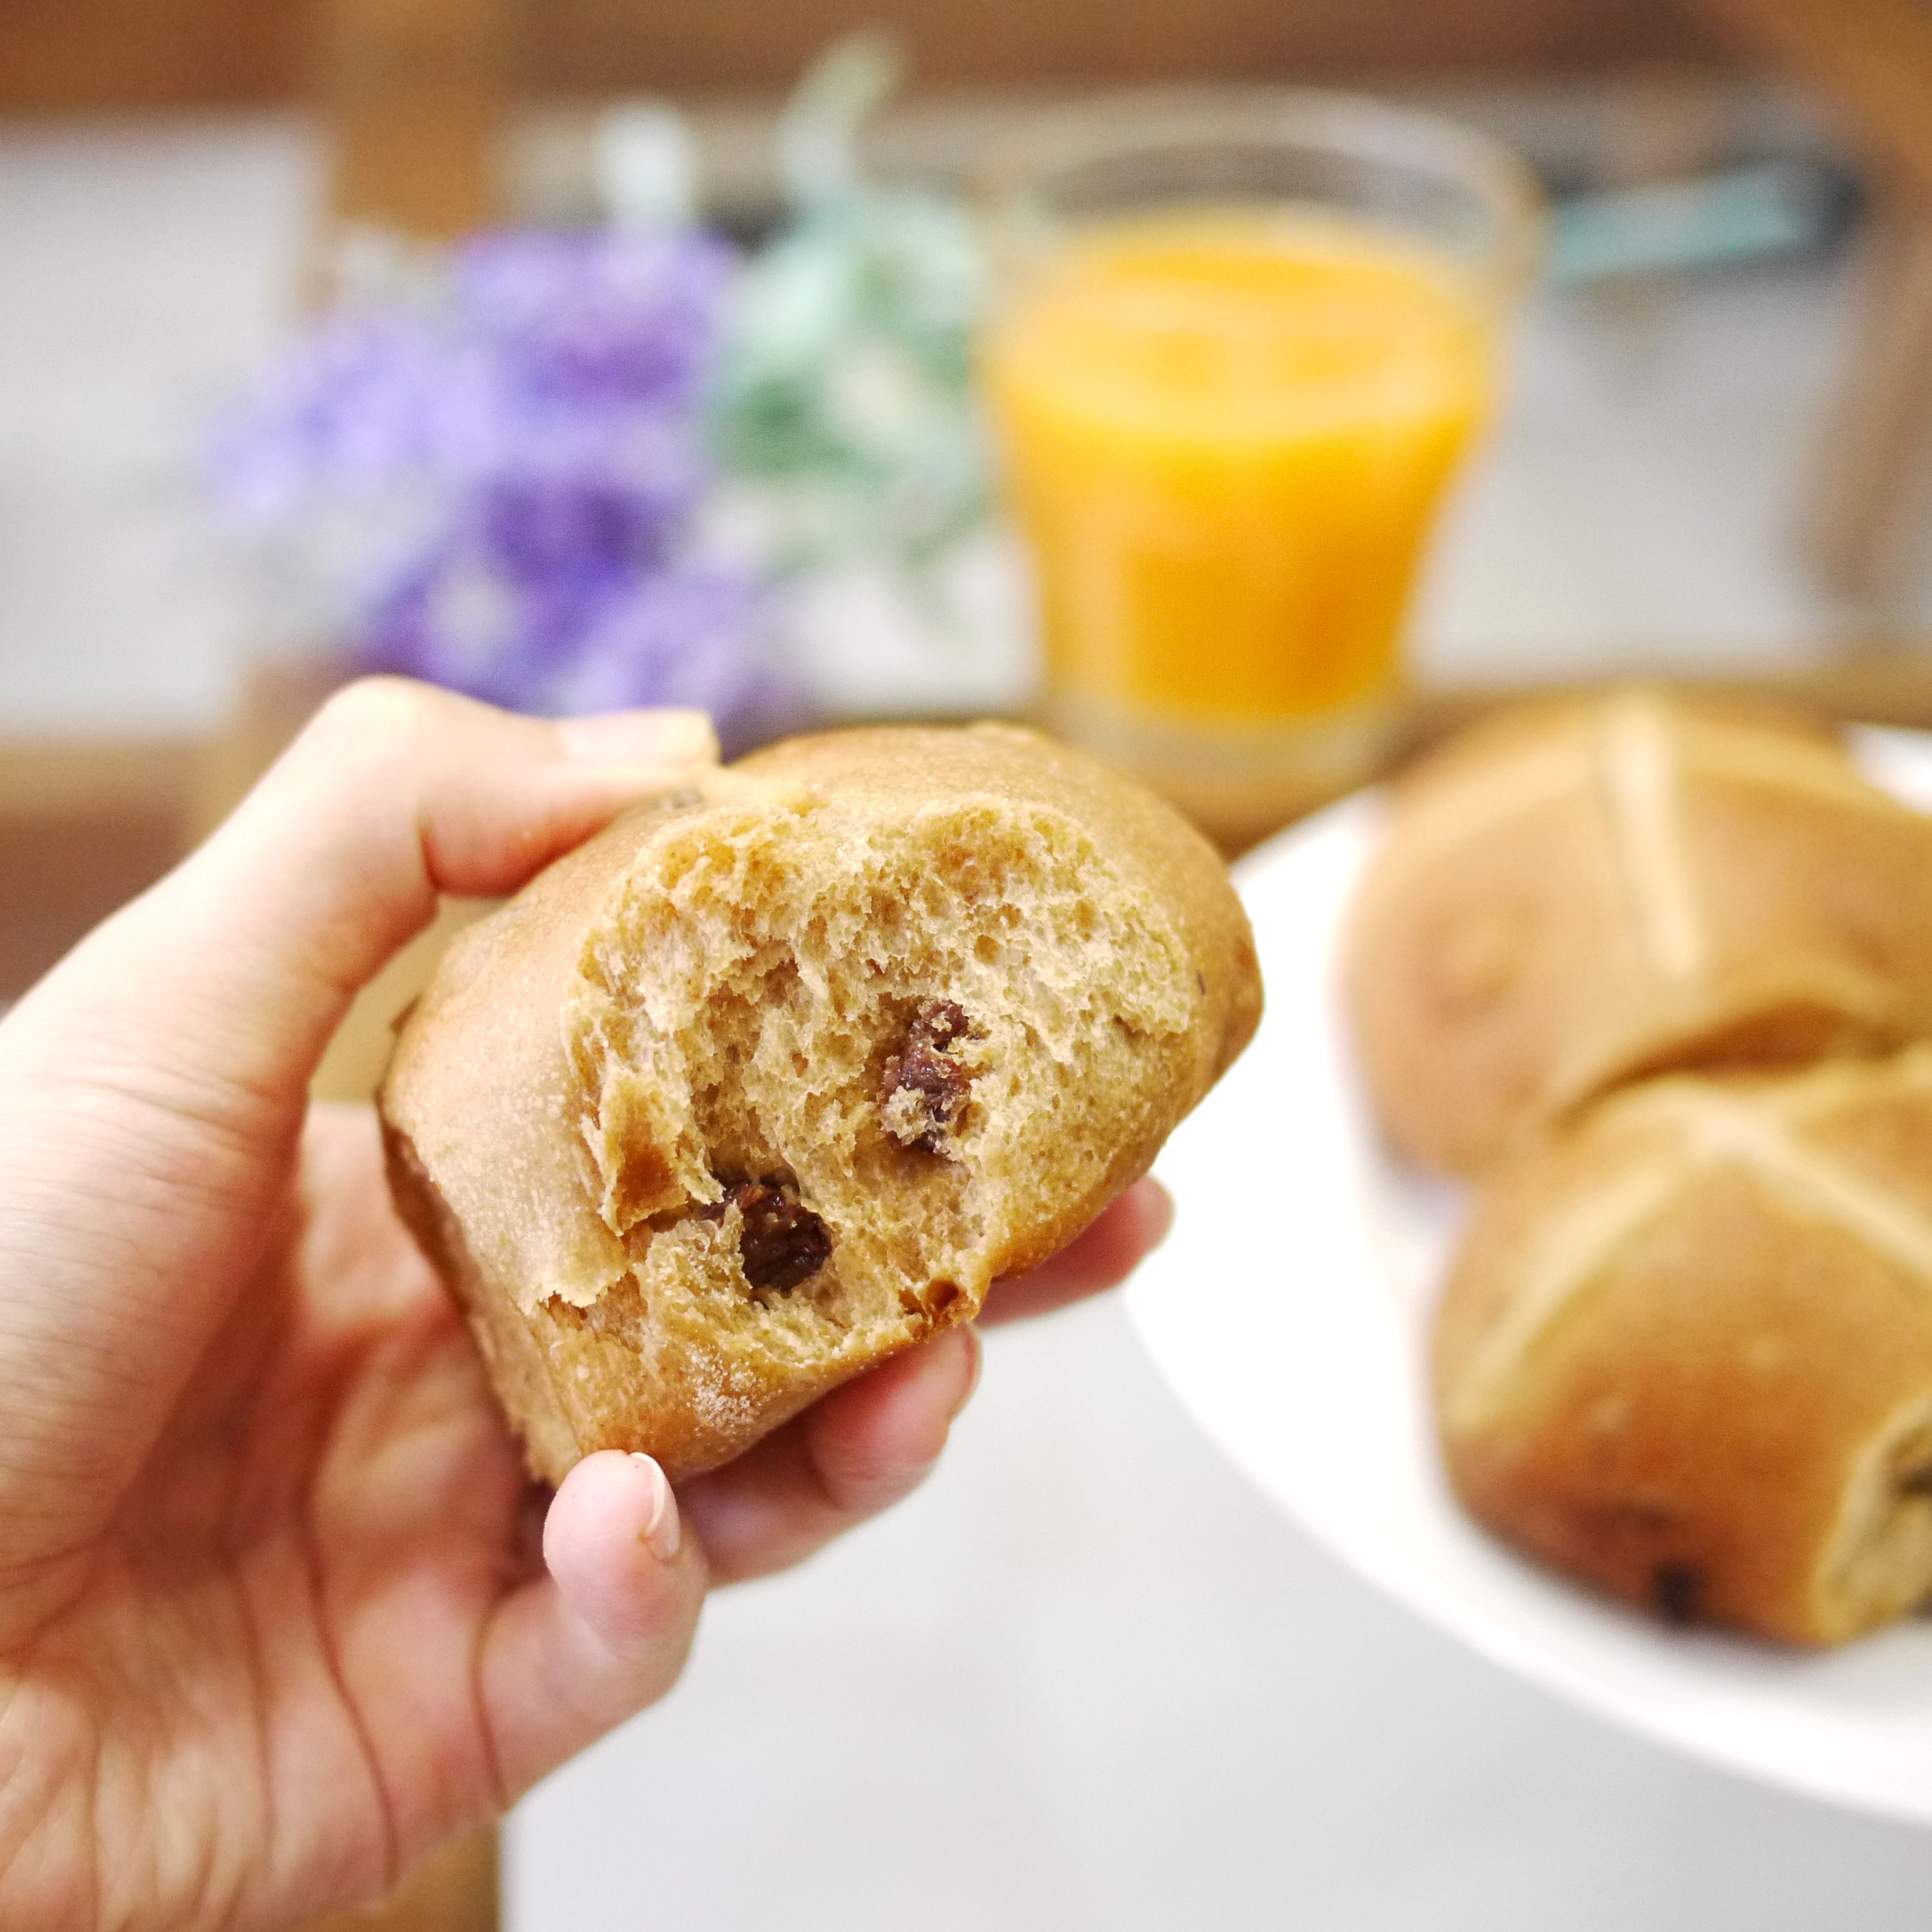
Sourdough Hot Cross Buns
So here I am, dusting my old blog and making an entry… There really isn’t any excuse for not posting apart from laziness. While i have been cooking and baking up a storm over the past couple of months, I haven’t been posting them up in here.
Nevertheless, it’s 10.38 pm on a Good Friday evening. I didn’t want to miss posting a “Hot Cross Buns” recipe. Because as we all know Hot Cross Buns are made to celebrate Good Friday. And i didn’t want to wait till Good Friday 2015 to post this up!

These buns were made using sourdough starter which i’ve been growing in my kitchen for the past couple of months (more on that on a later post). They were studded with raisins and are refined sugar free with the use of coconut sugar.
“Why the sudden health kick???”, u ask… Well, it’s because these buns were made with my toddler’s health in mind. And you know how paranoid mothers can get… Plus, they are all not that bad for you!

So here’s wishing everyone a Good Friday!
Sourdough Hot Cross Buns
250 gram bread flour
120 gram sourdough starter
50 gram coconut sugar
5 gram salt
1 egg yolk
35 grams butter
40ml milk
50 ml water
100 grams raisins
For the crosses, i just made a paste out of water and flour.
1. Mix the flour, sugar, salt and sourdough starter into a bowl. Make a well in the center, add in the egg yolk, water and milk. Pour the dough onto a kneading table, add the butter and start kneading away till the dough turns elastic and is able to be stretched to thin membrane without tearing. Add the raisins and knead till they are well distributed around the dough
2. Round the dough into a ball and leave it at room temperature, covered, till it doubles in size (about 2 hours, on a hot climate like mine).
3. Gently deflate the dough and cut the dough into balls each weighing 50 grams. Place them on your baking sheet and set aside till it doubles in size again. (about 2 hours)
4. Make a paste with flour and enough water. Pipe crosses across each bun
5. Preheat oven to 200 degree celcius. Bake for about 10-15 minutes till the bread turns a nice golden brown.
Indonesian FoodBlogger Challenge- Cassava & Yoghurt

A glance at this photo wouldn’t have you guessing of the crazy that went behind making it.
This donut combines two of the most unfitting ingredients ever thought of in a challenge.
Cassava and Yogurt.
The Indonesian Foodblogger has outdone itself by challenging its members to use these two ingredients in a dish.

And if you think things couldnt get any worse, I’ve further outdone myself by choosing another fermenting component on top of my fermenting milk product (read: yogurt).
Yup, you guessed it, this donut is made from fermenting cassava.

While i would love to go on and on about the benefits of food that has been fermented, this donut is not it.
Because all the goodness in eating live organisms went out the window when i drowned these donuts in a pool of hot oil.
But what about the yogurt, you ask?
Well, the yogurt was sugared, egged and cooked to make pastry cream!
Oh wells, YOLO !

So while this donut may not be the healthiest snack.I am glad I took up the challenge to combine two incomplementary product to make a mind blowing dessert.
Here’s to you, IDFB!
Donut tape Singkong (Recipe in Indonesian)
Taken from Sajian Sedap
Bahan:
300 gram tepung terigu protein tinggi
100 gram tepung terigu protein sedang
6 gram ragi instan
35 gram gula pasir
15 gram susu bubuk (Saya pake creamer)
1/2 sendok teh baking powder
200 gram tape singkong
1 butir telur
175 ml air es
40 gram margarin
1 sendok teh garam
minyak padat untuk menggoreng
Cara membuat:
- Campur tepung terigu, ragi instan, gula pasir, susu bubuk, dan baking powder. Aduk rata. Tambahkan tape singkong. Uleni rata.
- Masukkan telur dan air es sedikit-sedikit sambil diuleni sampai kalis. Masukkan margarin dan garam. Uleni sampai elastis. Diamkan 15 menit.
- Kempiskan adonan. Timbang masing-masing 35 gram. Bulatkan. Diamkan 10 menit.
- Pipihkan adonan. Bentuk bulat lagi. Letakkan di loyang yang ditabur tipis tepung terigu. Diamkan 45 menit sampai mengembang.
- Goreng dalam minyak padat yang sudah dipanaskan di atas api sedang sampai matang. Dinginkan.
Yogurt Pastry Cream
- 2 cups strawberry flavoured yogurt (Heavenly Blush)
- 1/4 cup sugar
- Pinch of salt
- 4 large egg yolks
- 1/4 cup cornstarch
- 2 tablespoons unsalted butter, cut into small pieces
- In a medium saucepan, combine milk, sugar,and salt. Cook over medium heat until mixture comes to a simmer.
- In a medium bowl, whisk together egg yolks, and cornstarch. Whisking constantly, slowly pour hot-yogurt mixture into the egg-yolk mixture. Pour mixture back into saucepan, and cook over medium-high heat, whisking constantly, until it thickens (about 2 minutes).
- Add the butter, and stir into the mixture. Let the mixture cool.
- Cover with plastic wrap, pressing it directly onto the surface of the pastry cream to prevent a skin from forming. Refrigerate until chilled. Pour into a pipping bag fitted with the longest pipping tip you can find at home.
To assemble:
Take a piece of the donut. Push the tip of the pastry cream filled pipping bag into the middle. Squeeze gently to fill the donut with the pastry cream
For the garnish, melt some hot chocolate over a double boiler. and dip the donut tops into it.
Nigella’s Caramel Croissant Pudding
What strikes me the most about Nigella Lawson is her beauty.
It’s almost a pity that she is hosting a cooking show instead of starring in a blockbuster movie. What a waste of pretty face, me thinks.
After watching numerous episodes of her show, I’ve come to conclude that Nigella’s style of cooking comes with a careless wanton. She is not very rigid on her measurements. It’s always a “drizzle of this” or a “handful of that”. That doesn’t sit well with me. My sense of estimation is tragically useless.
Thankfully, someone was able to convert her recipes into teaspoons, tablespoons and cups. Precise instructions are my bedrock. Without it, I am just a piece of wood drifting about cluelessly in the world of culinary.
So the recipe I’ve chosen for this month’s cook like a star , organised by Bake for Happy Kids, Joyce from Kitchen Flavours and Anuja from Simple Baking – is Nigella’s Caramel croissant pudding.


What made this pudding stand out is the use of croissant instead of the common stale bread. This made a very soft, melt-in-your-mouth pudding texture which you barely have to chew.
So, grab a spoon and dig in!

Recipe taken from Food Network.
Caramel Croissant Pudding
2 stale croissants
1/2 cup sugar
2 tablespoons water
1/2 cup heavy cream
2 tablespoons bourbon
1/2 cup whole milk
2 eggs, beaten
Directions
Preheat the oven to 350 degrees F.
Tear the croissants into pieces and put in a small gratin dish; I use a cast iron oval with a capacity of about 500ml/ 2 cups for this.
Put the sugar and water into a saucepan, and swirl around to help dissolve the sugar before putting the saucepan on the hob over medium to high heat. Caramelize the sugar and water mixture by letting it bubble away until it all turns a deep amber colour; this will take 3 to 5 minutes. Keep looking but don’t be too timid.
Take the pan off the heat and add the cream – ignoring all spluttering – followed by the bourbon and milk. Whisk to mix, then still whisking add the beaten eggs. Pour this quickly over the croissants and leave to steep for 10 minutes.
Place in the preheated oven for 20 minutes and prepare to swoon.
Fast food @ home
I am currently reading a book titled “the super natural home” by Beth Greer. In this book, Beth tells us about the toxins that we unwittingly expose to ourselves daily and what we can do to avoid or rather minimize them.
In a chapter of the book, she mentioned about her daughter coming home having eaten two pieces of McNuggets. She said, and i quote : “the dreaded food made from highly processed reconstituted chicken that is breaded and mixed with toxic additives and preservatives , then deep fried in fat-laden, partially hydrogenated oil.”
Also in the recent news was Jamie Oliver winning his case against McDonald’s over the use of pink slime, Where he pointed out that the meat in the burger patties had been pre-treated with a cocktail of chemicals and thus not fit for human consumption. McDonald’s has since agreed to change its recipe.
But, I don’t think i will be going to the golden arches for a while now.
So instead, i try to re-create. I’ve even gone a step further by making my own burger buns!

So here i am with my sausage patty burger. Appearance wise, it’s a far cry from the McDonald’s sausage McMuffins. Namely because i’ve used burger buns instead of english muffins and added the lettuce and tomatoes which are absent from the original.
The sausage patty tasted pretty close. I can confidently say that because Mr. Crustabakes who had absolutely no inkling of my copycat attempt pointed out the taste resemblance.
So, do try it out and save yourselves a trip to the drive-thru!
Simple Homemade Sausage Patties
Taken from MarthaStewart.com
Ingredients
- 1 pound ground pork- i used chicken
- 1 garlic clove, minced
- 1 tablespoon dried sage, crumbled
- 3/4 teaspoon dried thyme
- 1/2 teaspoon dried fennel, crushed
- Pinch of ground nutmeg
- 1 1/2 teaspoons coarse salt
- 1/2 teaspoon freshly ground black pepper
- 1 large egg white
- 2 teaspoons vegetable oil
Directions
-
Step 1
Mix together the pork, garlic, sage, thyme, fennel, nutmeg, salt, and pepper in a medium bowl. Add the egg white and combine thoroughly. Cover and chill for at least 15 minutes.
-
Step 2
To easily form the sausage patties, rinse your hands in cold water. Divide the mixture into eighths and shape each portion into a 2 1/2-inch disk. Patties can be made to this point and refrigerated or frozen until ready to use.
-
Step 3
Heat a skillet over high heat, and then swirl in the oil. Fry the sausages on both sides until completely cooked through and golden brown, about 4 minutes per side. Drain and serve immediately with pancakes, waffles or eggs. Sausage patties can be fully cooled, wrapped, and frozen for microwave reheating.
Beautiful Burger Buns |
Taken from King Arthur Flour
- Volume
- Ounces
- Grams
Buns
- 3/4 to 1 cup lukewarm water
- 2 tablespoons butter
- 1 large egg
- 3 1/2 cups King Arthur Unbleached All-Purpose Flour
- 1/4 cup sugar
- 1 1/4 teaspoons salt
- 1 tablespoon instant yeast
- *For best results (a smooth, slightly soft dough), use the smaller amount of water in summer (or in a humid environment), the greater amount in winter (or in a dry climate); and something in between the rest of the time.
Topping
- 3 tablespoons melted butter
Directions
| 1) Mix and knead all of the dough ingredients — by hand, mixer, or bread machine — to make a soft, smooth dough. |
| 2) Cover the dough, and let it rise for 1 to 2 hours, or until it’s nearly doubled in bulk. |
| 3) Gently deflate the dough, and divide it into 8 pieces. Shape each piece into a round ball; flatten to about 3″ across. Place the buns on a lightly greased or parchment-lined baking sheet, cover, and let rise for about an hour, until noticeably puffy. |
| 4) Brush the buns with about half of the melted butter. |
| 5) Bake the buns in a preheated 375°F oven for 15 to 18 minutes, until golden. Remove them from the oven, and brush with the remaining melted butter. This will give the buns a satiny, buttery crust. |
| 6) Cool the buns on a rack. |
| Yield: 8 large buns. |
Cinnamon French Toast with Red Berry Sauce
I’ve never really known how to spell “cinnamon”. I always get confused with double ‘N’s or double ‘M’s, or double both.

What i always do is, i type them in and try the different combinations till the red wriggly line, which signify a spelling error is gone. That’s on good days. Sometimes, i don’t even bother. Who cares if i spell “cinammon” wrong? I am pretty sure everyone still knows i am referring to that bark of a spice.
Nevertheless, here’s a cinnamon (Ha! I got it right @ first try) French Toast with Red Berry Sauce. I decided to make this because :
1. I’ve just made a loaf of sandwich bread, which means i could cut them up as thick as desired.
2. I’ve got spare berries lurking about in the fridge
3. I wanted to join the “cook like a star” organised by Zoe of Bake for Happy Kids, Baby Sumo from Eat your heart out and Grace from Life can be simple.

The selected star for the month of July is Curtis Stone. I know him from watching snippets of “take home chef” whereby he surprises his guests going into their homes and cooking for them.

So, here’s your “berry” delicious toast Curtis. Enjoy the month of July where everyone will be flocking to your site to join the event. 😉
Cinnamon French Toast with Red Berry Sauce
Serves 4
Ingredients
Red Berry Sauce
1 6-ounce/170g package fresh blueberries
1 6-ounce/170g package fresh raspberries
1 4.4-ounce/125g package fresh blackberries
3/4 cup/180ml sugar
French Toast
6 large eggs
4 1/2-inch-thick slices brioche bread, halved diagonally
3 tablespoons butter
1/4 cup sugar
2 teaspoons ground cinnamon
1/3 cup crème fraîche
Assorted fresh berries
Method
- To prepare the red berry sauce: Combine all the berries and sugar in a blender and puree until smooth.
- Strain the berry puree through a fine sieve, discarding the seeds, and into a small saucepan.
- Place the saucepan over medium-low heat and simmer for 2 minutes, stirring frequently.
- Remove from the heat and keep warm while preparing the French toast.
- To prepare the French toast: Using a fork, beat the eggs in a 13×9 baking dish to blend. Place the slices of brioche in the eggs and let stand for 5 minutes, or until the eggs are absorbed, turning the brioche slices once.
- Melt the butter on a heavy large griddle pan over medium heat.
- Add the brioche slices to the hot pan and cook for about 2 minutes per side, or until golden brown on the outside and heated through.
- Meanwhile, stir the sugar and cinnamon on a large plate; set aside. Immediately place the hot French toast in the cinnamon-sugar and turn to coat completely.
- Divide the French toast among 4 serving plates.
- Top with a dollop of crème fraîche. Spoon the berry puree over the French toast.
- Scatter the fresh berries over and serve immediately.
document.write(”);
Homemade Sprinkles
Ever since Baby Caitlyn started her solids, I’ve been really watchful of what she eats.
I go out of my way to ensure that all her meals were homemade and prepared with the freshest ingredients that were free of unecessary toxic chemicals. Yes, i am one of those pesky mothers who insist on organic produce.
I want her food to be healthy, wholesome and nourishing. I don’t want her to grow up mindlessly eating sugar laden cereal for breakfast, fast food burger and fries for lunch and takeaway pizza for dinner.
I want her to respect and enjoy food (and its preparation), the way I’m enjoying myself making meals daily for my family.
Geez, how can all the above sentences start with “I” when it’s all actually about her?
To be fair, I (there I go again…) also dont want her to be the “weird” kid singled out at school with steamed brusselsprout in her lunch box. I want Caitlyn to be the “cool” kid with the sprinkled chocolate bread in her lunch box.
Like so:

Made of icing sugar and cornstarch, this sprinkle is free of synthetic dyes, wax and whatever unpronounce-able ingredients that plague the storebought variety.
I used raspberry juice for the pink sprinkles, and purple sweet potato for the purple one. 
I’m really excited about this. I bet i can make the whole spectrum of colors with other fruit juices and vegetables out there.
So come on, bring out the child in you and sprinkle some fun on your food!
Home made Pink sprinkle:
2 tablespoon of icing sugar
1/4 tsp of cornstarch
1 – 2 tsp of raspberry juice (strained of seeds)
Mix the ingredients together to form a thick batter of pipe-able consistency. The consistency of the batter should “sheeting” (batter should fall in sheets when lifted with spatula).
Fill your pipping bag with the batter. Cut ever so small an opening.
Pipe the batter in straight lines across a pre-greased parchment paper.
Let the piped sugar dry. It will harden as it dry
The sprinkle is ready to use.
Chocolate Bread Recipe:
This is actually a recipe for a doughnut, but instead of frying, i decided to bake it instead.
Recipe taken from Resep donut Ala Jco by Fatmah Bahalwan
A
225 grams bread flour
7 grams instant yeast
150 ml water
0.25 tsp salt
Mix the ingredients together and set aside to proof for 90 mins.
B:
50 gr bread flour
30 grams sugar
15 grams milk powder
30 grams shortening
1 egg yolk
Mix ingredients B together, then knead it into ingredients A.
Preheat oven to 170 degree
Continue kneading till the dough is no longer sticky and is elastic.
Set aside to rest for 10 minutes.
Shape the dough into balls and let it proof for another 30 mins
Bake at 170 degree for +- 15 mins.
When the bread is cooked and cooled, dip it into the chocolate and sprinkle the sprinkles.
Sourdough Sandwich Bread
After all the sourdough recipes you had to put up with, I am glad to say that the sourdough adventure is almost coming to an end.
You see, my previous recipes were all recipes that didn’t require the lifting powers of the yeast thriving in the sourdough starter. Items such as brownies, muffins, pancakes, waffles all had either baking powder or baking soda in them that did the lifting. The sourdough starter was superfluous at the very best. It’s just there to add flavour, or as a means to use up all the sourdough discard that came with each sourdough feeding.
Last night however, i put my sourdough starter to its ultimate test. I baked a bread with it.

Unlike instant yeast which probably takes two hours to proof, i had to let it sit for about three hours for its first proofing, and another 5 hours for its final proofing.

Nevertheless, I am pretty happy with the result. The bread came out sufficiently soft with that sour twang that trademark sour twang that comes with sourdough bread! I can’t believe i just baked a bread with yeast that i grew in my own kitchen!
Yay Me!
Sourdough Sandwich Bread
Slightly modified from “Rahasia Membuat Roti Sehat & Lezat Ragi Alami” by Sangjin Ko
375 grams Bread Flour
180 grams sourdough starter
7 grams salt
37 grams sugar
165 grams water
30 ml milk
45 grams butter
In a bowl, mix the flour, salt, sugar and sourdough starter. Make a hole in the middle and pour the water and milk into it. Mix well. Transfer the batter onto a table top that has been dusted with flour. Add the butter, and knead till is elastic and stops being sticky.
Shape the dough into a bowl. Cover and let to proof at room temperature till it doubles in size (3 hours).
Punch the dough down to let out excess air. Divide dough into 2. Cover with plastic and let rest for another 30 minutes.
Grease you S\sandwich tin with butter. Preheat oven to 200 degree celcius.
Take one of the dough, flatten it and roll it up like a swill roll. Place the dough onto the sandwich tin.
Let the dough proof for another 2 hours (i left mine to proof for 5 hours).
Bake the dough at 180 degree clecius, for about 30 minutes till the tops get crusty and golden brown.
Sourdough batter Onion Rings

Yet another sourdough recipe. This time, sourdough discard was used to make the batter to dip these onion rings. Looks like there is no end to the wonders of sourdough!
Sourdough Onion Rings
taken from Williams Sonoma
Ingredients:
- 2 cups sourdough starter
- 1/2 cup cold sparkling water
- 1/2 tsp. sea salt, plus more, to taste
- 3 large onions, peeled and cut into 1/2-inch
slices - 1 cup all-purpose white bread flour
- Peanut or canola oil for deep-frying
Directions:
Fill a large bowl with ice cubes and place a medium bowl on top of the ice. In the medium bowl, combine the sourdough starter, sparkling water and the 1/2 tsp. salt and stir to mix. Separate the onions into rings, leaving the centers intact. Place the flour in a shallow bowl and toss the onions in the flour to coat.
In a deep fryer, pour in the oil and heat to 370°F on a deep-frying thermometer. Dip the flour-coated onion rings, one at a time, into the sourdough starter mixture, then drop them into the hot oil. Fry in a single layer, turning if necessary, until they are golden brown. Using a slotted spoon, transfer the onion rings to the baking sheet and season with salt. Place the baking sheet in the oven and fry the next batch. Be sure the oil returns to 370ºF before adding the onions or they will be greasy.
Sourdough Brownies
Not bringing anything much to the table today. Just another sourdough discard recipe.
*hangs head in shame*

I wasnt expecting anything extraordinary from this recipe. To me, it was just another recipe to help me save my daily sourdough discard.

But i must say, i am pleasantly surprised at how they turned out. Dense, fudgy, and very chocolatey.

Just like how good brownies should be!
Sourdough Brownies
Taken from the Wild Yeast
Yield: 24 brownies (9 x 13-inch pan)
Time:
- Mix: 10 minutes
- Bake: 40 minutes
Final Dough Ingredients:
- 300 g 72% cocoa (bittersweet) chocolate, chopped
- 226 g unsalted butter, cut into pieces
- 200 g sugar
- 6 g (1 teaspoon) salt
- 8.4 g (2 teaspoons) vanilla extract
- 160 g (3 whole) eggs, at room temperature
- 40 g cocoa powder
- 220 g mature 100%-hydration sourdough starter
Method:
- Preheat the oven to 325F.
- Butter a 9 x 13-inch metal baking pan. Line the bottom of the pan with parchment, and butter the parchment.
- In the microwave, melt together the chocolate and the butter. Check it frequently to make sure it doesn’t burn.
- Whisk in the sugar, salt, and vanilla.
- Add the eggs one at a time, whisking to combine after each addition.
- Sift the cocoa powder over the chocolate mixture and stir to combine.
- Add the starter and stir gently until it is completely incorporated.
- Turn the batter into the prepared pan and bake for about 40 minutes, until a bamboo skewer inserted in the center come out clean.
- Cool in the pan for 20 minutes, then loosen the edges with a knife, invert onto parchment paper, and re-invert onto a cooling rack.
- When completely cool, cut into squares.
Sourdough Chocolate Chip Muffins
Please bear with me as i yet again put up another sourdough recipe.
This time, i used my sourdough discard to make chocolate chip muffins.

The sourdough here acts as an acidic base for the baking soda, which made the muffins get an extra “oomph” while rising in the oven.

As always with muffins, i was extra generous with my chocolate chips. I loved picking the chips with my fingers when i eat my muffins.

Taste wise, i couldnt really taste the sour twang of the sourdough starter. Neither did Mr.Crustabakes… I know this because he didn’t complain. You see, Mr. Crustabakes isn’t a big fan of sourdough related items. He thinks they are stinky and rotting. Little did he know that he just scarfed a whole muffin of sourdough. Ha!
Sourdough chocolate chips muffins
Yields about 8 muffins
Adapted from Sourdoughhome.com
- 1 C “discarded” sourdough starter
- 1 C All Purpose flour (sift flour prior to measuring)
- 1 egg
- 1 tsp vanilla
- 1/4 tsp salt
- 1/4 C oil
- 1/2 C sugar
- 1 tsp baking soda
- ~1/2 C chocolate chips
Preheat oven to 425F.
Combine dry ingredients in small bowl. Stir in chocolate chips. Combine wet ingredients in medium bowl. Add dry ingredients to wet ones.
Line your muffin tins with cupcake wrappers. Mix the wet and dry ingredients quickly and spoon into your muffin cups.
Bake at 425 for about 20 minutes.
Sourdough Discard Crackers
Help. I cant stop eating these!

It may not look appetizing, but boy, does it keep you munching away!
Made from sourdough discard (I did warn you to be prepared for an avalanche of sourdough recipes ahead), seasoned just with garlic powder, cheddar cheese and salt, these nuggets really keep you coming for more!

If you had to know, these were the pretty much the only things i ate today.
Yep, I ate them for lunch, and i had them for dinner.
And i still want more!
In fact, i have some baking away in the oven as i am writing this down…. The new batch is flavored differently…. I used the leftover seasonings i had from a packet of instant noodles. So i bet they would taste good!
Sourdough Crackers
1 cup of sourdough discard, unfed
1/2 to 1 cup flour
1/4 cup oil
Seasonings of your choice (I used 1/4 tsp garlic powder)
1/2 cup shredded cheddar cheese
1/4 tsp baking soda
1/4 tsp salt
Mix the oil with the sourdough discard.
Add the flour to form a stiff dough
Set aside for 8 hours or overnight.
Preheat oven to 180 degree celcius
Sift the baking soda into salt, the cheddar cheese and your choice of seasoning. Mix well
Knead the baking soda into the dough
Roll it into 1/8 inch thick, and cut into bite sized pieces
Bake for 15 minutes or till they turn a pretty golden brown.
Sourdough Discard Waffles
U know those little packets of living organisms that you use to make breads? The one that spring to action when it is watered? The one responsible for making your bread expand and rise?
Well, i’ve been trying to grow my own packet of them.
Yup, I’ve been trying to grow my own natural yeast.
I’ve prowled all over internet sites and books.
I’ve joined a facebook group called the “natural homemade bread” club. I’ve asked for opinions, advise, guides from the experts in that group. And I must genuinely thank these people for offering me needed instructions and solutions to caring for my yeast.
So, a little bit about natural yeast, from my short lived “research”….
Natural yeast is a tiny organism. It exists around us. You can find them clinging on the surfaces of fruits, or even on the surface of flour particles.
By soaking your fruits/flour in water, you are giving a media for these little yeast to grow. These yeast feed on starch molecules. Be it the flour or sugar.
So like a pet, you are supposed to feed and water them at intervals to make sure they have enough water and food to thrive.
However, before you feed them, you are supposed to throw away a good portion of it to make sure the yeast population is controlled, and there is enough food and water for the remaining yeast that you did not discard.
The thought of discarding this yeast bothers me. They were afterall good yeast, which I had cared, fed and looked after.
So again, I prowled the internet for recipes which use discard yeast.
So here I am with my first post on a waffle recipe using discarded yeast.

A sourdough waffle.
One of the most flavorful waffle I’ve ever tasted.
Like its name would suggest, these waffles have a slight twang of sourness to it. Just like how sourdough breads are.
These waffles were so good, I didnt really need any kind of topping to eat them with. Maybe just a slight dusting of icing sugar

It really depends on personal preference though.
Mr. Crustabakes on the other hand wasn’t too crazy over these sourdough waffle.

But with maple syrup, he managed to scarf down two slices without any complaints though.
With this yeast project in hand, I foresee myself posting more discard yeast recipes. I wish I could interest everyone into growing their own yeast. Because not only is it healthier, but it is also easier on the digestive system…
But if all these yeasty things arent your thing, please do bear with me…
For instructions on how to grow your own yeast, you can refer to King Arthur Flour’s website HERE
Sourdough discard Waffles
Recipe taken from King Arthur Flour
Overnight sponge
- 2 cups King Arthur Unbleached All-Purpose Flour
- 2 tablespoons sugar
- 2 cups buttermilk (I used 2 cups of milk mixed with 2 cups of lemon juice)
- 1 cup sourdough starter, unfed
Waffle or pancake batter
- all of the overnight sponge
- 2 large eggs
- 1/4 cup vegetable oil or melted butter
- 3/4 teaspoon salt
- 1 teaspoon baking soda
1) To make the overnight sponge, stir down your refrigerated starter, and remove 1 cup.
2) In a large mixing bowl, stir together the 1 cup starter, flour, sugar, and buttermilk.
3) Cover and let rest at room temperature overnight.
4) In a small bowl or mixing cup, beat together the eggs, and oil or butter. Add to the overnight sponge.
5) Add the salt and baking soda, stirring to combine. The batter will bubble.
6) Pour batter onto your preheated, greased waffle iron, and bake according to the manufacturer’s instructions.
7) Serve waffles immediately, to ensure crispness. Or hold in a warm oven till ready to serve.
Egg benedict and Bacon Sandwich
It’s an Egg-citing day for me today,
Because i successly:
1. Poached an egg
2. Made hollandaise sauce.

Yay Me!
For tips and instructions to make these two, i refer to KitchenRiffs, here
Bread Pudding with Brown Sugar Crumbles
Using yesterday’s swirled sweet potato sandwich bread, i made this bread pudding, with brown sugar crumbles.

It’s a recipe re-visited, from HERE

Happy Friday everybuddy!
Another potato bread, this time, swirled.
I know I just posted a purple sweet potato bread yesterday. But the truth is, the bread was made last week. And we finished it.
And I just had to make another one.

This time however, i used two types of sweet potatoes. The regular orange skinned, white flesh sweet potatoes and the purple ones.
Then i swirled them together.
It takes a little bit more effort making this, I had to divide everything into two. Which means double the dirty bowls, double the kneading process, double almost pretty much everything.
But I wanted to see how it would swirl so badly, that i decided to go ahead and did double duty on this bread.

So here it is, the bread swirled.
And here it is, as a ham sandwich. Whoopee!

Swirled Sweet Potato Loaf
(adapted and modified from Jess of J3ss Kitch3n)
Recipe
Starter Dough Ingredients
200g bread flour
1/2 tsp instant yeast
65 cooked purple sweet potato (mashed)
65 cooked white sweet potato (mashed)
Water
- Combine bread flour, instant yeast and mashed PURPLE sweet potato in a mixing bowl, add in sufficient water to form a soft pliable dough, cover with cling wrap or a wet cloth and prove for 1hr or until double in size.
- In another bowl, Combine bread flour, instant yeast and mashed WHITE sweet potato in a mixing bowl, add in sufficient water to form a soft pliable dough, cover with cling wrap or a wet cloth and prove for 1hr or until double in size.
Main Dough Ingredients
15g bread flour
25g all purpose flour
33g cooked PURPLE sweet potato (mashed)
10g sugar
20g olive oil
15g bread flour
25g all purpose flour
33g cooked WhITE sweet potato (mashed)
10g sugar
20g olive oil
- Combine all of the PURPLE Main Dough Ingredients with the PURPLE starter dough ingredients in your bread maker machine or stand mixer and knead till the window pane stage, cover with cling wrap or wet cloth and prove for 1hr or until double in size.
- In a separate bowl, do the same for the White main dough and white starter dough ingredients.
- Punch out the air from the proofed dough and divide the dough into 2 equal parts, cover and rest the doughs for 15mins.
- Punch out the air from the rested dough, wrap the white dough in the purple dough, roll it up swiss roll stylea nd shape into rounds, place into bread tin and prove for 1hr.
- Bake in preheated oven of 170C for 38mins or till golden brown, remove bread from tin immediately once done and cool completely on a cooling rack before slicing.
Purple Sweet Potato Bread
Some of you are probably sick of the babyfood posts that i’ve been putting up lately.
Today, I shall suspend baby-related activities and return to regular Crustabake-y kinda post.
“Back to basics” as everyone would say.
Basics, in Crustabakes, would probably be baked goods.
While still on a “healthy” strike,
I bring you this Purple potatoes sandwich swirled bread.

No, its not gluten free, and yes, there is sugar involved in making this.

But it’s low gluten, due to the potatoes.
And no artificial coloring was used to get this beautiful hue.

It’s all natural from the pureed purple sweet potatoes.
Purrty ain’t it?
Sweet Potato Loaf
(adapted and modified from Jess of J3ss Kitch3n)
Recipe
Starter Dough Ingredients
200g bread flour
1/2 tsp instant yeast
130g cooked purple sweet potato (mashed)
Water
- Combine bread flour, instant yeast and mashed sweet potato in a mixing bowl, add in sufficient water to form a soft pliable dough, cover with cling wrap or a wet cloth and prove for 1hr or until double in size.
Main Dough Ingredients
All of Starter Dough
30g bread flour
50g all purpose flour
65g cooked purple sweet potato (mashed)
20g sugar
40g olive oil
- Combine all of the Main Dough Ingredients in your bread maker machine or stand mixer and knead till the window pane stage, cover with cling wrap or wet cloth and prove for 1hr or until double in size.
- Punch out the air from the proofed dough and divide the dough into 2 equal parts, cover and rest the doughs for 15mins.
- Punch out the air from the rested doughs and shape into rounds, place into bread tin and prove for 1hr.
- Bake in preheated oven of 170C for 38mins or till golden brown, remove bread from tin immediately once done and cool completely on a cooling rack before slicing.
Bread Pudding with Brown Sugar Crumble
I had half a baguette that’s way past it’s prime.
It was sitting on my kitchen counter for the first couple of days, after which it was shifted into the refrigerator for fear of mold attack.
It became a refrigerator resident for another two days, in which it started to lose moisture and started to turn crisp.
I decided to make a bread pudding out of it. For what better way than to salvage a piece of old, dry bread than to drench it with milk, sugar and cream ?

The only problem i had was, i only had half of a baguette. Cutting it into 1″ thick, i didn’t have enough to cover the 9×13 inch pan that most bread pudding recipes are customed for. Geez, i didnt even have enough bread to cover an 8×8.
So i took out my smallest pan, a 9 x 5 and did some major mathematical computation to scale back on the recipe.

The original recipe also called for a praline topping of pecans.
I didn’t have any pecans on hands. But i knew i needed some sort of sweet topping for this since the sugar in the bread mixture was so scant.
So i flipped Martha Stewart’s Pies and Tarts book and proceeded with her crumble topping. I didn’t scale back on this recipe even though the recipe was for a much larger pan. I happen to like crumbles.

So with that, there we have it,
half a baguette revived, and a breakfast served.

I wish all of you a happy breakfast too!
Adapted from Paula Deen
Half a baguette (mine weighed to about 4 ounces)
2 eggs + 1 yolk
75 ml Half and Half
75 ml milk
10 gr sugar
1 tsp vanilla extract
1/8 teaspoon ground cinnamon
Dash salt
Taken from Martha Stewart
- 6 tablespoons unsalted butter, melted, plus room-temperature butter for pan
- 1 cup all-purpose flour, (spooned and leveled), plus more for pan
- 1/2 cup packed light-brown sugar
- 1/4 teaspoon salt
Directions
Slice baguette into 1-inch each. Arrange slices in a generously buttered 9 by 5-inch flat baking pan in 2 rows, overlapping the slices. In a large bowl, combine the eggs, half-and-half, milk, sugar, vanilla, cinnamon, and salt. Beat with a whisk until blended but not too bubbly. Pour mixture over the bread slices, making sure all are covered evenly with the milk-egg mixture. Cover with foil and refrigerate overnight.
The next day, preheat oven to 350 degrees F.
Make crumbles: Whisk together butter, brown sugar, and salt. Add flour and mix with a fork until large crumbs form. Refrigerate until ready to use.
Spread crumble Topping evenly over the bread and bake for 40 minutes, until puffed and lightly golden.
Mini Caramel Walnut Rolls
I am so glad to be back!
I’ve been away on a trip to the US of A for the last three weeks.
And while i was totally having a blast and the time of my life, i couldnt help missing my oven laying cold and lonely back home.
So here’s me, doing what i love most.
Baking.

And today’s baking involved a little yeast,
A little flour,
A bit of kneading,
And a whole lot of brown sugar.

And you do want all that brown sugar.
Cause the brown sugar will caramelize, and create the beautiful glossy sheen on the surface of your rolls. Which is what these are.
These are cinammon rolls with caramel brown sugar glaze.

This is how they look like from the bottom.
Did you notice the chocolate chips i’ve sneaked into the filling? 🙂

I served these for breakfast along with a bacon, scrambled egg sandwich and some baked beans.

Now all i gotta do is figure out how to burn the calories in here for the day.
Mini Caramel Walnut Roll
- 1 package Pillsbury crescent rolls ( I made my own rolls using the recipe HERE)
- 1½ Tbs butter melted
- 1/2 tsp cinnamon
- 2 – 3 Tbs brown sugar
Caramel:
- ½ cup Butter
- ½ cup brown sugar
- 1 tsp vanilla extract
- ½ cup chopped walnuts
- Pinch of salt
For the Caramel:
Mix together the butter, sugar and vanilla. Spread about 1 TBS of the mixture into each muffin tin. Scatter walnuts over the mixture.
For the Rolls:
Preheat oven to 350. Place the dough (I made my own dough instead of the frozen ones) on a floured surface and roll it with a rolling pin to make a thin rectangle. Brush topside of rectangles with butter, and sprinkle with sugar and cinnamon. Tightly roll dough rectangle starting from one of the short ends Cut the rolls crosswise and place each on the prepared muffin tins.
*Note:
My rolls were a bit on the small side. Between that and the fact that they are baked individually in muffin cups, these rolls bake up faster than usual. As a result, they were just a tad hard with a crunchy exterior. I would probably reduce the baking time for these the next time i make these.
Also, while turning these rolls out from the muffin tins to the serving plate, some of the caramel stuck to the base of the pan instead of sliding down the sides of these rolls. Again, i think i might have overbaked these which results in the sugar overcooking and turning candy like instead of remaning liquid.
I spread Nutella on everything!
So i like Nutella.
I like them in cookies,
i like them in brownies,
and i like them in pastries.
And now i like them in donuts.

Chocolate hazelnut goodness piped into a piece of fluffy light deep fried dough.
It’s totally worth going to the gym for.
Speaking of which, I wonder whether most people go to the gym because they need to burn all the excess calories they ate?
Or do they go to the gym so that they can eat excess calories?

I belong to team eat first, gym later.
I will eat this, and vouch to go to the gym.
And 30 percent of the time, I deliver.

For the remaining 70 percent, i just sucked it in. Literally. I suck in my stomach.

And then i make more donuts,
this time for my niece, who loves sprinkles everything.

And like all girls her age (3), pink is her favourite crayon.

but lets not digress, for this post is dedicated to NUTELLA.
And i am not done with showing you what i’ve got.

That’s a generous spoonful of Nutella.
It took quite a bit for me not to just shovel it into my mouth.
Because i had grander plans,

And that’s to spread it on a piece of crepes

Then top it with Bananas
awesome-ness! 🙂
Mini Pizza Bites
I knew i had to make these the first time i saw it at Annie’s eats.

Mini Pizza Bites.
Mini buns of pizza dough, wrapping around cheese and pepperoni.

Totally handy to eat.
Because they dont drip and droop they way pizzas do,
and because they are bite sized.

They are also not crazily coated with pizza sauce. Which makes them light enough for breakfast.
Hmmm breakfast…
I am a morning person. Breakfast is totally my favourite meal of the day.

But if for some reason, sauce-less pizza bites for breakfast dont fly with you,
You can totally have pizza dipping sauce at the side (I just warmed ready made pizza sauce).
Either way, they were wonderful. And they are totally making it to my breakfast staple list.
Pizza Bites taken from Annie’s Eats
Ham and Cheese Sandwich
What you are looking at, is an attempt at making hamburger buns.

Go ahead, laugh if you want.
I know i have a long way to go in my shaping skills.
These may not look like hamburger buns, at least they still function as one.
Here it housed a slice of ham and cheese.

I would have totally put on some lettuce,
and maybe tomatoes.
But i didn’t have any of that fancy veggie stuff in my fridge.
I did however, used the leftover egg wash mixture for the buns,
to make scrambled eggs.

I hope everyone had a good breakfast.
I know i did!
Asian Sweet Bread Recipe for the Buns.
Asian Buns With Mayo Spam
Today’s breakfast came in the form of Asian buns

Plaited and folded upon itself into a circle.

Topped with a mixture of
mayonnaise,
spam,
cheddar
and scallion.

🙂
Asian bun dough Recipe HERE
Garlic Baguette
As mentioned in my previous post, i am desperately trying to adapt to the new house while still keep things looking normal around here.
In case any of you are wondering, i am moving to an apartment unit.
Now, don’t get me wrong, i am no stranger when it comes to living in apartments. In fact, all my 16 years of education life in Singapore, I’ve lived in nothing but apartments.
But that was before i started this blog.
That was before i couldn’t give two hoots about the size of my kitchen,
or how large my refrigerator was,
or how freely the sunlight reaches our outdoor yard, making it the most perfect studio to take photos in.
But really, i shouldn’t be complaining. I am happy in our new little house.
Sure, i might need to make some major adjustments. But they are not impossible.
To kickstart things off, i made my first bake of the house.

The Garlic Baguette.
They are looking quite ashen and pale. That’s because i brushed the dough with milk instead of egg yolk before going into the oven.

You might also notice the difference in lighting in my pictures. These are taken with artificial light. I can no longer push the door open and walk to our yard the way i usually did.
Because the apartment is in midair. And because we have no yard.

And as for the lack of props?
Well, lesser living space means lesser storage space. I couldnt bring my gigantic trunk of coloured bowls and plates with me. I’ve selected a few of my faves of course. But they are still packed in some boxes…. somewhere.
So till i get to them, these would have to do.

Despite all the setbacks, these are still good breads.
Using an overnight sponge dough, these breads have that that deep, complex flavour that is only attained when the yeast are allowed a slow rising. I can’t really describe it. It’s slightly sour, and maybe salty. but it’s definitely flavourful and aromatic. Just the way good breads are supposed to be!
And how to settle the garlic into the baguette?
Well, after their final proofing, i’ve sliced the middle of the unbaked baguette with a knife (Do not slice it till the ends, or the bottom of the baguette, just a slight tear on the surface is good enough). And in that tear, i’ve pipped in the garlic butter, before they go straight into the oven.
Now, doesnt that sound super easy? 🙂
Egg Mayonnaise Buns
I have always wondered what happens if i fill my bread dough with mayonnaise and sent them to bake?
Would the mayo turn into a runny goo and spill out of the buns?
And just for the fun of it, i decided to give it a go.
This bun was filled with egg mayo and ham.

Then i sent it to bake as usual.

and voila! No runny goo, no spills!
Just delicious buns with egg mayonnaise and ham as fillings!
Boston Cream Donuts
While Boston Cream Pies are conventional, and Boston Cream Cupcakes are uninspiring, i was so excited when i thought i was the first one who thought of extending the Boston Cream family to donuts.
Boston Cream Donuts.
Sound good doesn’t it?
That’s when i typed the words into google and saw the deluge of recipes available from people who have done it before.

So much for thinking i was gonna be the pioneer in this.
I am not blaming the world for coming up with this earlier than me though. Cause seriously, it’s just too good to NOT think about.

True to the Boston Cream family signature, these donuts are filled with pastry cream and topped with chocolate.
I’ve used a different recipe for the donuts. This one is pretty different. It called for the use of a new(at least to me) ingredient. The Japanese bread flour.
I am not very familiar with the ingredient, but from what i have been reading, this flour contains more protein than the usual bread flour. It results in better gluten formation, better rise and ultimately softer, super aerated donuts. In fact, when i bit into it, it feels like biting on a cloud of cotton.
And while they are probably not the healthiest snack around, they are quite “light” in the sense that you probably have to eat 2, to get full. Or maybe 7.
So if you prefer something with more bulk, these are not for you.
For me, i decided to add bulk my way. Not by the texture of the donuts, but by filling the donuts.
One was, as seen above, to fill it up with pastry cream.
And another, with peanut butter.
I’ve thinned the peanut butter with a bit of a cream, topped the tops in white chocolate, and decorated with the dark chocolate.

Pretty good!

Doughnut Recipe
Ingredients:
DOUGH 1
* 850 Japanese ‘Komachi’ bread flour. *
* 30 gr instant yeast
* 10 gr gsalt
* 600 ml water
* You can use regular bread flour for this, just adjust by reducing the water by 75 to 100 ml.
DOUGH 2:
* 200 gr Japanese ‘Komachi’ bread flour
* 10 gr salt
* 60 gr milk powder
* 125 gr sugar
* 100 gr eggs
* 125 gr shortening
Cooking Direction:
1.) Mix dough 1 with a mixer till it comes together, cover & rest for 90 minutes
2.) Mix dough 2 together. Knead dough 2 into dough one til smooth and elastic. Cover and rest for 15 mnts
3.) With a roller pin, roll the dough abt 1 cm thick. Rest for 10 mnts
4.) Cut with round cookie cutter. Rest for another 10 mnts
5.) Deep fry in low heat until it turns light golden yellow.
6.) Cool on cooling rack.
Pastry Cream Recipe can be found HERE
To assemble:
- Pipe cooled pastry cream into the cooled donuts. (I used a kitchen shear to tear an opening before jamming my pipping bag into the donut).
- Melt some dark chocolate and dip the tops of the filled donut
- Set aside to dry
Garlic and Rosemary Focaccia
It seems like my sweet tooth is gone on a little vacation.
Cause for once in my life, I am favouring savoury foods instead of my usual staple of cakes, cookies and candies.
Take today for instance, i started out with an ingredient rarely mentioned in this blog.

Garlic.
A neglected and underrated vegetable (or is it root?) here in Crustabakes.

So along with dried rosemary (Well, ideally, i was supposed to use fresh ones), i have taken the garlic and massaged it into a focaccia bread dough to create the most wonderfully smelling kitchen.
And of course the most wonderfully smelling bread too.

The recipe for this focaccia was taken from Sweet Pea’s kitchen. As with most of the recipes on her blog, this recipe was pretty straightforward. And although this is my first time making focaccia, i thought it went quite well. I pretty much adhered to the instructions, substituting only on the scale to fit the bread into a 9×13 pan instead of the 12×14 pan.
The resultant bread had a good crisp skin and a chewy interior. And with its dimpled surface and aromatic flavours, this is as focaccia-ish as it could be. Oh, instead of the usual spray of cooking oil on the pan to prevent sticking, i drizzled garlic oil on it, to infuse even more flavour on the bread.

With all the garlic, rosemary and seasalt, this focaccia is actually good enough to be eaten on its own. But i did have some leftover tomato dip which went along very well with the bread.

Oh, and you might want to brush your teeth again after that. Or at least get the breathmints ready. 🙂
Taken from Sweet Pea’s Kitchen
Pepperoni and Cheese Pizza
So after days of not turning the knobs of my oven, i decided to crank it up today.
All the way up, at 500 F.

Cranking the oven at such a high temperature is one of the steps to achieving flat, crusty pizza dough.
While some people prefer chewier, thicker dough. I like mine to be on the thin and crispy side.

Not taco shell thin and crispy of course, but just thin enough so that i don’t have to battle the chewy dough with my teeth.

And i read the key to that was to pop the pizza dough in the oven before it had the chance to rise, and the intensified heat of 500F will make sure that the underside of the pizza crisps up.

And as for the filling, i opted the easy way out of using a canned prego spaghetti sauce (How predictable right?). Then i sprinkled some grated mozarella, mixed italian herbs, pepperoni slices, and grated cheddar.

and Voila!
Pepperoni and Cheese Pizza
Taken from Annie’s Eats
Ingredients:
½ batch of perfect pizza crust
3 TBS canned Prego Spaghetti Sauce
Some dried Italian Herbs
¾ cup shredded mozzarella cheese
A handful of pepperoni
¾ cup shredded cheddar cheese
Directions:
Preheat the oven and a pizza stone to 500° F. Allow the stone to heat for at least 30 minutes. In the mean time, cut a round of parchment paper the size of your pizza stone. (Alternatively, use a pizza peel.) Sprinkle lightly with cornmeal or semolina flour.
*Note: I dont own a pizza stone, so i just placed a dark cookie sheet at the lowest rack in my oven.
Gently roll out the pizza dough into a large circle, leaving a thicker ring around the edge for the crust. Spread the Prego spaghetti sauce in a thin layer evenly over the unbaked crust. Sprinkle with Italian herbs, then shredded mozzarella. Top with pepperoni slices and finally sprinkle with shredded cheddar. Once assembled, carefully transfer the parchment round and pizza to the preheated baking stone (*dark cookie sheet) and return to the oven. Bake for 10-12 minutes, or until the cheese is melted and browned. Slice, serve, and enjoy!
Baguette and Mushroom Crostini
This is ground breaking.
I think i might have cooked (as opposed to baking) today.
And i think i might have liked it!

In fact, i liked it so much that i am gonna focus on the cooking today, and downplay the fact that the cooking lies over homemade, freshly baked baguettes.

Homemade baguettes. That’s pretty groundbreaking too.
I am always baking Asian breads, so this is a bit out of my area. Literally.
But let’s keep that to another day.
So what was cooking anyways?
Sauteed creamy mushroom, flavoured with cheese and garlic
Sure, it’s nothing impressive. But it’s a mile stone for me (I can barely cook an egg!)

They call this arrangement a “crostini”.
And just as i like these crostinis, i think i am liking cooking too!
Recipe from Tomcat in the Kitchen
Chicken and Cheese Buns
My incompetence in cooking magnifies itself whenever i make savoury buns.

With so many choices for a filling out there, i had to fall back on either frozen sausages or canned Spam.
Just because i didnt know how to grill, sautee, or stir fry for the life of me.

Today’s chicken and cheese buns are not any different. I’ve suckered and used frozen chicken nuggets.
I know… frozen chicken nuggets. How lame can i get?
Well, at least i wrapped some cheese in it,
piped tomato sauce on the surface, and sprinkled some dried herbs over.

And my family will just have to swallow the unfortunate situation and stomach these for now.
Chicken and Cheese Buns
For the Bun recipe, CliCk HERE
Hidden Cheese and Spam Burgers
Just the usual bread dough, stuffed with cheese and SPAM

And it’s pretty easy too. I just rolled the bread dough into a square, lay the cheese and Spam on the bottom half of the square, fold the top half over the filling, and seal it at the edges. Bake, and

cut them as desired!
It’s like having a hidden Burger!
The Rabbits and the Lamb Buns
Instead of making Hot Cross Buns to celebrate Easter this year, i made these bun(nies)

This bunny definitely taste better than rabbit foods.
And they are pretty easy to make too.
It started with a dough looking like this.

I have stuffed a generous ball of Pineapple Jam within the rabbit head and a line of the same jam along the ears.
See the ball of golden pineapple jam? (Sorry wabbit for the surgery)
As for the facial features, i just melted a bit of chocolate and drew them on.

Pretty easy right?
And since i was already on the hare-y journey, i have decided to get acquainted to another hairy friend.
The lamb
Unlike the bunnies, big guy here is pretty huge.

Each bunny is made of one ball of dough (pictured on the right), weighing 35 grams. So u can pretty much imagine how many bunnies it would make to make up Big guy here.
Anyways after baking in the hot oven, big guy here gets lotioned with good moisturising mayonnaise,

The hairy business comes next

I have used Chicken floss for “hair”.
While this lamb may look all fluff and airy without much substance, i promise you that it is not. Because within each ball of dough, i have fitted a mini sausage.

Like so.
And as usual, i have used my bun recipe to make the dough for this.
Happy Easter everybuddy!
Garlic Cheddar Rolls
This would be one of the very rare moments when I post something savoury.

A crown of cheddar cheese rolls, topped with sliced cheese and dried herbs. Breakfast fit for the kings, or at least the kings dwelling in my house.
These buns are made from my Rotiboy bun recipe. I wanted to have ultra soft rolls which can remain moist and tender overnight without having to be reheated for breakfast the next day. Because Kings don’t do things like re-heating. I dont even think they know how to work the oven.

As you can see, i have retarded shaping skills. They were supposed to be perfect rounds, not irregularly egg shaped.

Here is one of the weird eggs, haphazardly pulled apart from its circle of friends.

And what’s going on underneath that cheesy exterior?
MORE cheese of course. I absolutely loved the cave the cheese made within each bun.
I used a sliced cheese for each bun. I tore each slice into mini pieces and stuff them into the dough. The cheese will melt, coat the walls of the hollow and turn chewy, making it my favourite part of the bun.

While the buns may remain soft and moist for extended periods of time, these buns taste best when they are served warm. The cheese in them would be in its gooey, semi-molten state when warm. Poor kings, if only they knew how to on the oven.
The buns get brushed with garlic butter the minute they get out of the oven. The butter will ensure the skin of these buns to remain flexible and soft, while the garlic will just enhance the delicious aspect of these buns. Cheese, herbs and garlic. Who can go wrong with that?

For the Bread Dough
Adapted from and Indonesian Cookbook Roti Unyil by Chendawati (Please pardon my poor translation)
Ingredients A
700 gr Bread Flour
300 gr AP Flour
250 gr Sugar
5 Egg Yolks
2 Egg Whites
150ml Evaporated Milk
275 Iced Water
20 gr Instant Yeast
10 gr Bread Softener *
50 gr Milk Powder
Ingredients B
75 gr Butter
75 gr Margarine
50 gr Butter Substitute **
10 gr Bacom (Bread emulsifier) *
15 gr salt
*( U can omit these if you like, but i think they really helped in making the bread that much softer and moister)
** These are butter flavoured margarine.
1. Combine Ingredients A till the dough stops sticking all over the surface and starts getting tacky and elastic.
2. Gradually add ingredients B and knead till the dough gets so elastic, you are able to stretch it into a thin membrane.
3. Gather the dough into a ball, and leave it covered for its first proofing for about 30 mins.
4. Punch down the dough, and scale the dough into balls weighing 30 grams each. Let them rest for 15 minutes, covered.
5. Roll the dough, fill with sliced cheese, seal, and shape it into rounds.
6. Let it proof for a second time till it doubles in size (60 minutes).
7. Brush the surfaces with some evaporated milk, and put a square slice of cheese over it. Sprinkle with dried herbs.
8. Bake at 160 degree CELCIUS or till cooked. The surface will turn a gorgeous shade of golden brown (about 20 mins).
9. Pull bread from the oven and brush some melted garlic butter over it.
10. Store in airtight containers.
This post has been submitted to Aspiring Baker #6: Say Cheese, hosted by Jean of needmorenoms. Thanks for hosting Jean!
Buns, buns, buns
Besides the common round buns, these are some of the other shapes that the Asian sweet bread buns take form

The caterpillar buns
For instructions on how to shape these buns, head over to Happy Home Baking
and,

and the sakura buns. I don’t have a reference on how to shape the sakura buns. But it is pretty easy. You just filling in the dough as per usual, flatten it a bit and using a knife make 5 mini slits around the circumferece bread at regular intervals before you leave it to proof.
Both of the fillings for these buns are made with store bought red bean paste, while the recipe for the dough is the same dough i used for my rotiboy.
The recipe that never fails to produce the softest, and moistest breads.

Rotiboys
What’s the weird saucer looking thing on my plate?

Commonly known as “rotiboys” or “mexican buns”, these UFO looking things took the world by storm quite a few years ago. Most of the people living in Asia would probably need no introduction to these, but for those of you who are unfamiliar, these are actually pillow soft Asian buns with a slightly crispy, coffee scented topping.

In fact, if i were to describe them, these rotiboys are like buns with a piped cookie topping.
They are usually filled with diced unsalted butter. But i decided to stray and filled mine with chocolate… again ( this blog is getting too predictable isn’t it?)

The name “Rotiboy” is actually a brand which made this type of buns famous, and soon after, the name got attached to the product, just like how tissues are sometimes called “kleenex”
Of course, after seeing the success of Rotiboy, every other family member wanted a piece of that fame, and names like “mama buns” or “roti papa” came about.

Not that i mind of course, i find that most of these replicas are almost as good as the original Rotiboy.
And this happens to be one of those replicas!

Crispy, cookie skin covering a soft and moist bread with a chocolate filling.

Or can i call it the “Roti Girls”?
RotiBoys
For the Bread Dough
Adapted from and Indonesian Cookbook Roti Unyil by Chendawati (Please pardon my poor translation)
Ingredients A
700 gr Bread Flour
300 gr AP Flour
250 gr Sugar
5 Egg Yolks
2 Egg Whites
150ml Evaporated Milk
275 Iced Water
20 gr Instant Yeast
10 gr Bread Softener *
50 gr Milk Powder
Ingredients B
75 gr Butter
75 gr Margarine
50 gr Butter Substitute
10 gr Bacom (Bread emulsifier) *
15 gr salt
*( I think U can omit this if you like, but i think this really helped in making the bread texture, making it that much softer and moister)
1. Combine Ingredients A till the dough stops sticking all over the surface and starts getting tacky and elastic.
2. Gradually add ingredients B and knead till the dough gets so elastic, you are able to stretch it into a thin membrane skin.
3. Gather the dough into a ball, and leave it covered for its first proofing for about 30 mins.
4. Punch down the dough, and scale the dough into balls weighing 30 grams each. Let them rest for 15 minutes, covered.
5. Roll the dough, fill with chocolate filling, and seal it in.
6. Let it proof for a second time till it doubles in size (60 minutes).
7. Pipe toppings onto the surface of the unbaked dough
8. Bake at 200 degree CELCIUS till the surface looks crispy and brown (about 10 mins)
For the Chocolate Filling
20 gr Cocoa Powder
30 gr Milk Powder
100 gr Icing Sugar
100 gr Margarine
1/2 tsp Vanilla essence
Mix all ingredients together till well combined.
For the Coffee Topping
50 gr Buter
50 gr Margarine
100 gr Icing Sugar
100 ml Egg whites
120 gr Cake Flour
20 gr Milk Powder
1 TBS Coffee Paste
Mix all ingredients together till they are well combined.
In-built Hot Dogs
So while the most common way of eating a hot dog is to take a hot dog bun, slice it in the middle, stuff it with the hot dog and pile and/or squirt your favourite sauces and relishes, i decided to plant the sausages in the dough.

That makes convenient eating doesn’t it?
You can just pick one up as you walk out the door.
But of course having said that, there is also the drawback of not having the full fledged hotdog, and the obligated fresh tomatoes and lettuce. Because while i managed to incorporate the sausages into the dough and sent it to bake, i dont think i can do like wise with the fresh vegetables. Not unless i want a vegetable slushie in my hot dog anyways.
So, while it is tempting to just forget the greens (or red) altogether, i decided to serve in on the side instead.

With the hope of whoever is getting a plate of this would not just pick up the hot dog and leave the rest uneaten.
This is the third yeasted bread i made with the help of the bread softeners, and like the previous two, these buns were also cotton soft. However, there is a slight deviation from the first recipe with this. This recipe had more water, and lesser fat content, and instead of using a combination of AP and bread flour, this recipe called for 100 percent bread flour.
Due to the high water content, this was a wet wet dough, and it sticks to any and every surfaces. And like a cane to every naughty child, it’s good to come armed with a scrapper to handle this bugger.

The resultant buns from this recipe was also rather different. Although they both share the same level of softness, the pores on this buns are more structured and less fine. As such, each pore pocket is able to house more air, creating a bun that was more aerated, and thus fluffier.

Okays, sorry to bore with all the boring scientific details, let’s go back to hot dogs.
I drew a circle of tomato sauce and a sprinkle of dried mixed herbs to garnish these hot dogs, and was really surprised by how those few specks of herbs was able to knock me giddy with the most aromatic scents as i first opened the oven door to retrieve the dogs.
And of course, a dip of the mandatory tomato sauce (i ran out of mustard) doesnt hurt either!

Soft Bread Dough
(Adapted From Roti Modern)
Ingredients A
1 kg Bread Flour
15 gr Instant Yeast
Ingredients B
30 gr Milk Powder
200 gr Sugar
12 gr Salt
10 gr Bread Softener
Ingredients C
125 gr Egg
80 ml Evaporated Milk
460 ml Iced Water
Ingredients D
50 gr Butter
50 gr Margarine
50 gr ButterSub (A butter subtitue)
1. With the mixer on low speed, mix ingredients A together, add ingredients B and C, continue beating till they are well combined
2. Add ingredients D gradually, and beat till it gets tacky and elastic
*note I hand kneaded this
3. Leave the dough to proof till it doubles in size (+- 40 mins)
4. Punch the dough down, and scale them to 50 grams each. Let the scaled buns rest for 5 mins
5. Roll the scaled dough like a rope, and twirl it around each sausage and let rest for a second proof till they double in size (+- 60 mins)
6. Brush the surfaces with evaporated milk and sent it to bake at 180 degree Celcius or till they get a nice golden tan
Hot Cross Buns
I had the “hot cross bun” song in my head the whole time i was making these. My subconscious brain just seemed to have the song on “repeat”. It was quite annoying actually, considering that it was one of my least favourite nursery rhyme.

But song or no song, i am glad i made these though.
After all, Good Friday and Easter are just around the corner.

Okay, who am i kidding? With about a month or so away, Good Friday and Easter are not exactly around the corner. But after that chocolate rolls, i just wanted to find another excuse to make another batch of ultra soft, ultra moist and ultra chewy yeasted buns.

Plus it’s always good to be armed with a good recipe right?
While the original hot cross bun is spiced and studded with dried fruit, mine was plain, and filled with custard.

The same custard which i used to pipe the crosses over the surfaces of these buns

And like the chocolate rolls, the recipe really lived up to its name and worked its magic again in creating the most tender crumbs and the finest of pores. And I absolutely loved how the subtly sweet soft bread carresed my tongue and the roof of my mouth. These buns are perfect for breakfast, with a cup of tea.

Now, all i need is for the song to stop treadmilling in my head!
Recipe for the yeasted bun Here!
Chocolate Cupbread
So while everyone needs no introduction to the universally celebrated cupcakes, i shall present cupbreads!

Here in Indonesia, these breads are known as “bloeder”, or sometimes spelt as “bluder”. And I am guessing, from its name, it is probably western influenced. These breads are very much like French Brioche, without small head of a dough on top of it.

Similar to the brioche, the bloeders is very high in both butter and egg content, they are indeed very rich and tender crumbed. I don’t even think you need to chew on these. Besides butter and egg, these bread are also very high in sugar content, which makes it pleasantly sweet tasting even when eaten on its own. But having said that, still, i have decided to fill them up with a generous chunk of milk chocolate. Because really, since i am already eating something sinfully delicious, why not go all the way? LOL

The proofing time for this bread takes a wee bit longer than usual. I suspect it might be because of all that butter and sugar, which might dampen the yeast activities. The total proofing time for this bread was about three hours, and in my tropical weather, that’s considered very, very long.
The dough for these bloeders are also quite different from the dough i am used to. Being high in butter content, these breads are very slimy. My hands kept sliding off the dough as i tried to knead it. Sealing the chocolate chunks within the dough was also not easy with the grease coating all over the dough.

As for the texture of the final product, these breads are so fluffy that you tear a huge chunk off these bread, thinking you will get full after a few mouthful, but in reality, being voluminous looking because of air, these bites just dissolve into nothingness.And you risk looking like a glutton when u reach for your second piece.
I also think i might have overbaked this dough as it turned out quite dry and crusty at the sides, and i must definitely keep closer watch over these next time!

Chocolate Filled Cup Breads
Recipe from an Indonesian cookbook “Roti sisir & Roti Sobek” by Lanny Soechan
15 egg yolks
250 gr granulated sugar
1 kg bread flour
20 gr instant yeast
50 gr milk powder
300 ml fresh milk
250 gr butter
1 tbs salt
some chocolate chunks
some evaporated milk
some chocolate chips
1. Beat egg yolks and sugar till it thickens and turns pale yellow
2. Combine flour, yeast, and milk powder. Add in the egg yolk mixture gradually and stir till well combined.
3. Add in the fresh milk, salt, and butter. Knead till elastic
4. Leave to proof till double in size
5. Punch down dough, cut and weigh each dough to be about 60 gr. Wrap the chocolate chunks within each dough and drop them into papercups. Let it proof a second time till double in size.
6. Brush the surfaces with evaporated milk and sprinkle some chocolate chips.
7. Bake at 160 degree celcius till the surfaces turn a nice golden brown.
Have a SPAMming Good time!
Its the weekend again! which means i get to muck around in the kitchen the whole day without the usual weekday morning rush. Translated, that means i get to spend some precious time with yeast and play some dough.

I have decided to go on savoury for this one, since all of us know that there is enough dessert items in this blog to last us a couple of lifetimes. So i settled on this bacon and cheese bread from Happy Home Baking – A loaf bread studded with bacon bits on topped with shredded cheese.
I’ve made a few changes though, making do with whatever i had in my pantry. I subbed bacon for canned luncheon meat (or better known as SPAM), mozarella cheese for cheddar, and added my own dried herbs to the party.

So i kneaded the dough and waited for the first rise, and kneaded, and waited some more for the second rise, (now you see why i need the weekend?) before i was able to pop them into the oven.
I was really surprised by how much further the dough grew in the oven. What went in as an average heighted loaf, promised a much taller outcome. A good payoff, to put it in financial terms.

The only drawback i had on this was the kink at the sides of the bread. Instead of a square loaf, my loaf had a waist, which i suspect was due to me taking out the bread too soon.

Nevertheless, i am still pleased at how cottony soft and moist this bread turned out. It’s a good contrast the to slightly crusted cheese on top. Needless to say, between the cheese and luncheon meat, this bread is good enough to be eaten on its own.
So go SPAM!
(Taken from Happy Home Baking)
Ingredients
A:
3 slices of bacon; finely chopped
1/2 tsp black pepper
B:
250g bread flour
15g caster sugar
1/2 tsp salt
1 tsp instant yeast
150ml water, lukewarm
20g unsalted butter
C:
40g grated mozzarella cheese
1/8 tsp black pepper
some dried parsley
Method:
- Pan-fry finely chopped bacon over low heat, until brown and crisp. Drain off any excess oil and mix in the black pepper. Set aside to cool.
- Place all ingredients B, except the butter, in the pan of the bread machine (according to the sequence as stated in the instruction manual of your bread machine). Select the Dough function of the bread machine and press start. After about 8mins of kneading (the ingredients should form a smooth dough by now), add in the 20g of butter. Let the machine continue to knead the dough. After the kneading cycle has stopped (20mins), Stop and Restart the machine. Continue to let the machine knead for another 10mins.
- Add in the bacon and black pepper mixture and let the machine run for another 1~2 mins until the bacon mixture is incorporated into the dough.
- Stop the machine and remove dough from the bread pan. Shape the dough into a smooth round and place in a lightly greased mixing bowl, cover bowl with cling wrap and let dough rise till double in volume for about 80 ~ 90 mins.
- Remove dough and give a few light kneading on a lightly floured work surface. Press out the trapped air as your knead. Shape into a round dough and cover with cling wrap, let the dough rest for 15mins.
- Flatten and roll out the dough into a rectangular shape (20cm by 15cm). Roll up swiss roll style and pinch the seam in place. Place dough in a loaf pan (size, 7.5″x4″x4″, lined with parchment paper, both bottom and sides), seam-side down. Cover with cling wrap and let dough proof for 50~60mins or until the dough reaches about 90% of the height of the pan.
- Sprinkle top with grated cheese, black pepper and some dried parsley.
- Bake at preheated oven at 190 degC for about 30mins until the bread is golden brown all over. Cover the top with a sheet of aluminum foil if the surface browns too quickly.
- Remove from oven and unmold immediately. Let cool completely before slicing.
Recipe adapted from 孟老师的100道面包
Happy Donuts
I was looking over my archives when i realized that it’s been ages since i mucked about with yeasted dough. 
I guess i was somewhat put off by the labour and time intensive effort involved.
Between all that kneading, rising, and re- rising, yeasted breads are definitely something i would never attempt for breakfast on a weekday morning.
But it’s a happy, sunny Sunday today. I jumped at this opportunity to make doughnuts, a classic favourite in this household.

Especially when they are dipped in chocolate and sprinkled with colours.

And this green one is just for u, St. Pat’s, cause your big day is just around the corner!

(Taken from Alan Ooi)
Ingredients;
(A)300g high protein flour
200g plain flour
80g sugar
5g salt
20g milk powder
10g yeast
(B) 230ml water
1 medium egg
(C) shortening/oil/butter/margerine
Methods:
1. Combine (A), add in (B) and knead into dough. Add in (C) and continue knead until smooth, elastic and shiny dough.
2. Cover the dough and let it proof for 30 minutes (double bulk), Roll out the dough for 1cm thickness.
3. Use doughnut cutter to cut out doughnuts, let it on tray and proof for another 20 minutes (double bulk).
4. Use medium heat to deep-fry the doughnut till golden brown. Remove, place on absorbent paper.
Unsliced Bread may be the greatest thing since Sliced bread

I am sure many are familiar with the quote “….. is the greatest thing since sliced bread. I don’t know how the quote came about, but i am guessing sliced bread must have pretty much taken the world by storm to be quoted in such a timeless fashion.
Sure, sliced bread is great, it takes away that nerve wrecking task of bread cutting. And if you don’t own a serrated knife, you definitely will appreciate pre-sliced bread more than your counterparts with a serrated knife.

I am fortunately a proud owner of a serrated knife, and i do enjoy slicing my own bread. And let me tell you how wonderful it is to be baking my own bread, a sandwich loaf no less.

It will probably take your whole afternoon. So, don’t expect to serve this for breakfast the morning you decide to start baking. Don’t let that scare you though, for all that time intensiveness, you do get much loafing (no pun intended) around. That is of course, after u are done with the initial kneading stage. Once you are through that hurdle, all you have to do is pretty much wait around for the second, third, fourth … rising (I told you it will take some time).
I seemed to have acquired the patience of a rock statue the day i made this bread. I followed the instructions, kneaded my dues and then goofed my afternoon away with a little kitchen timer in my hand to remind me of the next “session” i have with my dough, be it the next punch down, or the next shaping… etc. I didn’t for one regret though, at the end of all that timed activities, i got myself a soft crumbed tall sandwich loaf 🙂

Yup, all that goodness in a sliced bread minus all the harmful chemicals and preservatives. A good homemade sandwich loaf, which u can pretty much serve in any way you fancy.

Like with lettuce, cheese and tomatoes? (Sorry i ran out of Bacon to make this a regular BLT)

Or maybe with some blueberry jam?
That is of course the goodness you can get out of sliced bread. But waittt, there is more.
What about an UNsliced loaf? After all, the title is about unsliced loaves being greater than their sliced cousins right?
Surely there are some goodness in that too?
Right ON!

We make bread boxes out of sandwich loaves.
These bread boxes, better known as Honey Toasts are very popular as asian desserts. I believe they may have originated from Hongkong.
Basically, the interior of the bread is removed via a slit made at the bottom of the loaf. They are then buttered and given a light toasting before they are replaced back in the bread boxes with a drizzle of honey. They are usually topped with ice cream and u can imagine how wonderful it is when the ice cream melts and soaks up the underlying bread pieces.

I however, replaced the ice cream with Rum pastry cream as i was gifting these to my friends and there was no way ice cream could have survived the journey.
I arranged the fresh fruits over the pastry cream and gave it a light coating of honey for an added touch of sweetness and shine. 🙂
So let’s get loafing!
Recipe from Happy Homebaking Thanks for sharing!!
Ingredients:
(makes one 11cm x 11cm x 20cm loaf)
75g bread flour
53g boiling water
100g bread flour
60g water (room temperature)
1/4 teaspoon instant yeast
225g bread flour
10g milk powder
22g caster sugar
5g salt
4g instant yeast
143g water (room temperature)
60g overnight sponge dough
gelatinised dough from (A)
30g butter (cut into cubes)
Method:
Add the boiling water in (A) into the bread flour, stir and mix to form a rough dough. Cover dough and set aside to cool. Wrap dough and leave it to chill in fridge for at least 12 hrs. (Bring back to room temperature before using.)
Mix bread flour in (B) with instant yeast. Add water and mix to form a rough dough. Cover dough let it proof for 30mins. Wrap dough and refrigerate overnight. Note: only 60g is required. Bring back to room temperature before using.
- Mix together bread four, milk powder, caster sugar, salt and instant yeast in a mixing bowl. Make a well in the centre, and add in water and overnight dough. Knead to form a rough dough. Knead in gelatinised-dough.
- Transfer dough to a lightly floured work surface. Knead the dough till smooth. This should take about 10mins. Knead in the butter. Continue to knead the dough until it no longer sticks to your hand, becomes smooth and elastic. This should take about another 15~20 mins. Do the window pane test: pinch a piece of the dough, pull and stretch it. It should be elastic, and can be pulled away into a thin membrane without tearing/breaking apart easily.
- Place dough in a lightly greased (use vegetable oil or butter) mixing bowl, cover with cling wrap and let proof in room temperature (around 28 to 30 degC) for about 60mins, or until double in bulk.
- Remove the dough from the bowl and give a few light kneading to press out the gas in the dough. Divide the dough into 3 equal portions. Roll each dough into smooth rounds, cover with a damp cloth or cling wrap and let the doughs rest for 10mins.
- On a lightly floured work surface, flatten each dough and roll out to form a longish oval shape. Starting from the shorter end, roll it up swiss-roll style. Leave the doughs to rest for another 10 mins.
- Flatten each dough and roll it out again to form a long rectangle (around 30cm x 10cm). Flip the dough over and roll up swiss-roll style, roll up as tightly as possible. Pinch and seal the seams. Place the three doughs, seam side down, in a well greased (with butter) pullman tin.
- Cover with damp cloth or cling wrap and leave doughs to proof for the second time for about 50~60mins, or until the pan is 80% full. Cover the lid (well greased with butter) and bake at 220degC for 35mins. Unmold immediately and once cool store in an airtight container.
Rockin’ the Rolls

After yesterday’s less than satisfactory bread, i was itching to make something that will redeem my faith in my breadmaking.
So, i went back to my true, tried and tested recipe, and switched from cinnamon to chocolate. The process was just like visiting an old friend, i knew know what to do, what not to do, what to expect and and what not. It was quite relaxing, if not comforting.
I kneaded the dough for a good 30 minutes, and was rewarded with the smoothest and silkiest dough which was able to pass that elusive window pane test. All it took was some patience, and persistence if you must.
I left the dough to proof for about an hour, which was more than enough when u have a hot, humid climate like mine ( i live in Indonesia). By the end of the hour, the dough has more than tripled in size! i was a bit worried that i might have overproofed it, and that it might taste sour later on. But thankfully none of that happened.
As for the filling, instead of the usual cinnamon sugar i settled on chocolate chips today, just because, u can never go wrong with chocolate.
I moved at a leisurely pace as i rolled the dough into a log, sliced it, and let it proof a 2nd time. Just because it’s a Sunday, and i didnt have to worry about the office, or anything boring like that. A very indulgent baking session, really.
The dough went into the oven for a good 20-25 minutes.

and after all that time in the oven, i pulled out a pan of golden brown deliciousness.
Which was promptly drizzled with chocolate, of course

Next, came the final test,
the texture of the bread.
I pulled at the first roll and soft fluffy goodness greeted me. The texture was somewhat like a sandwich bread, a fresh one. The roll was so soft i had to collapse it sidewards, and use the gentlest sawing motion with my serrated knife.

aahh, thats about right for Asian styled sweet bread.
For dough recipe, refer to my older post, HERE.
What a Happy Sunday Breakfast.
Floss Roll Bread

After all the cakes and cookies i have baked in the past couple of days, i have decided that something heartier, (and healthier) was in order. These chicken floss rolls are no strangers in Asian bakeries. They make pretty good breakfast items.
Instead of its usual bun shapes, this Asian-type sweet, soft bread was baked in a jelly roll pan. It is then spread with a thin layer of mayonnaise and rolled into a log over a bed of floss ( in this case chicken). If you’ve ever made Buche De Noel, this will be easy peasy for you.
Like my previous bout with yeasted bread, this recipe also requires a water roux to be made before the kneading and all that jazz. I’ve been told that this method extends the moisture keeping qualities of the bread. I guess it does help somewhat.
Between this recipe and the previous, this one however seems rather on the dry and tougher side. Don’t get me wrong, they are not, u know, bad, but they just dont live up to my expectations, which was lifted rather high from that previous recipe.
I was quite disappointed that after all that kneading (i hand kneaded these for about half an hour!!), i was not quite rewarded with what i anticipated. Then again, it might be due to overbaking on my part, or the fact that the dough is rolled thinly, but I am sticking to the old recipe for now.
Of course, an additional spread of mayonnaise and a dunk in the floss on the surface wouldn’t hurt too!

For a more successful version of this, head over to HappyHomeBaking. Thanks for sharing the recipe!
Seaweed Pork Floss Rolls (65degC TangZhong)
Ingredients
(makes 6 rolls)
20g bread flour
100ml water
195g bread flour
90g cake flour
30g caster sugar
12g milk powder
6g salt
6g instant yeast
60g egg, lightly beaten
65ml water
75g water roux (tangzhong)
45g unsalted butter
chopped spring onions
sesame seeds
seaweed pork floss
mayonnaise
- Place 20g bread flour in a saucepan. Add 100ml water, mix till smooth, making sure there are no lumps of flour. Cook over medium to low heat, stirring constantly with a hand whisk to prevent it from burning. Within 1 to 2 mins, the mixture will start to thicken, stop when you see traces in the mixture for every stir you make with the hand whisk. (Take a look at the video clip here. ) The 65degC tang zhong is ready. Immediately transfer the hot tang zhong into a bowl and cover it with a cling wrap, making sure the cling wrap sticks onto the surface of the mixture. This is to prevent a film from forming on the surface. Leave to cool completely before using it. Measure 75g for the recipe, there will be a little bit of leftover.
- Mix all the dry ingredients in a mixing bowl. Make a well in the centre and add in the egg and tang zhong. Reserve about 20ml of water and add the rest into the mixing bowl. Mix the ingredients with hand and slowly form into a rough dough. Add in a little of the reserved water if the mixture is too dry.
- Transfer dough to a lightly floured work surface. Knead the dough till smooth. Add in the remaining water a little at a time, knead well after each addition. (This way, the dough will not be too wet and sticky). Use up all the water. The whole process should take about 10mins.
- Knead in the butter. Continue to knead the dough until it no longer sticks to your hand, becomes smooth and elastic. This should take about another 20 to 30 mins. Do the window pane test: pinch a piece of the dough, pull and stretch it. It should be elastic, and can be pulled away into a thin membrane without tearing/breaking apart easily.
- Place dough in a lightly greased (use vegetable oil or butter) mixing bowl, cover with cling wrap and let proof in room temperature (around 28 to 30 degC) for about 40mins or an hour, or until double in bulk.
- Turn dough out onto a lightly floured surface and give a few light kneading to press out the gas. Roll into a round dough. Cover with a damp cloth or cling wrap and let the dough rest for 15mins.
- Roll out the dough into a rectangular shape to fit a 30cmx40cm baking tray (I used a 10″ by 14″ tray). Place dough in baking tray(lined with parchment paper). Cover and let it proof for around 30~40 minutes.
- Use a fork to poke holes all over the surface of the dough (this is to ensure the bread will not puff up too much during baking). Brush with egg wash then sprinkle with chopped onions and sesame seeds. Bake at 170~180degC for about 15 minutes (do not over bake).
- Remove bread from tray and leave to cool. Invert the bread on a parchment paper. Cut a few slits along the longer edge of the bread, make the slits only half-way through the bread do not cut through. The slits will make rolling up the bread easier.
- Spread a thin layer of mayonnaise on the surface and sprinkle with pork floss. From the longer edge, roll up like a swiss roll. Wrap the bread roll with the parchment paper. Secure and leave it for about 30mins so that the roll can stay in its shape without unrolling. (I tried to tape it down, but the tape couldn’t stick onto the parchment paper, so I had to use stripes of paper to secure the roll.) Trim away the edges and cut the bread into 6 portions. Spread the cut sides with some mayonnaise and coat with pork floss.
Best Cinnamon Rolls. Ever.

You will probably do a jiggle as you bite into your first bun. After a couple more, your body may start to jiggle.
I don’t exactly know the calorific content of these babies. The buns are probably quite harmless, with only a scant amount of butter. Adapted from HHB’s recipe, these buns were really soft and fluffy, just like she promised. Definitely a recipe for keeps.
As for the glaze, they are to-die-for.
As you can see from the picture, the glaze seemed pretty thin, and it spreads out quite a bit.. But i don’t think i could have added any more sugar to help thicken it out.
You see, i have added half a kilo into that glaze. Yes, half a kilo. That’s quite a lot for about a cup full of glaze.
But boy, are they good. When i was making the glaze, it took some massive willpower for me not to just drink the mixture and call it a day. There is maple, coffee, butter and sugar in the glaze. All agreeable ingredients in my book.
Try these buns, give them to your friends and family, and bask in the glory of their praises.
Amen.
Cinnamon Rolls (adapted from happy home baking)
(makes 9)
25g bread flour
125ml water
210g bread flour
56g cake flour
20g milk powder
42g caster sugar
1/2 tsp salt
6g instant yeast
30g egg, lightly beaten (about half an egg, reserve the leftover for egg wash)
85g water
84g tang zhong (water-roux)*
22g unsalted butter
1 teaspoon cinnamon powder (this amount is just right for my kids, use more if desired)
30g sugar (I used raw sugar)
25g unsalted butter, melted
Method:
Place 25g bread flour in a saucepan. Add 125ml water, mix till smooth, making sure there are no lumps of flour. Cook over medium to low heat, stirring constantly with a hand whisk to prevent it from burning. Within 1 to 2 mins, the mixture will start to thicken, stop when you see traces in the mixture for every stir you make with the hand whisk. (Take a look at the video clip here . ) The 65degC tang zhong is ready. Immediately transfer the hot tang zhong into a bowl and cover it with a cling wrap, making sure the cling wrap sticks onto the surface of the mixture. This is to prevent a film from forming on the surface. Leave to cool completely before using it.
Mix all the dry ingredients in a mixing bowl. Make a well in the centre and add in the egg, water and tang zhong. Mix to form a rough dough. Transfer dough to a lightly floured work surface. Knead the dough till smooth. This should take about 10mins. The dough is quite wet and sticky, it helps to have a dough scraper on hand to scape up the dough as your knead.
Knead in the butter. Continue to knead the dough until it no longer sticks to your hand, becomes smooth and elastic. This should take about another 20 to 30 mins. Do the window pane test: pinch a piece of the dough, pull and stretch it. It should be elastic, and can be pulled away into a thin membrane without tearing/breaking apart easily.
Place dough in a lightly greased (use vegetable oil or butter) mixing bowl, cover with cling wrap and let proof in room temperature (around 28 to 30 degC) for about one hour, or until double in bulk.
Mix cinnamon powder and sugar together. Reserve about 1 teaspoon of the mixture.
Remove the dough from the bowl and give a few light kneading to press out the gas in the dough. Roll the dough into a rectangle, about 30cm by 25cm, 1/2 inch thick. Brush surface with melted butter. Sprinkle the cinnamon/sugar mixture over the dough surface. Roll over the surface with a rolling pin, this is to make sure the fillings will stick onto the dough.
From the longer end (30cm), roll up the dough to form a long log (ie 30cm in lengh). Pinch the edges to seal. Place the log seam side down, trim off the two ends. With a sharp knife, cut the roll into 9 equal pieces, about 3cm each. (To get even rolls, use a dental floss to slice the log. Position a long string of dental floss under the log, hold the two free ends, criss-cross over the top of the log, pull the two ends to cut the roll. Tip from cookbook, 天然麵包香, Natural Bread Made Easy.)
Arrange the rolls cut-side up in a greased (or lined with parchment paper) 20cm square pan or any suitable baking tray. Leave some space in between the rolls to allow them to expand. Cover with damp cloth or cling wrap and leave doughs to proof for the second time for about 45mins, or until double in size.
Brush top with egg wash (mix leftover egg with 1 tbs water) and sprinkle the reserved cinnamon sugar mixture over the top. Bake in pre-heated oven at 180 deg C for 15-20 mins or until golden brown. Remove from oven and once cool store immediately in an airtight container.
- MAPLE FROSTING: (Adapted from Pioneer Woman )
- 1 bag Powdered Sugar
- 2 teaspoons Maple Flavoring
- ½ cups Milk
- ¼ cups Melted Butter
- ¼ cups Brewed Coffee
- ⅛ teaspoons Salt
mix together all ingredients listed and stir well until smooth. It should be thick but pourable. Taste and adjust as needed. Generously drizzle over the warm rolls. Go crazy and don’t skimp on the frosting.
We taste like the rainbow too!

These buns are baked. Not fried…
That means you can eat another one. Or another four or five..
Then u would want to pack them up to bring to the office. Because you want to share the love with your co- workers.
Or because you couln’t trust yourself with the remaining buns.
Besides being inherently yummy, these buns are also a breakthrough. If u’ve ever baked bread before, you would know about the direct relationship between the yeast lifespan and the flavour from the final bread.The longer u let the little organisms thrive, the yummier ur bread gets.
But with these buns, i experimented with yogurt. The slightly sour taste from yogurt seems to emulate the flavour that comes from aged yeasts. As u can guess, no overnight sponge was needed for this buns. Definitely for a spur- of- the- moment baking itch!
Try it:
300 gr Bread Flour
100 gr AP
20 gr milk powder
75 gr sugar
8 g instant yeast
1 egg, lightly beaten
50 gr yoghurt
150 ml cold water
75 gr butter
1 tsp salt
For Glazing:
Evaporated milk
1. Mix the flours, milk powder, sugar and instant yeast
2. Add egg, youghurt, and water gradually while mixing. Knead till u get a shaggy dough. Add in butter and salt. Knead till elastic. Let proof for 30 minutes.
3. Punch down dough and scale it to 30 gr pieces. Shape it round.
4. Proof for 70 mins, glaze with milk
5. Bake at 190 degree C for 12 mins
Oh my, aren’t u a Cheesy Mess.

Okay, i think i might have gone overboard with the cheese. But no one is complaining.
The recipe called for a scant 40 gram of mozarella cheese. But i just had to do it my way and forcefully piled whatever amounts that would cling to the surface of the bread.
Oh, did i mention that it’s a loaf bread hidden underneath all that crusted golden brown goodness?
Yeah, just a regular sandwich loaf, topped with crazy amounts of cheese and baked to a golden brown perfection.
Sounds simple enough?
Sausage Rolls

This morning i got up, and prepped myself for a good arm workout.
I am talking about 30 whole minutes of hand kneading half a kilo of bread dough.
That’s an achievement for someone as exercise deprived as me. I know i should be doing something about that fact.
I will get to that.
But first, lemme just lament on how soft and chewy these sweet breads are.
And not forgetting moist. Cause no one likes stale dry breads… Definitely not asians, where bakeries run aplently with sweet soft breads with every imaginable fillings and toppings.
Try it, if u already havent!
Basic Sweet Bread Dough
(adapted from “Magic Bread” by Alex Goh)
Ingredients A :
100gm bread flour
70gm boiling water
Ingredients B:
300gm bread flour
100gm plain flour
80gm sugar
6gm salt
20gm milk powder
9gm instant yeast
Ingredients C :
175gm cold water
60gm cold eggs
Ingredient D :
60gm butter
Method :
1. Add the boiling water from A into flour, mix until well blended to form dough. Cover and set aside to cool. Keep it into refrigerator for at least 12 hours.
2. Mix B until blended. Add in C and knead to form rough dough. Add in A and knead until well blended.
3. Add in D and knead to form elastic dough.
4. Let it proof for 40 minutes.
5. Divide the dough into required weight and mould it round. Let it rest for 10 minutes and ready to use.
Garlic Bread Baguette

I didnt take the shortcut making these. I learnt my lesson and went about making these breads the old, traditional way.
I got home late in the evening, and painstakingly took out my kitchen weighing scale, bread flour, and instant yeast (i am a morning baker. i am not a big fan of being in the kitchen in the evenings). I then proceeded to make my scalded and sponge dough, recipe below.
Thereafter, i let the whole party of ingredients in the refrigerator and wait for the instant yeasts to do their thang. I like yeast. They kind of remind me of the little elves who helped the shoemaker at night.
This A.M, i took out the said sponge dough from the refrigerator. I mixed, kneaded, proofed, baked as according to instructions. And i must say, the end results are a far cry from the previous baguette i made without the sponge.
I guess when the bakers gave instructions to make a sponge, they weren’t actually just trying to make life difficult for others. These garlic bread are way more flavourful than the previous baguette. They are also chewy and moist within. Double points!
Recipe: From Alex Goh’s Magic Bread
Ingredients I:
60 gr Bread Flour
45 gr Boiling water
Ingredients II:
240 gr Bread Flour
6 gr Sugar
6 gr Salt
4 gr Instant Yeast
Ingredients III:
135 gr Cold Water
75 gr Overnight Sponge *
Ingredients IV:
15 gr Butter
Method:
1. Add the boiling water from I into the flour, mix until well blended to form dough. Cover and set aside to cool. Refrigerate for 12 hours before using.
2. Mix II until well blended. Add in III. Knead to form rough dough. Add in I. Knead until well blended.
3. Add in IV to form elastic dough. Let proof for 45 minutes.
4. Divide the dough into 85 gr. Mold it round. Let rest for 10 minutes.
5. Flatten the dough and roll into oblong shapes. Let proof for 45 minutes
6. Egg wash the surface and cut the centre with a sharp knife. Place some garlic butter** onto it.
7. Bake at 220 degree celcius for 18 minutes
* Overnight sponge
100 gr Bread flour
60 gr water at room temp.
1/4 tsp instant yeast
Mix water and yeast until well blended. Add flour, mix to form dough. Proof for 30 mins, wrap and refrigerate overnight.
** Garlic butter
10 cloves garlic
100 gr butter
Parsley
Salt (not in recipe, but i added it anyways)
Sliced Garlic Bread

Sliced Garlic Bread
Remember the bleaarrgh baguette i made? The one that didn’t call for a sponge? Well, rather than leaving it around in the hope of someone will eat it, i decided to jazz it up by slicing it into pieces and slathering it butter that has been preseasoned with chopped garlic and salt.
Reheat these babies at 220 degree celcius with the buttered sides up for about 7-8 mins. Transform drab to Deelish!
The cake that looks like a giant Donut

U can’t see the insides of this cake. But it’s marbled, and i was too lazy to take another shot of the interior of the cake.
This recipe came from Rose Levy Beranbaum’s latest book, Heavenly Cakes, titled "Marble Velvet Cake" .
This cake did deliver what the book promises, a velvety, rich and moist butter cake that is part chocolate and part vanilla.
To top all that goodness, i drizzled a generous coating of the optional, but super yumm-eh, chocolate ganache over it.
This chocolate ganache totally won me over. Its glossy appearance turns matte when the chocolate has cooled and dried up. (YES! this chocolate ganache actually dries up in the tropical and humid climate i am in!)
Cool and dry chocolate ganache are a dream come true for me. Cakes with cool and dry chocolate ganache are travel friendly can be delivered messy- free to unsuspecting recipients, which in turn, gives me more room to bake. ^^
Recipe:
85 gr dark chocolate
112 gr egg yolks ( about 6)
242 gr sour cream (1 cup)
2 tsp vanilla extract
300 gr cake flour
300 gr superfine sugar
1 tsp baking powder
3/4 tsp baking soda
1/2 tsp salt
255 gr unsalted butter
1. Double boil or using the microwave, melt the dark chocolate
2. In a medium bowl, whisk together the yolks, 1/4 c of the sour cream, and vanilla till just combined
3. In a bowl of a stand mixer fitted with the paddle attachment, mix the flour, sugar, baking powder, baking soda and salt on low for 30 secs. Add butter and the remaining sour cream. Mix on low until ingredients are moistened. Raise the speed to medium and beat for 1.5 minutes. Scrape down the sides of the bowl.
4. Starting on medium low speed, gradually add the egg mixture in three parts. Beat on medium for 20 seconds after each additions to incorporate the ingredients and strengthen the structure. Scrape down the sides of the bowl.
5. Remove 1/3 of the batter (354 gr) to a bowl and stir in melted chocolate until uniform in colour. Scoop 1/3 of remaining batter onto prepared pan. Top with dollops of half the chocolate batter. Spread gently, but evenly. Top with another 1/3 of the plain batter, then dollops of the remaining chocolate batter. Spread evenly and top with remaining 1/3 of the plain batter, spreading it evenly over the top. Use a regular spoon to marbelize the batter lightly. Dip the tablespoon without touching the bottom or sides and lift up and over in a folding motion, 6 to 8 times, going all around the pan. Smooth the surface evenly.
6. Bake the cake for 50-60 minutes, or until a wire cake tester inserted between the tube and the side comes out clean, and the cake lightly springs back when lightly touched. The cake should start to shrink from the pan after removal from oven. During baking, it will rise above the centre tube, but on cooling, it will level from center tube.
7. Let cool in wire rack for 10 minutes before unmoulding.
Soft, Fluffy Pull-Aparts

These pull aparts are so wonderfully soft and fluffy. They surprisingly stayed moist despite being pulled at and left uncovered for hours.
These fluffers go well with good ole plain salted butter. I eat mine with butter and chocolate sprinkles because i just happen to have it around.
On second thoughts, I always have chocolate sprinkles around.It is pretty much a staple at my home. It’s probably the only thing my family members reach for to go with their white sandwich bread, besides Nutella.
Too bad we ran out of Nutella, and i had to settle for second best.
Blahs.
For those of u without choc sprinkles, here are some other ideas:
Peanut butter,
Strawberry jam,
or a slice of cheddar
Or Nutella…. (well, the list is pretty much endless..)
Recipe is from an Indonesian Baking Book titled : 100 Resep kue & Roti by Lanny Soecha
Ingredients I:
500 gr bread flour
50gr sugar
50 gr milk powder
7.5 gr instant yeast
3 gr bread improver
Ingredients II:
3 egg yolks
250 ml iced water
Ingredients III:
75 gr margarine
1 tsp salt
Ingredients IV ( beat together):
250 gr butter
125 gr icing sugar
50 ml sweetened condensed milk
Ingredient V:
evaporated milk ( For glazing)
1. Mix Ingredients I & II till well combined. Add Ingredients III and knead till the dough is no longer sticky and is elastic.
2. Add a little oil into the dough and shape it round. Let proof for 20 minutes.
3. Deflate the dough, divide it into little rounds, each weighing 30 grams. Shape the mini doughs into elongated rolls. Brush each roll with Ingredients IV. Assemble the rolls into a 20cm x 20 cm square tin that has been lightly greased.
4. Let proof for a second time for 1 hour. Brush the surface of each roll with Ingredients V
5. Bake at 175 degree Celcius for 25 minutes, or till the surface is golden brown. Remove tin from oven. Remove bread from tin to cool
6. Serve each roll with Ingredients IV or whatever u fancy.
Okay, above are my feeble attempts at translating, i apologize. Please do bear with me.
A baking addict who loves to give away all her baked products to willing (or unwilling) recipients to make room for more baking. i would love to hear from you! Email me at twilightzky@hotmail.com
Flickr Photos


Foodgawker

Paperblog

Yummy

